Make A Science Fair Volcano
SUPPLIES
- 1 Cardboard Box (No smaller than 1’x1’)
- Masking Tape
- Newspaper or Old Magazine
- Sandtastik Rappit Plaster Cloth
- Ruler
- 1 Empty Plastic Water Bottle
- Scissors and/or Exacto Knife
- Actíva Actív-Wire Mesh
- Actíva CelluClay Instant Paper Mache
- Acrylic Paints
STEP 1
Take an empty cardboard box and cut the bottom off. The bottom portion of the box that you cut off is going to act as the base for your volcano. Take a look at the Step 1 photo and try to cut the box so that you have a lip of about 1” around the edge so that it is almost like a little tray. TIP: Be sure to keep the unused cardboard as you will be needing it for Step 3.

STEP 2
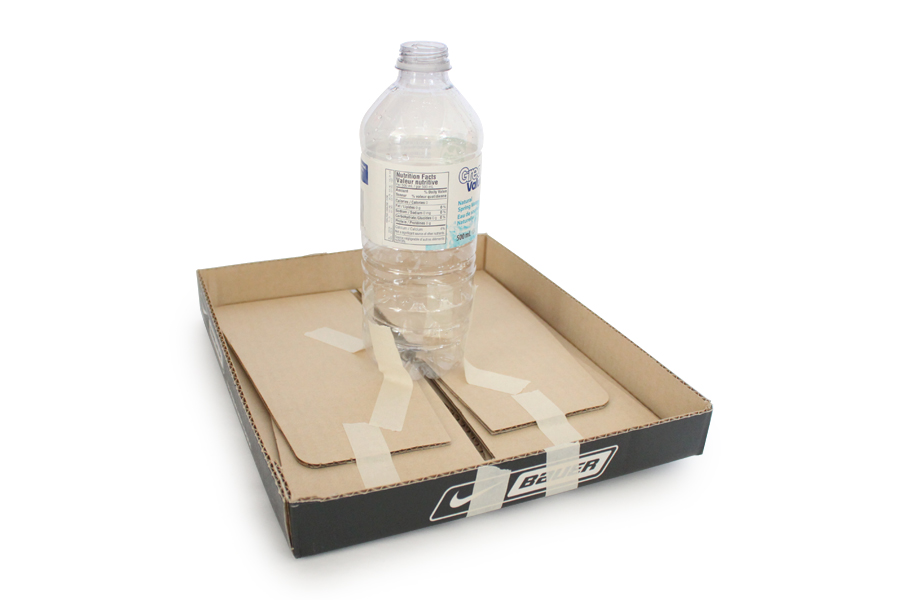
Take your empty plastic water bottle and stand it straight up in the middle of your cardboard box base. Use 4-5 strips of masking tape to tape the bottle to the base to hold it in place.
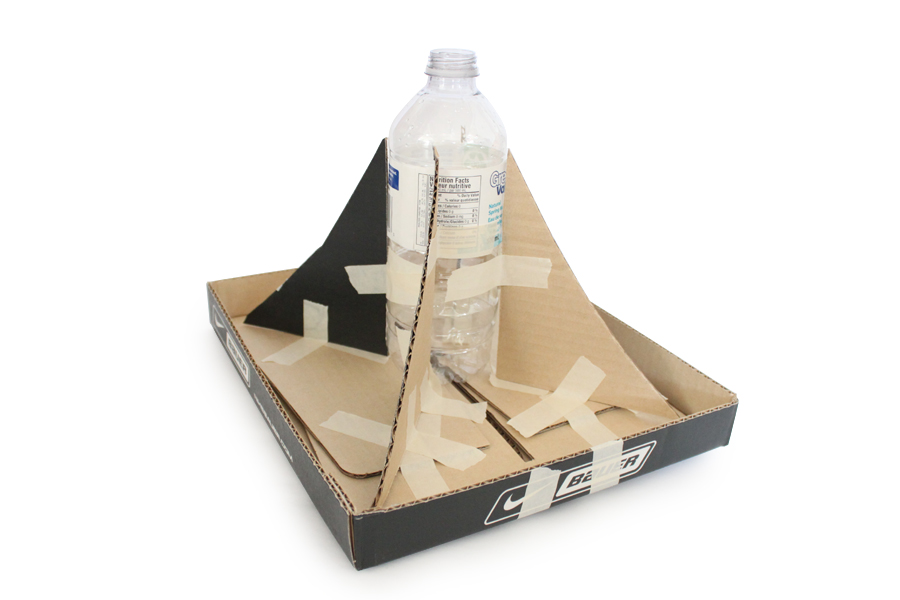
STEP 3
Using your extra cardboard from Step 1, cut 4 triangular pieces which will act as supports for the water bottle. They should be about as tall as your water bottle and make sure that the part that sits on the cardboard tray doesn’t extend beyond the edge of the tray (refer to the Step 3 photo). Use masking tape to hold these pieces in place, they will begin to give your sculpture a “mountain-like” shape.
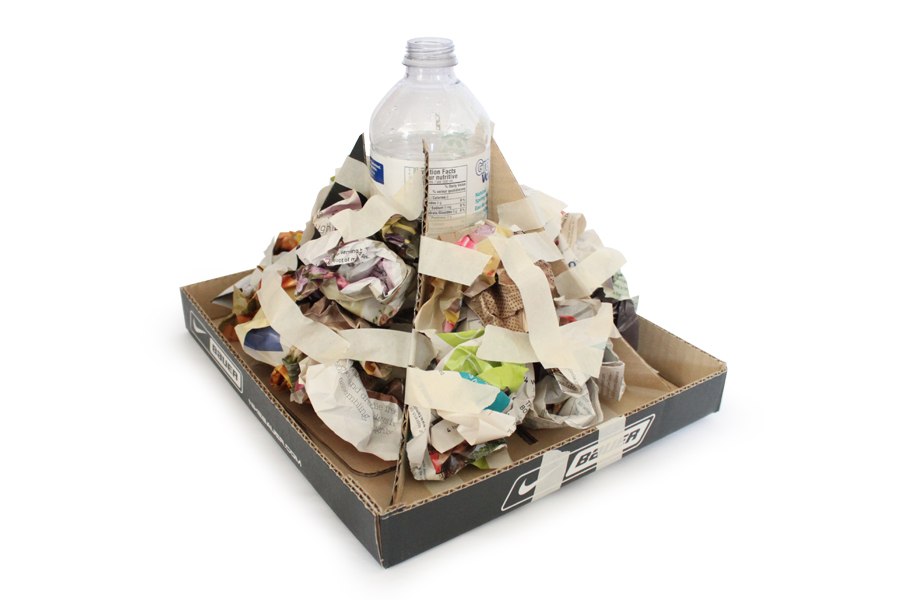
STEP 4
Using an old newspaper or magazine, make crumpled balls of paper and use them to fill in the gaps between the cardboard supports. This paper is meant to fill in the negative space and begin to give the desired form of the mountain. Be sure to tape the balls of paper roughly into place.
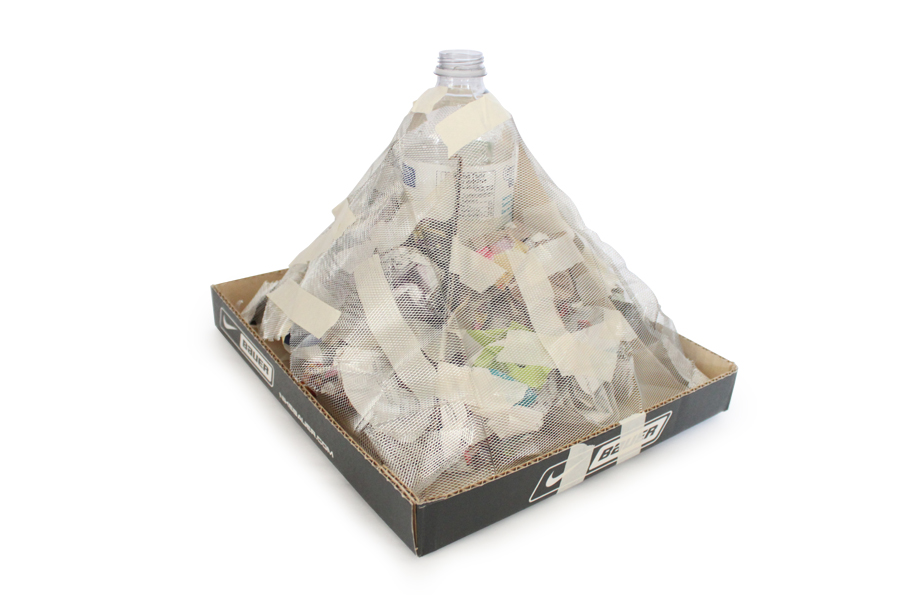
STEP 5
Cover the structure with a layer of Actíva’s Actív-Wire Mesh. This will give the structure some strength before you cover the structure with heavier layers – you can form the Actív-Wire into the shape you desire. Use some masking tape to hold the Actív-Wire in place.
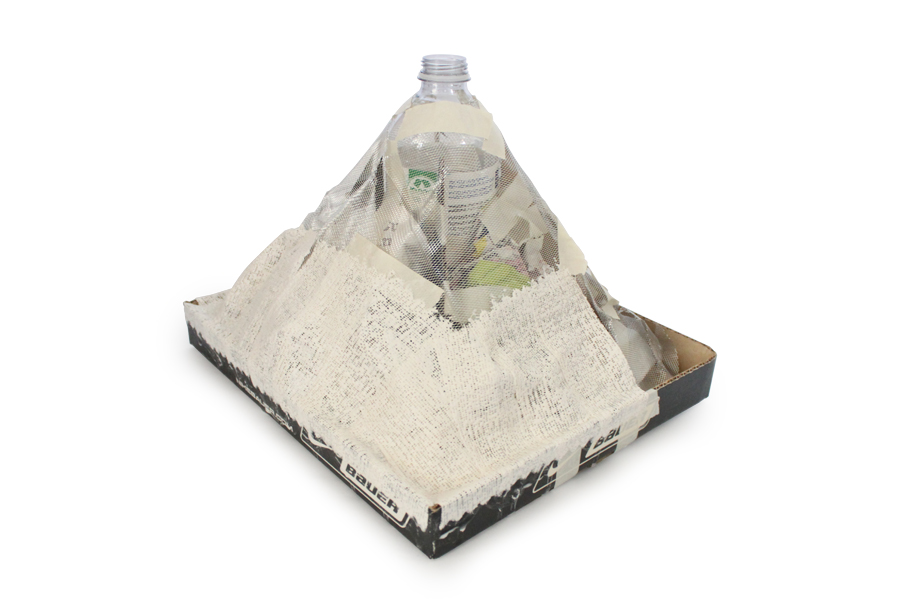
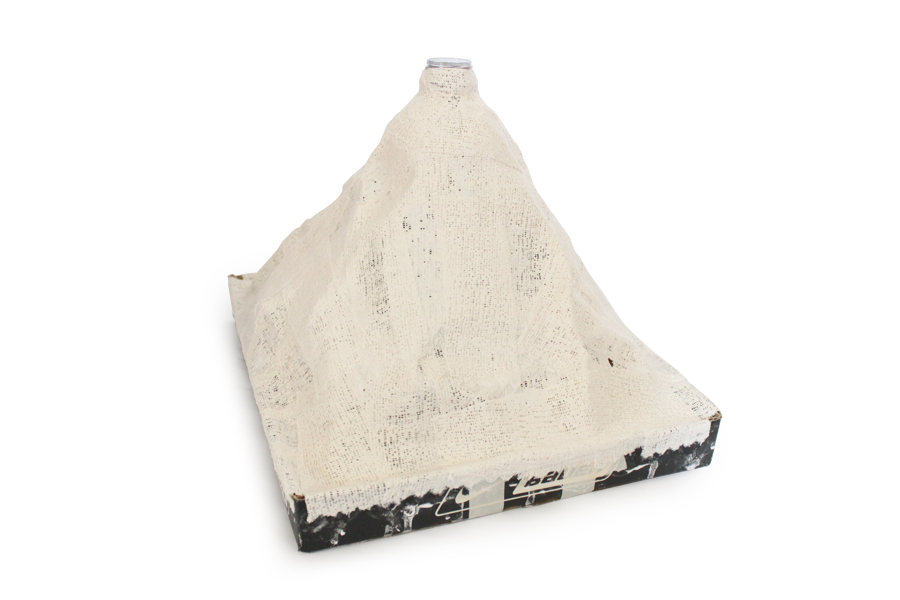
STEP 6
Once you have the basic form of the volcano, it is now time to completely cover the outside/visible portions of the sculpture with Sandtastik Rappit Plaster Cloth. At most, you will need 2 layers of the Plaster Cloth, and you can follow the detailed directions on the Rappit Plaster box for use. This layer will begin to "fine-tune" the form of the volcano and will give it a lot more strength when it is completely dry (this layer is kind of like the skeleton of the sculpture).
STEP 7
Let the Rappit Plaster Cloth completely dry. TIP: It is a good idea to leave it to air-dry overnight because you want to make sure that it has the time to harden correctly.
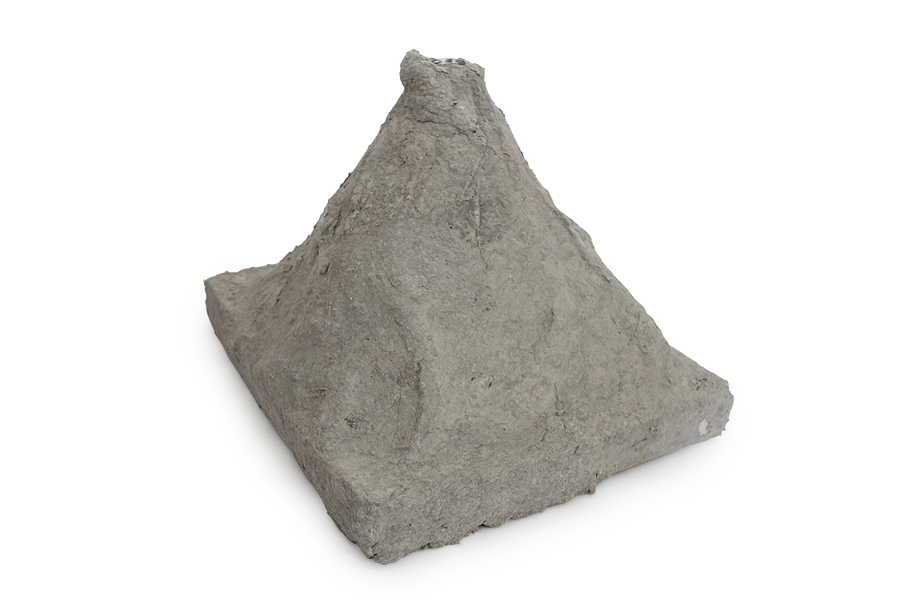
STEP 8
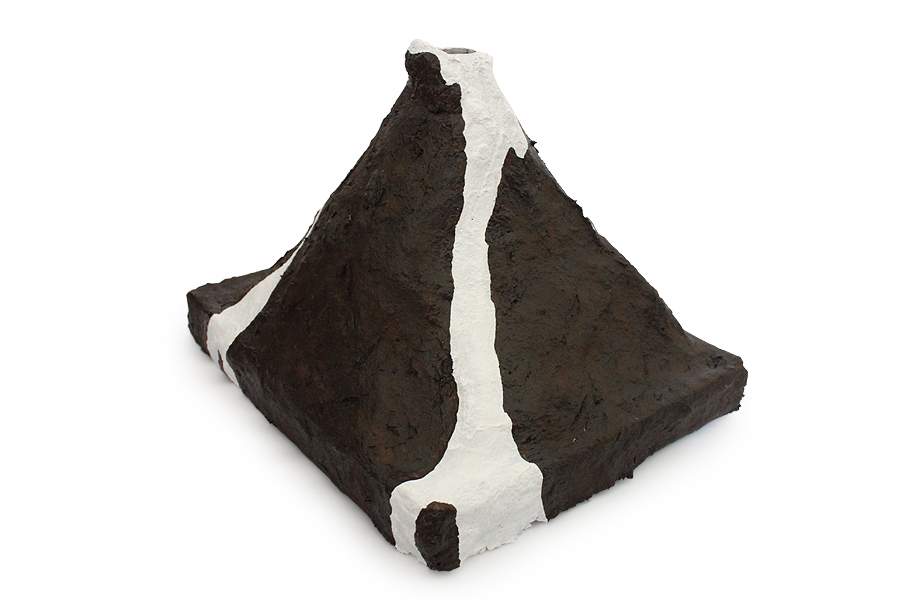
Once the Rappit Plaster Cloth is dry, the next step is to cover the entire visible area of the sculpture with about ⅜" of Celluclay. Follow the detailed directions in the Celluclay package on how to mix and use.
Right after applying the Celluclay and while it is still damp, use any tools (old butter knife or spoon) to add detail to the volcano sculpture. As an example you may want to add indents for the lava to flow, or carve out ridges on the side of the mountain to give the volcano some texture – be creative!! Leave the Celluclay to completely dry. It is a good idea to give it 2 days just to make sure that the Celluclay is rock hard.
STEP 9
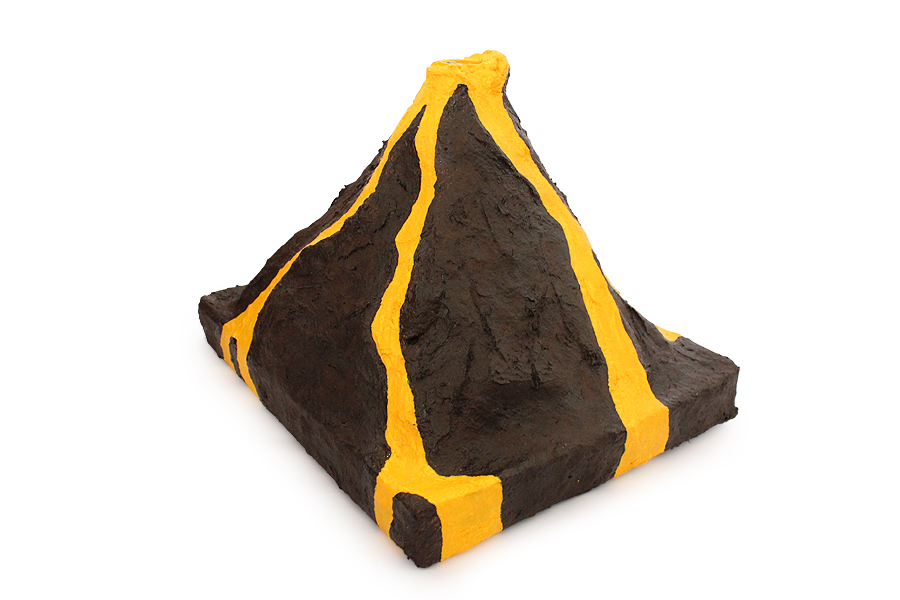
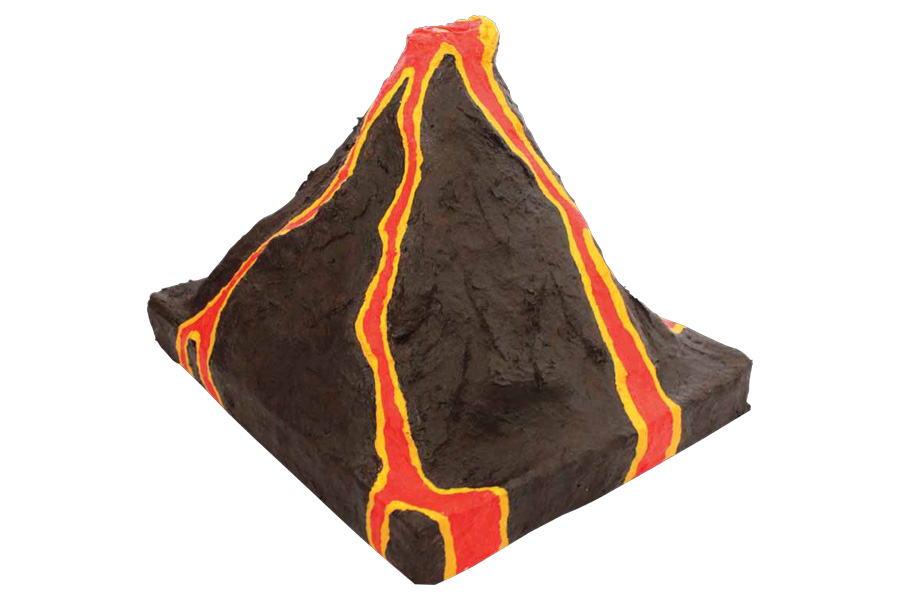
Once the Celluclay is completely dry, it is now time to paint the volcano. It is best to use acrylic paints if you have them because they will cover the Celluclay well. TIP: With some acrylic colors you may want to paint a layer of white first to act as a "primer" so that you can paint your color over-top and give it more vibrance!