Supplies Needed:
- Sandtastik® White Air Dry Modeling Clay
- Activ-Tools: Clay Tools Set
- 2 4mm Allen Wrenches
- Acrylic stains or paints
- Water bowl
- Brush
Step 1
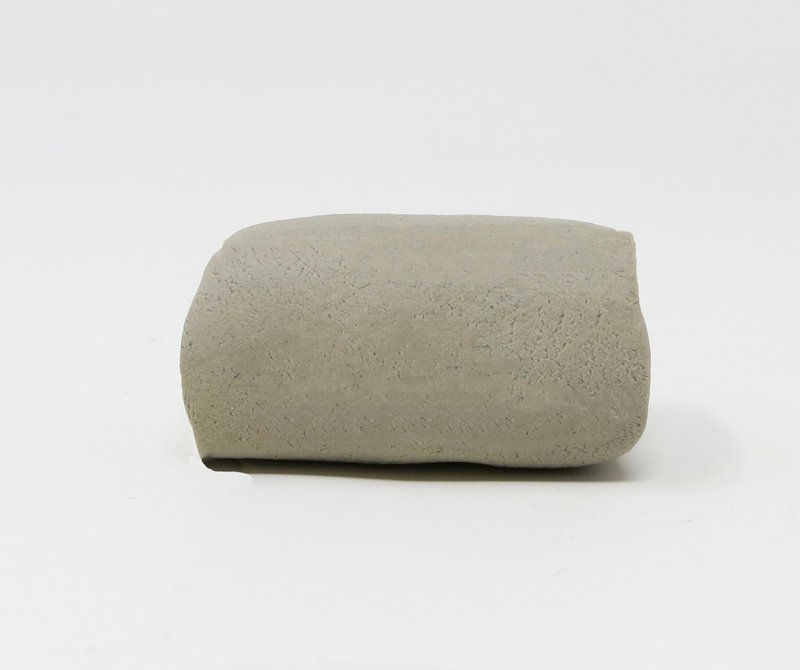
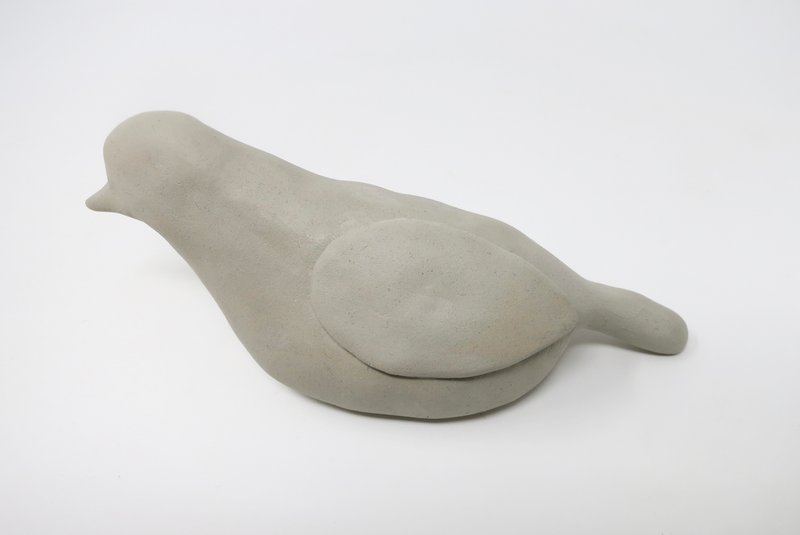
Body
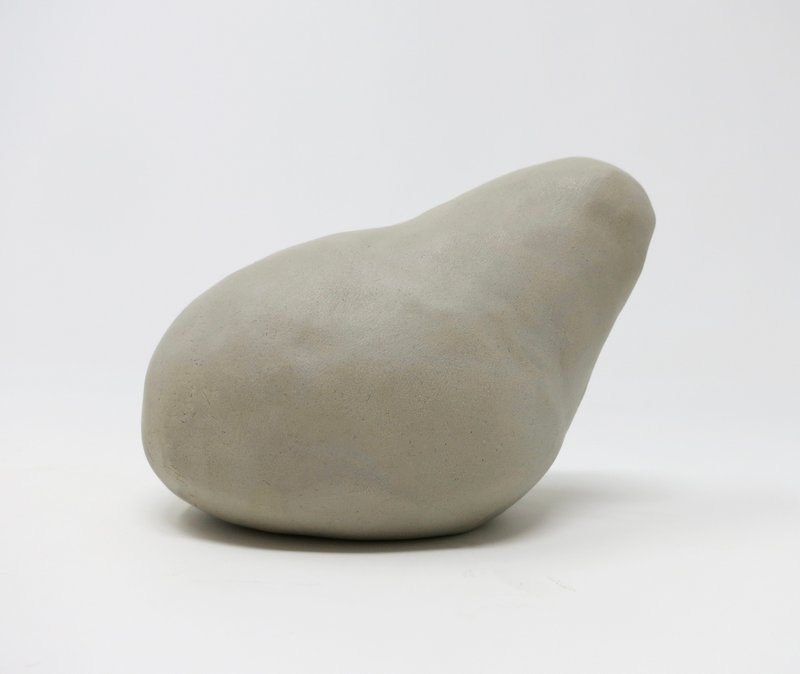
Roll a large sphere out of clay.

Roll a thick cylinder of clay.
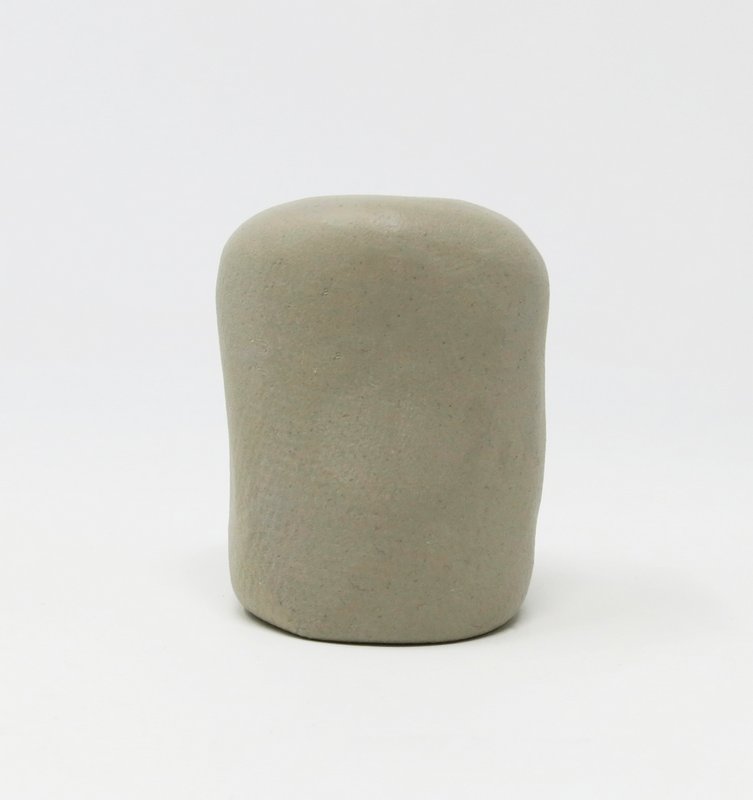
Join the two forms together using the modeling tool.
Smooth both pieces of clay together using wet fingertips to form the body.
Step 2
Tail Feather
Roll a small coil of clay.
Attach the coil to the rear of the bird’s body using the modeling tool.
Smooth both pieces of clay together using wet fingertips.
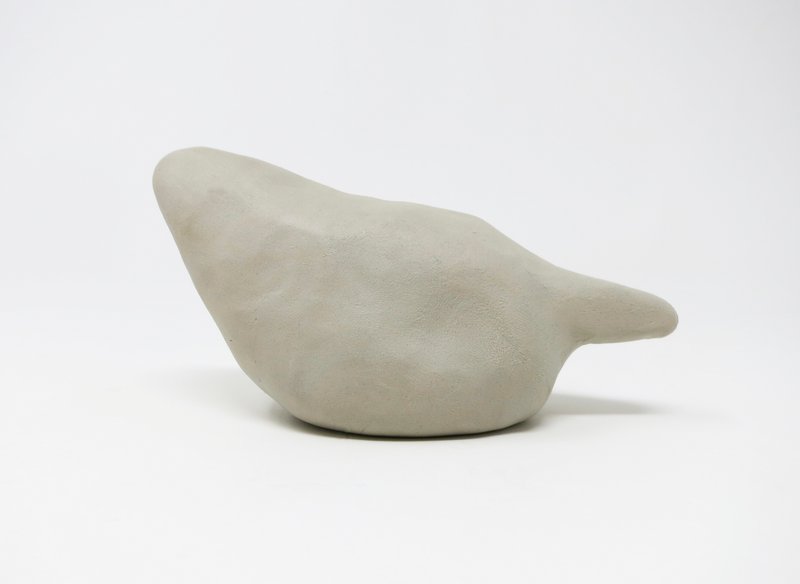
Step 3
Beak
Pinch out a small cone form from the front of the bird’s body using wet fingertips.
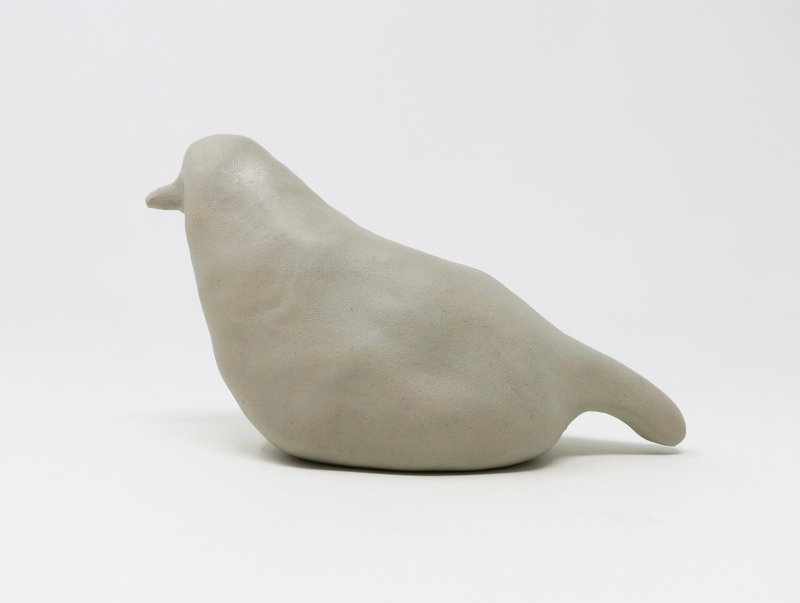
Step 4
Wings
Flatten a piece of clay to a 1/8” thickness.
Cut out 2 teardrop shapes using the knife tool.
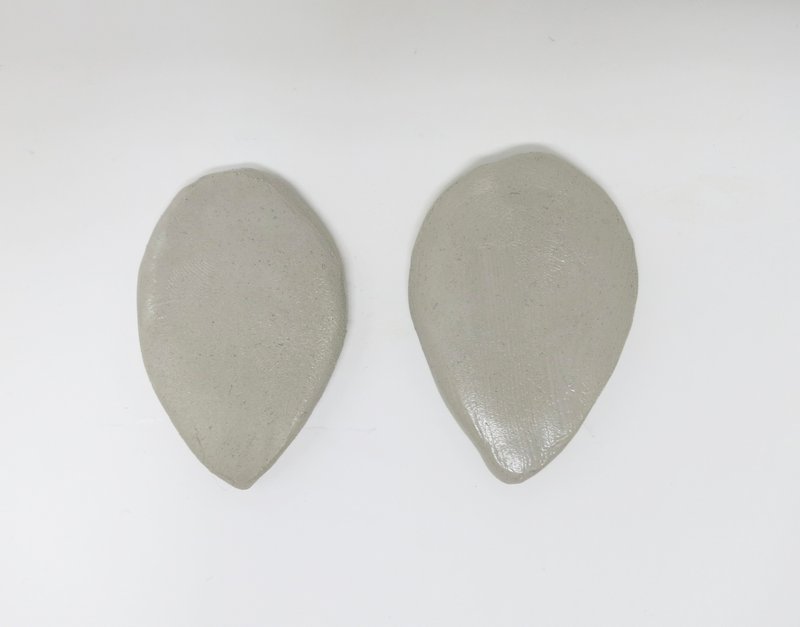
Attach one wing onto each side of the bird’s body by scoring and slipping the two pieces together.
Step 5
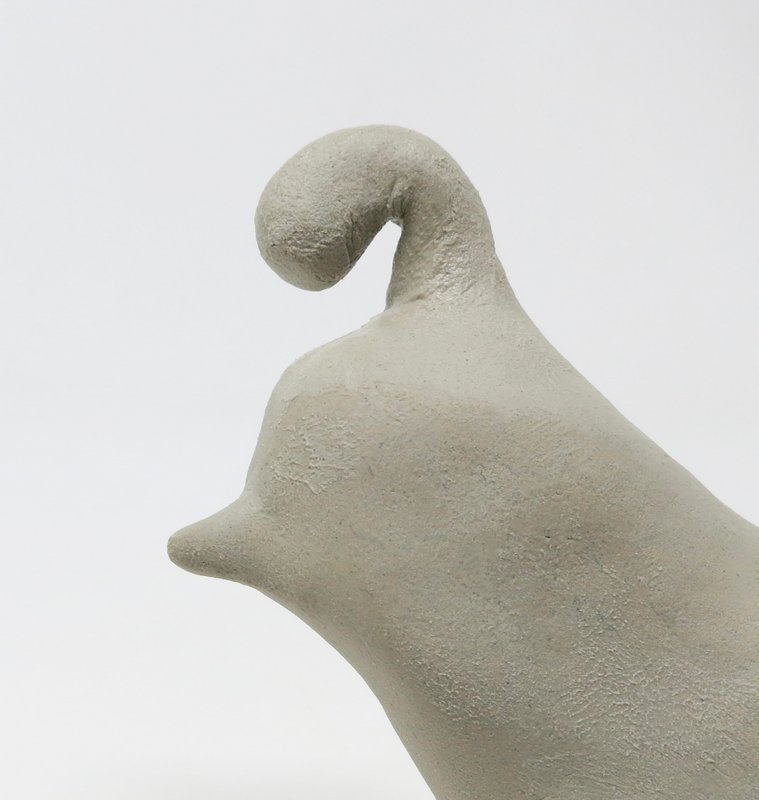
Head Plume
Roll a small teardrop form out of clay.

Attach it to the top of the bird’s head by scoring and slipping it on.
Step 6
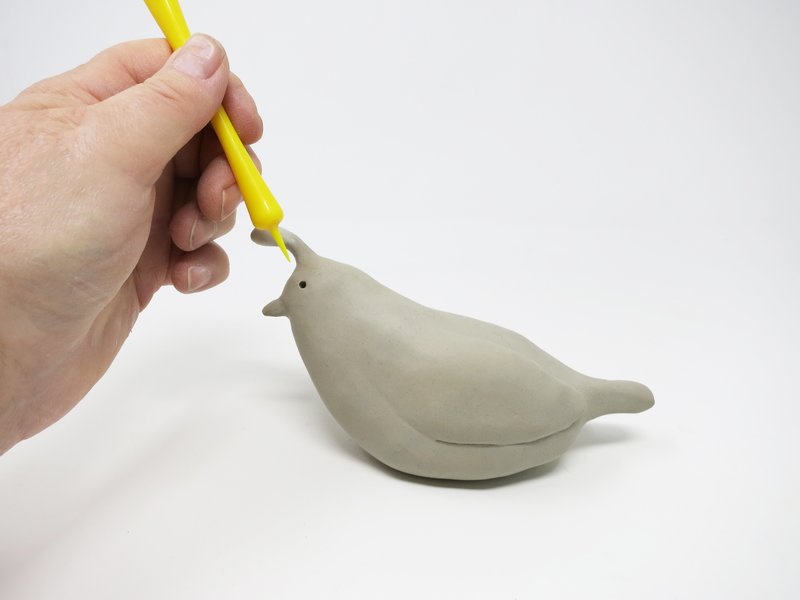
Eye
Use the needle point tool to draw in the bird’s eyes.
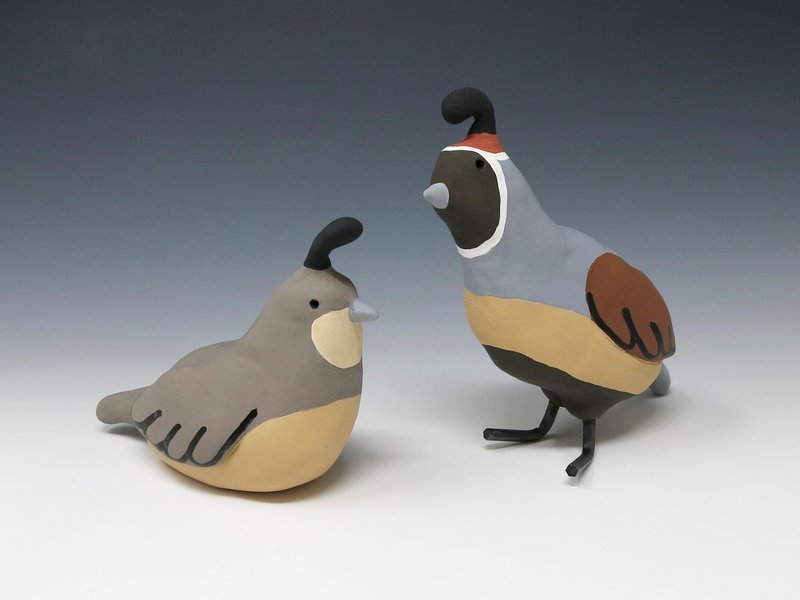
*NOTE: Set the bird aside to dry if a sitting position is desired. If not, legs can be added to poise the bird in a standing position.
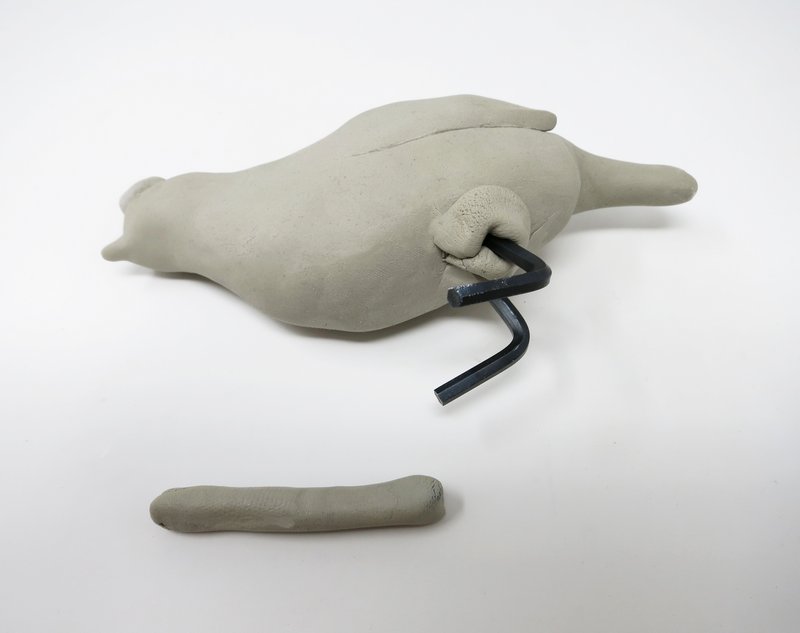
Step 7
Legs
Insert the two right angled Allen Wrenches into the bottom of the bird’s body.
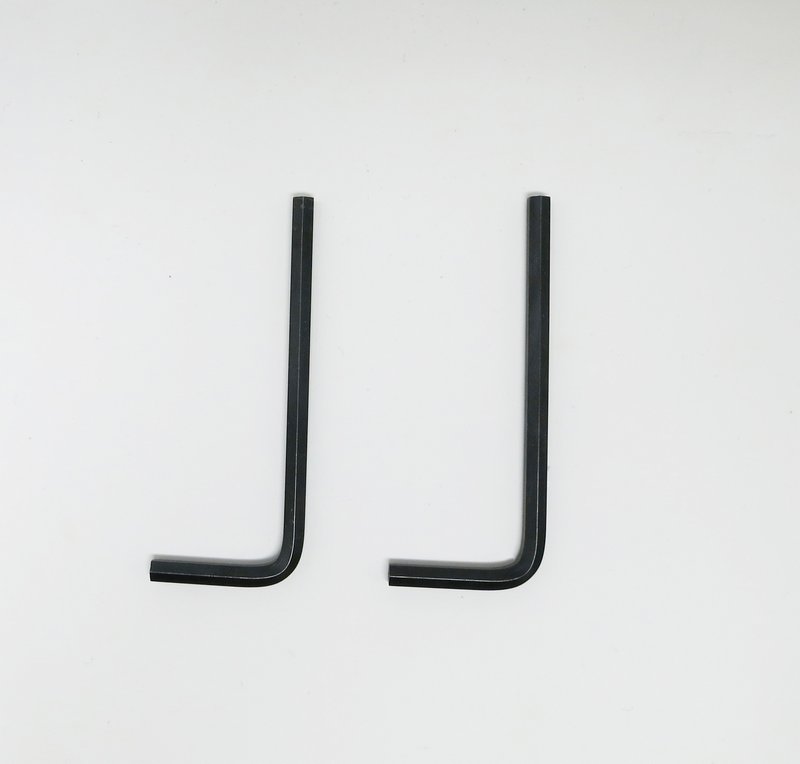
Wiggle the Allen Wrenches in place until the bird’s body becomes balanced on the table top and can stand alone.
*The tail feather may be used as the third leg of a tripod to stable the sculpture from falling over.

Secure the legs in place by wrapping around a thin coil of clay near the bird’s body.
Smooth both pieces of clay together using wet fingertips.
Step 8
Dry
Allow the clay to dry. The tan colored clay will turn whitish and have a chalky texture when it is fully dried out.
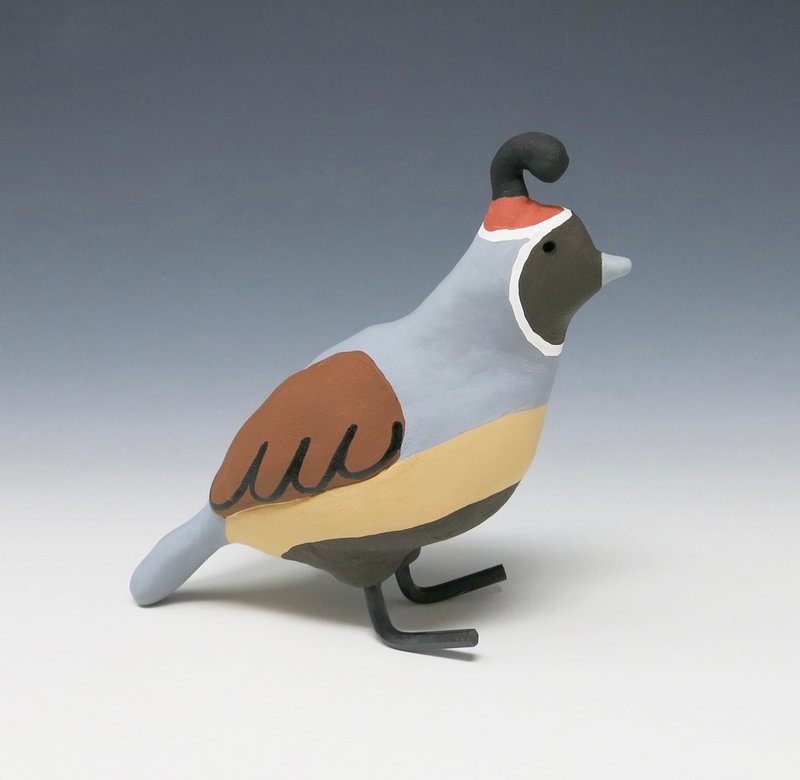
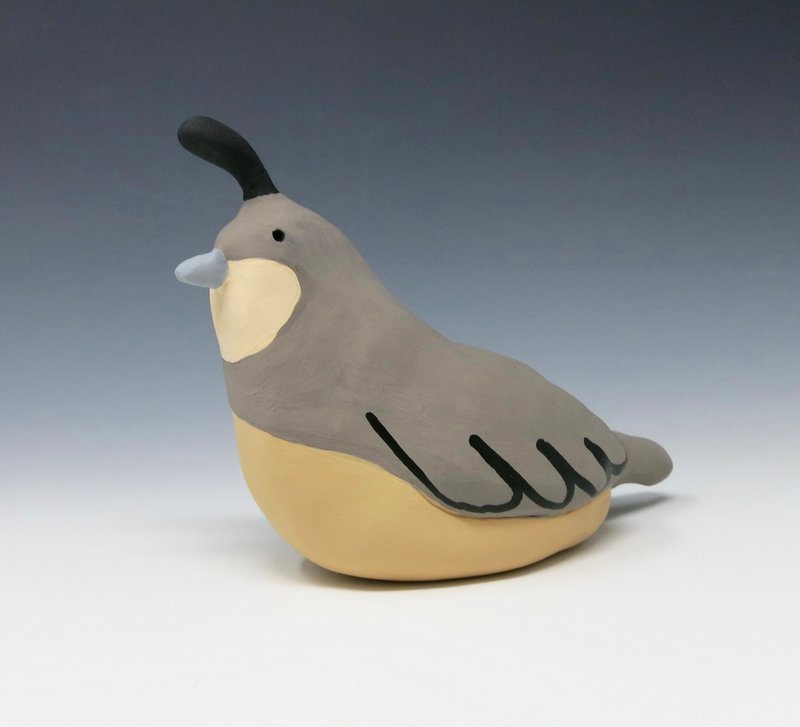
Step 9
Paint
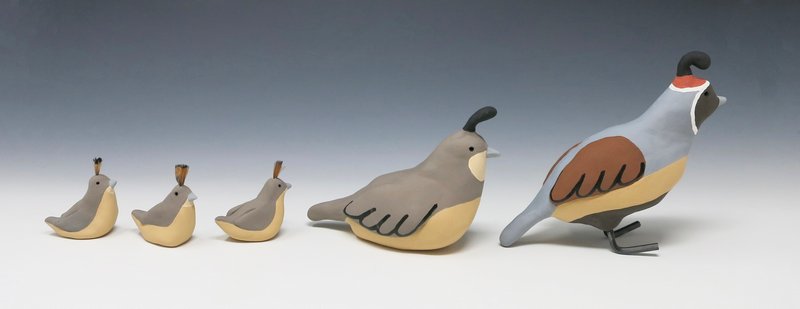
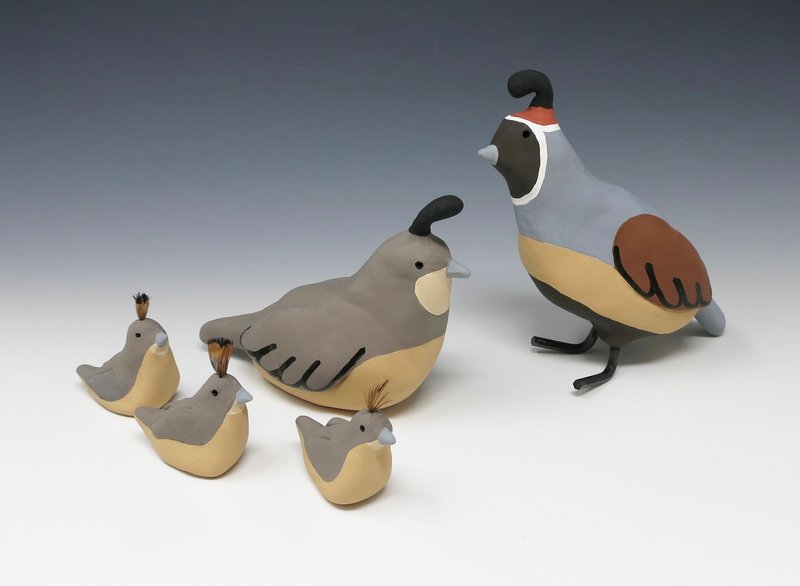
Paint the clay sculpture.
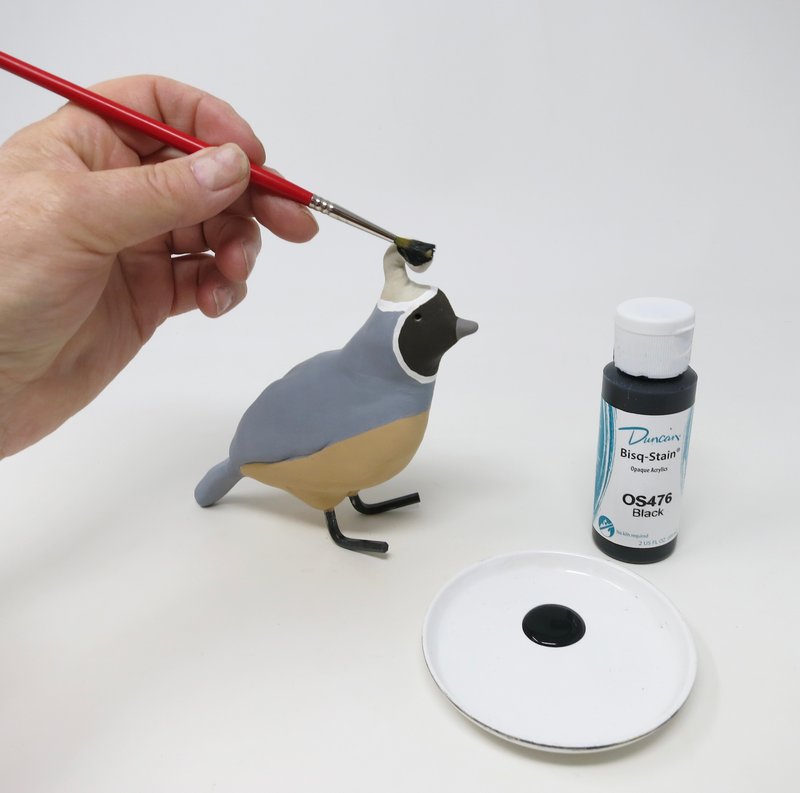
*This sculpture was painted using:

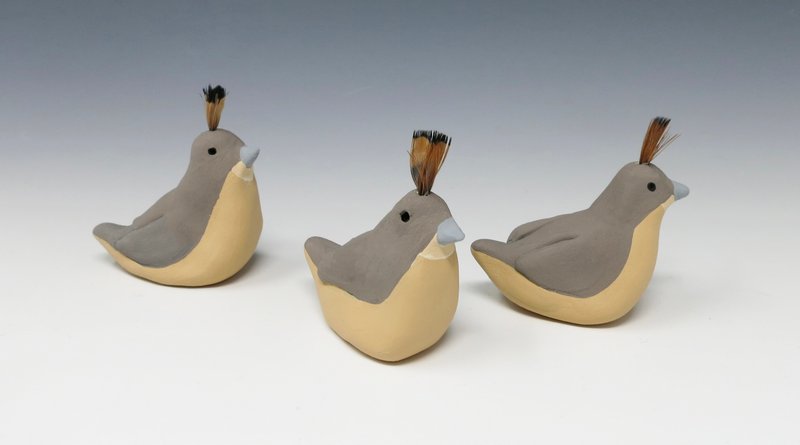
*NOTE: Quail chicks can be made using the same process only in a smaller scale.