

Supplies Needed:
- SIO-2® PRAI - White Stoneware Clay with Impalpable Grog
- Potter’s wheel
- Throwing bat
- Water
- Wooden rib
- Wooden knife
- Fetling knife
- Needle tool
- Rubber rib
- Wire tool
- Metal rib
- Shammy
- Loop tool
- Glaze
- Brush
- Kiln
Preparing The Clay
Wedge
Weigh out desired amount of clay. Prepare the clay by wedging it.
Step 1
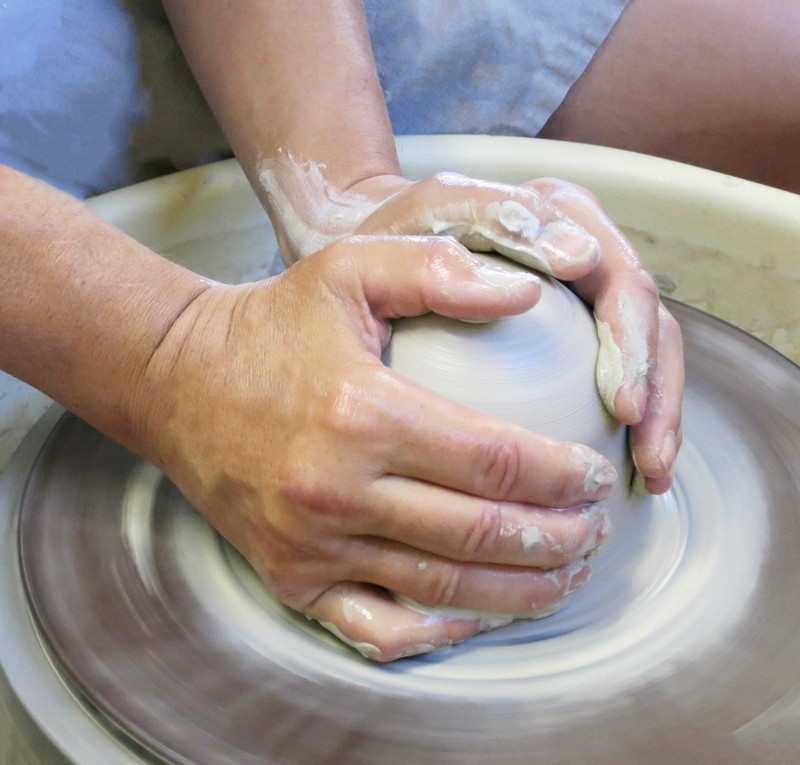
Centering
Form the clay into a sphere and slam it onto the center of the bat attached to the potter’s wheel.
Wet hands and clay. Turn the potter’s wheel on and center the clay.
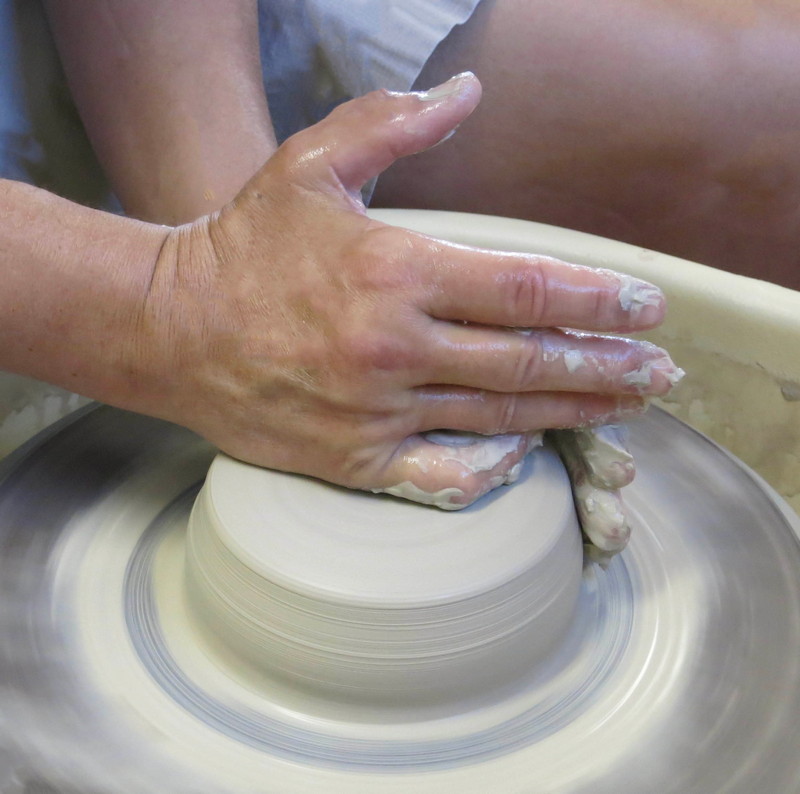
Step 2
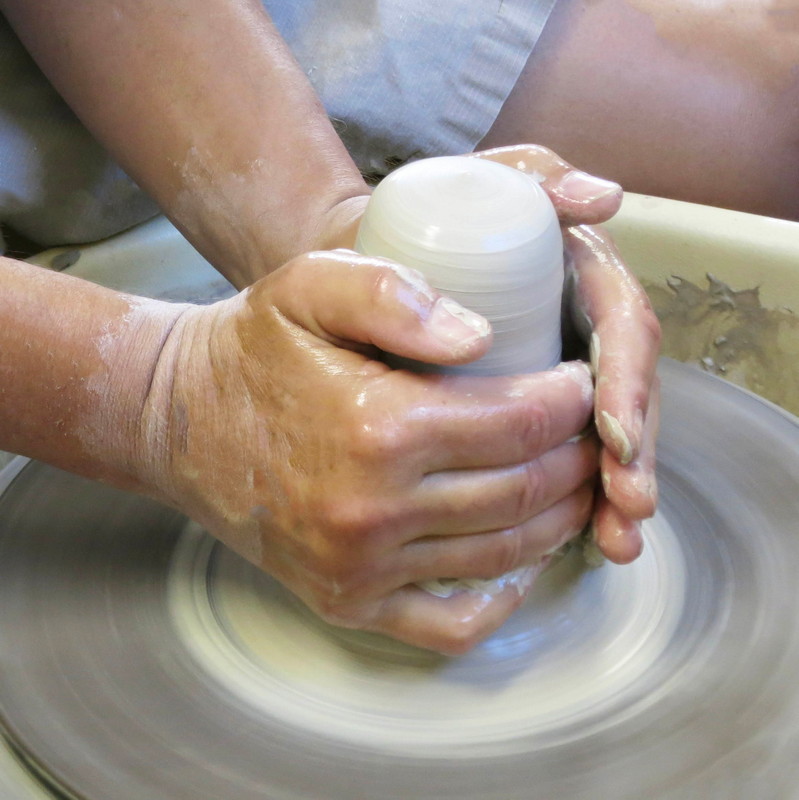
Open The Form
Insert one finger to start into the center of the clay.
Using fingers firmly pull the clay back towards the body creating an opening in the clay.
Repeat several times until the clay is the desired width.
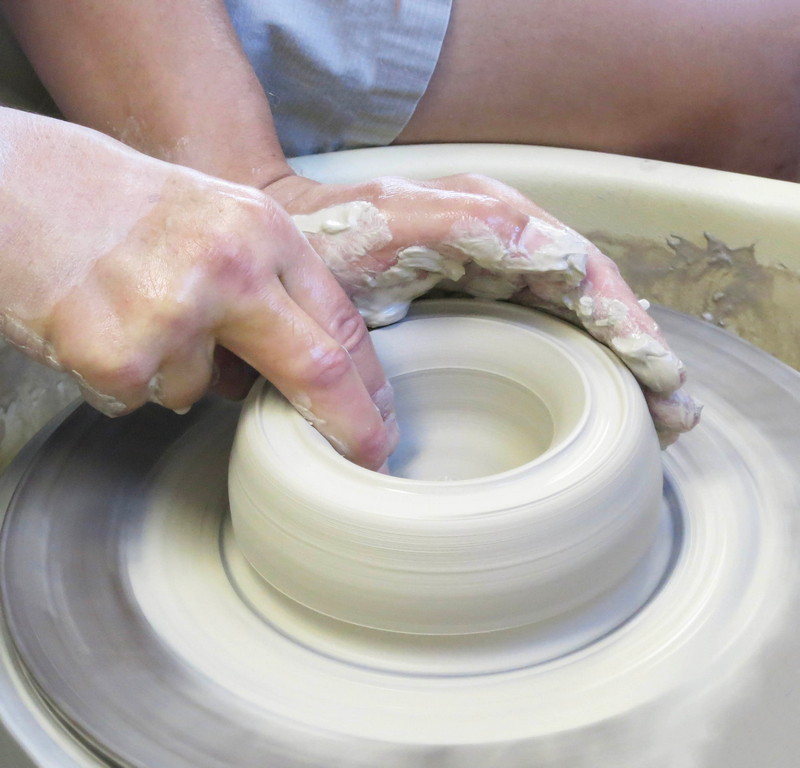
Step 3
Compress The Floor
Use the wooden rib tool to compress the floor of the form.
Insert the tool into the opening and pull the tool back towards the body.
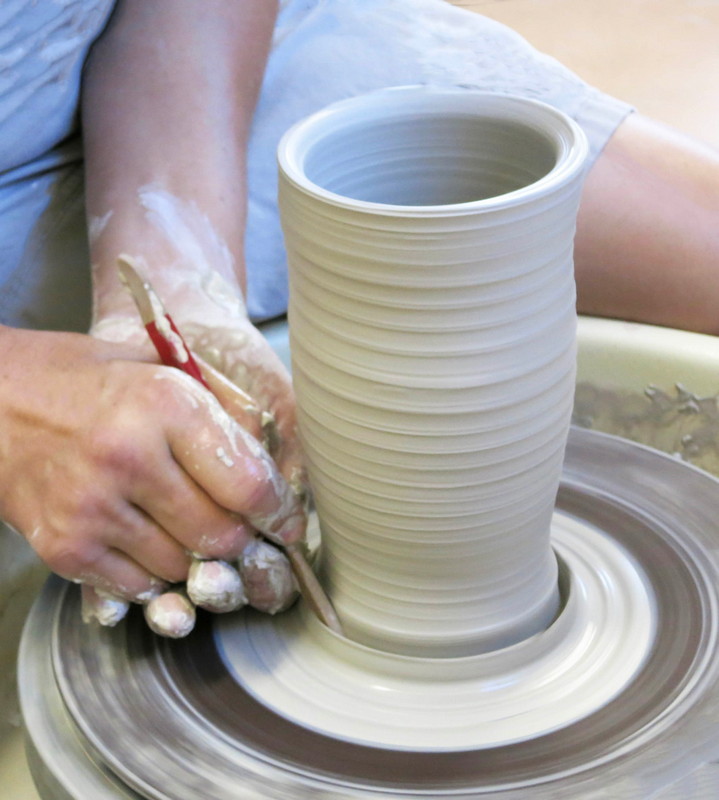
Step 4
Walls
Pull the clay up from the bottom in-between fingertips to create the walls of the form.
Repeat several times until the walls are the desired thickness and height.
Step 5
Base
Use the wooden and felting knife tools to trim away excess clay from the bottom of the form to shape the base of it.
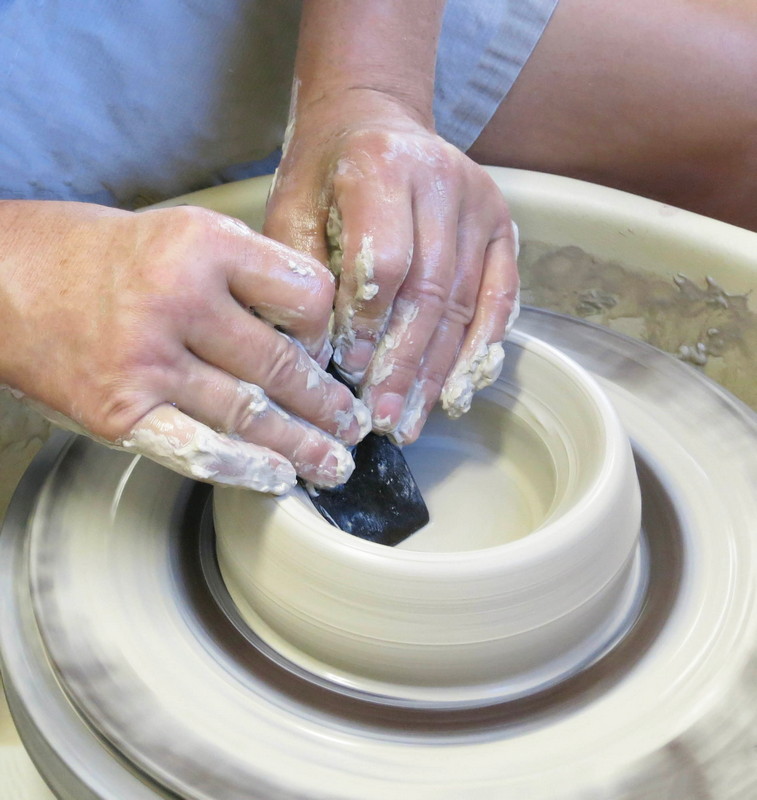
Step 6
Body
Use finger tips to shape the outside body of the form.
Use a rubber rib tool on the inside of the form to widen the interior.
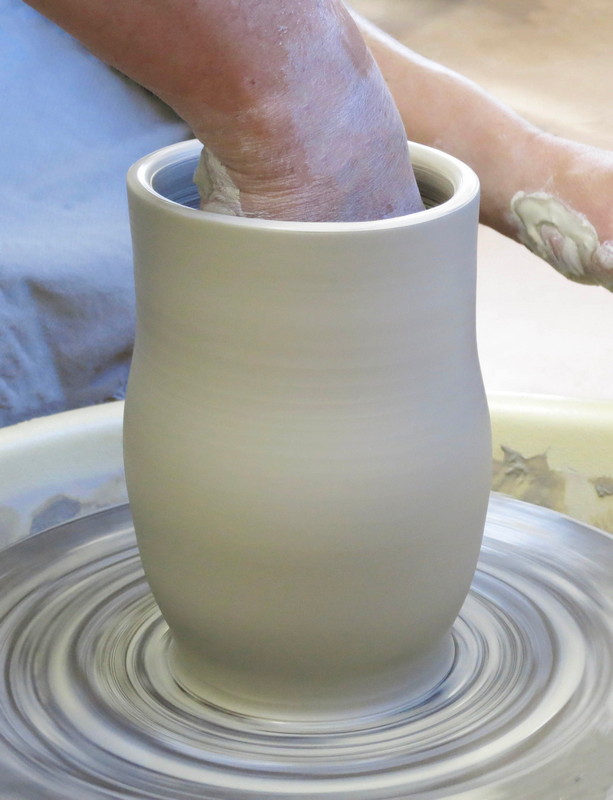
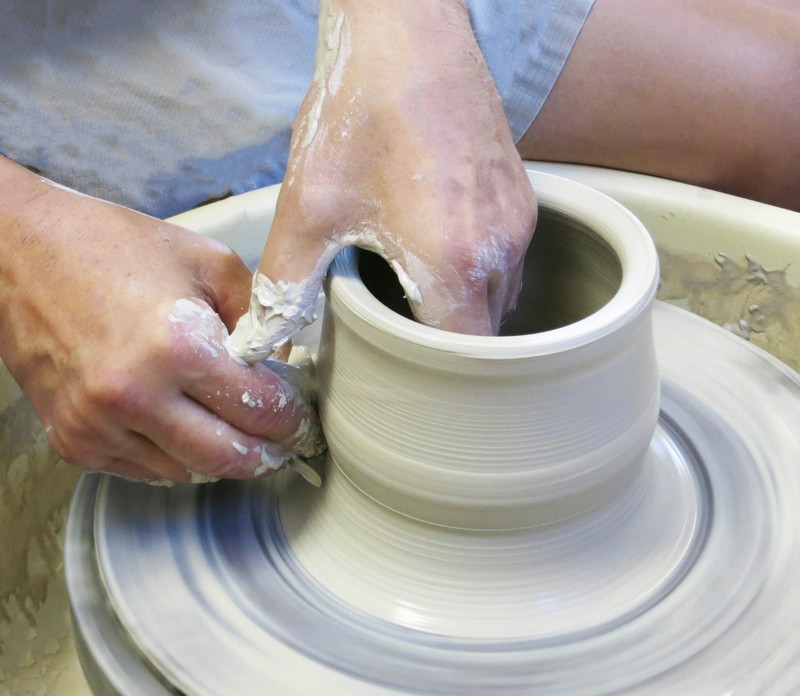
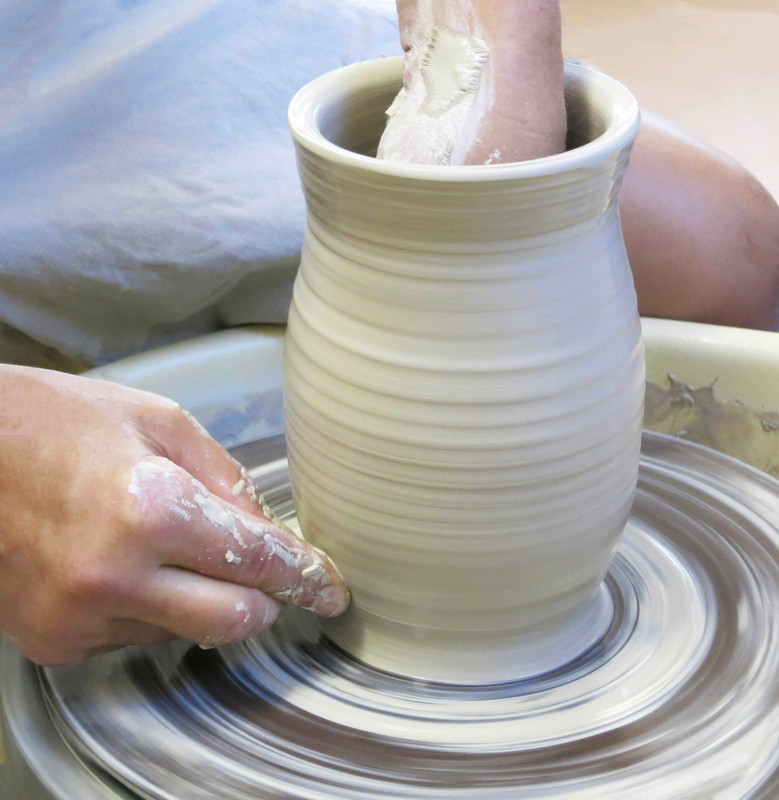
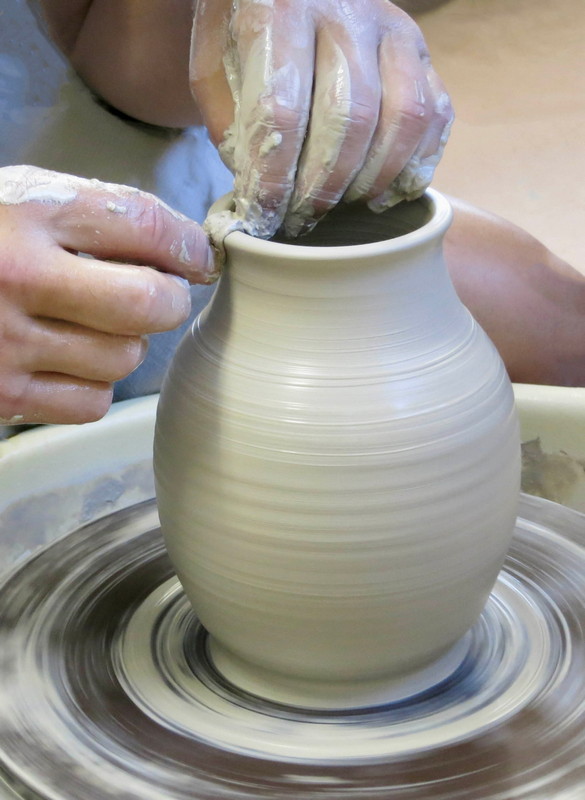
Step 7
Collaring
Wrap hands around the top portion of the form and gently push inward on the clay walls.

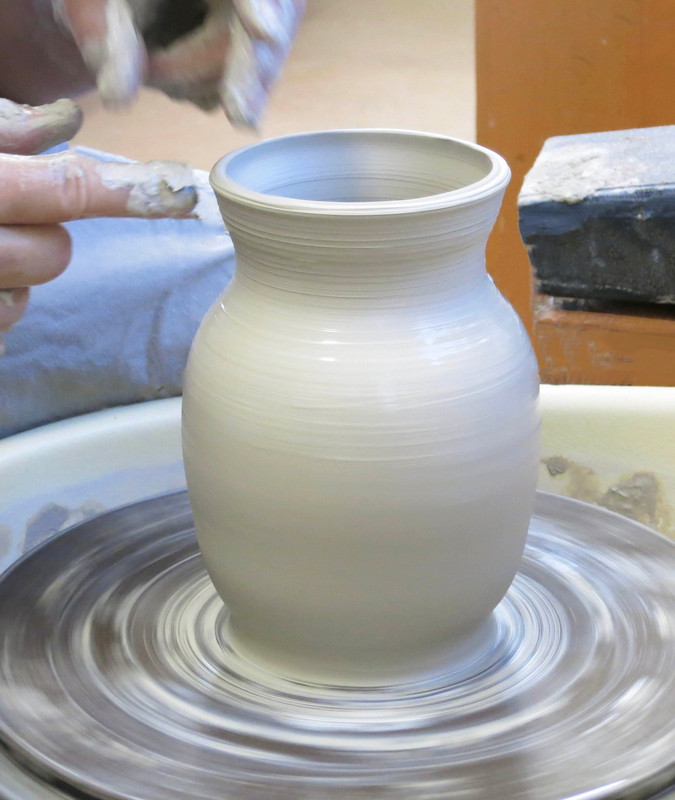
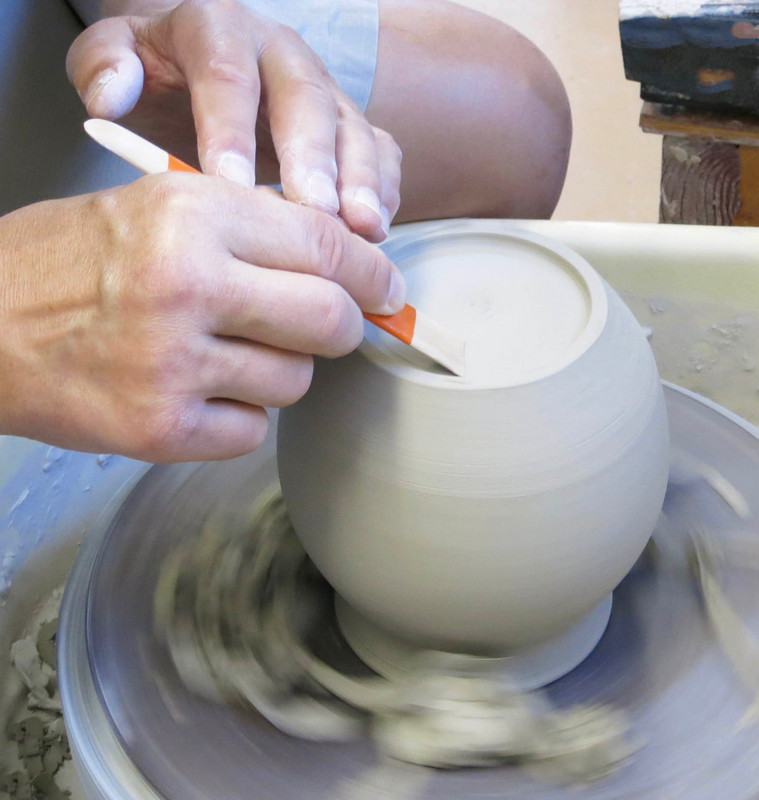
Step 8
Lip
Level the top of the vase by cutting off the uneven excess clay with a needle tool if needed.
Create the lip of the form by gently indenting a finger in the neck of the form while the wheel is in motion.
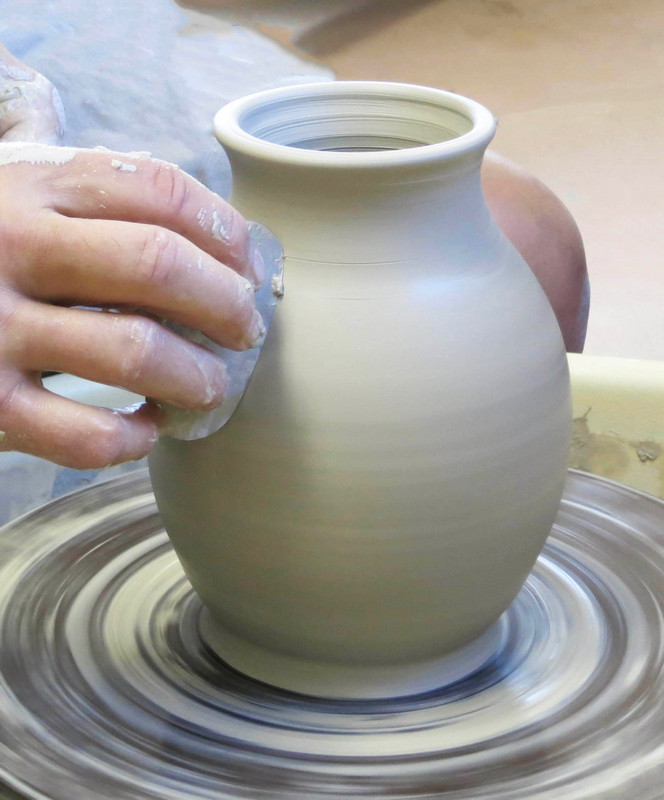
Step 9
Smooth
Smooth the rim of the form with a wet shammy.
Smooth the outside of the form with a metal rib tool.
Step 10
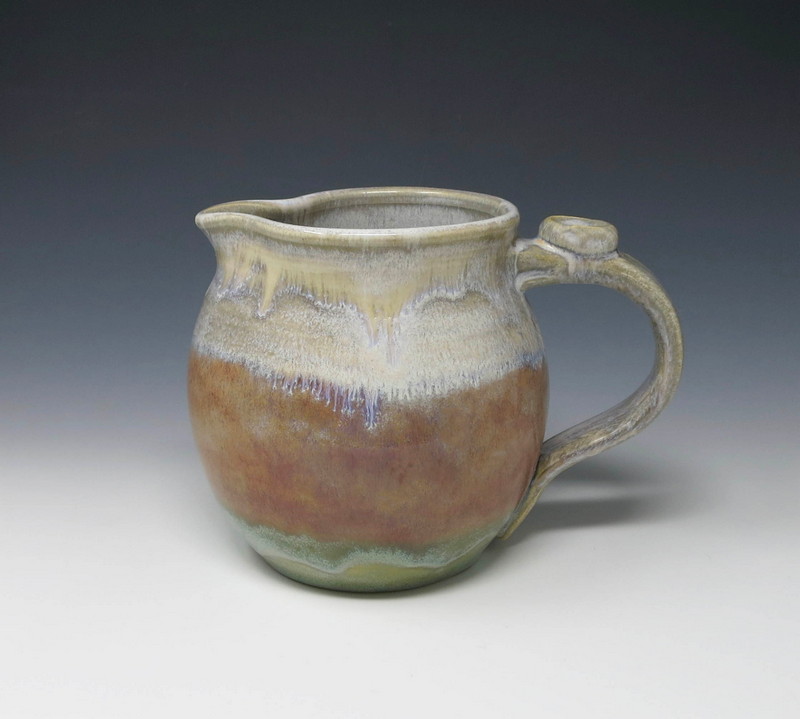
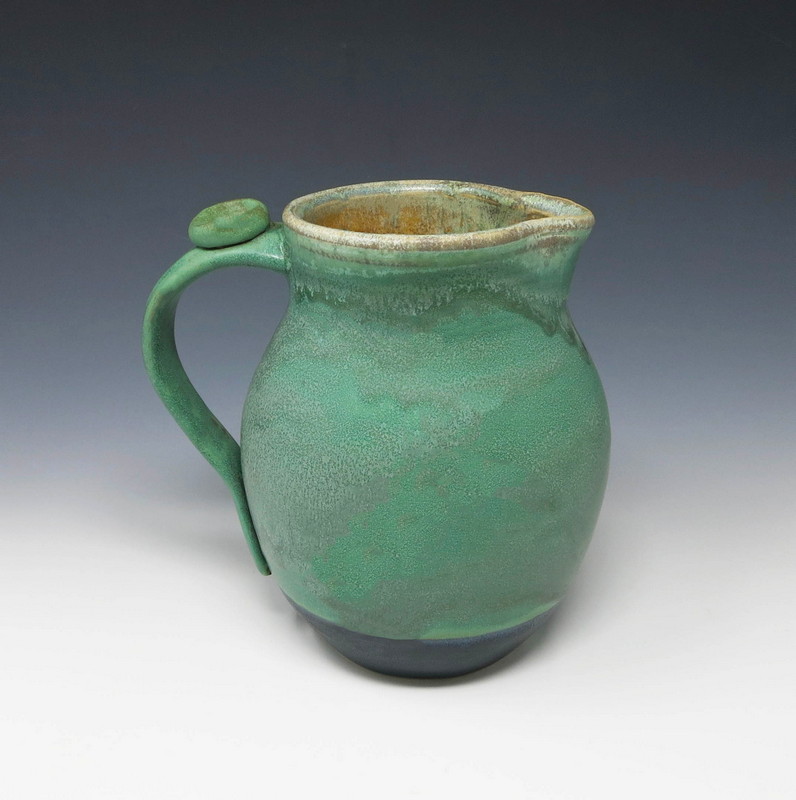
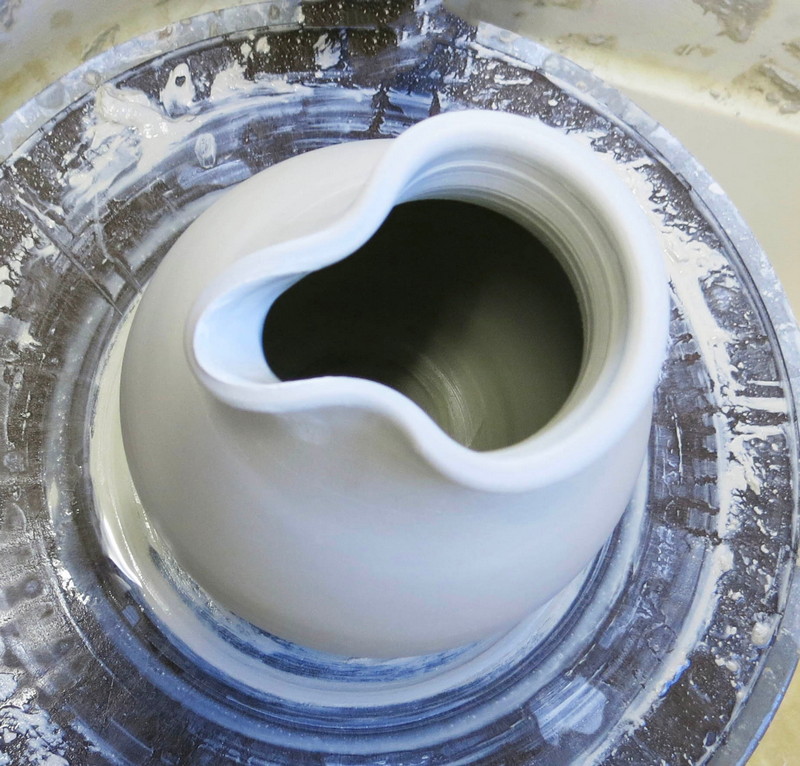
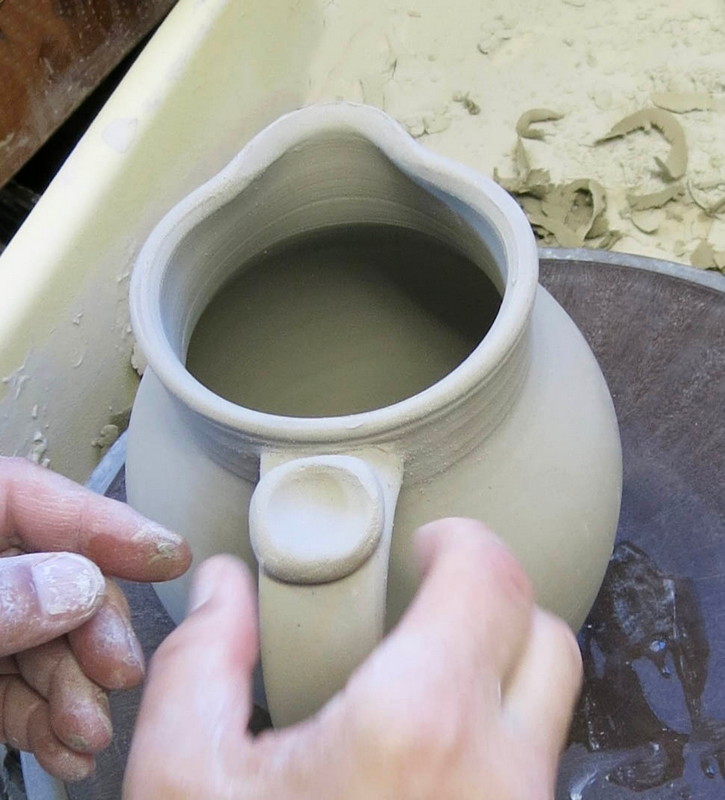
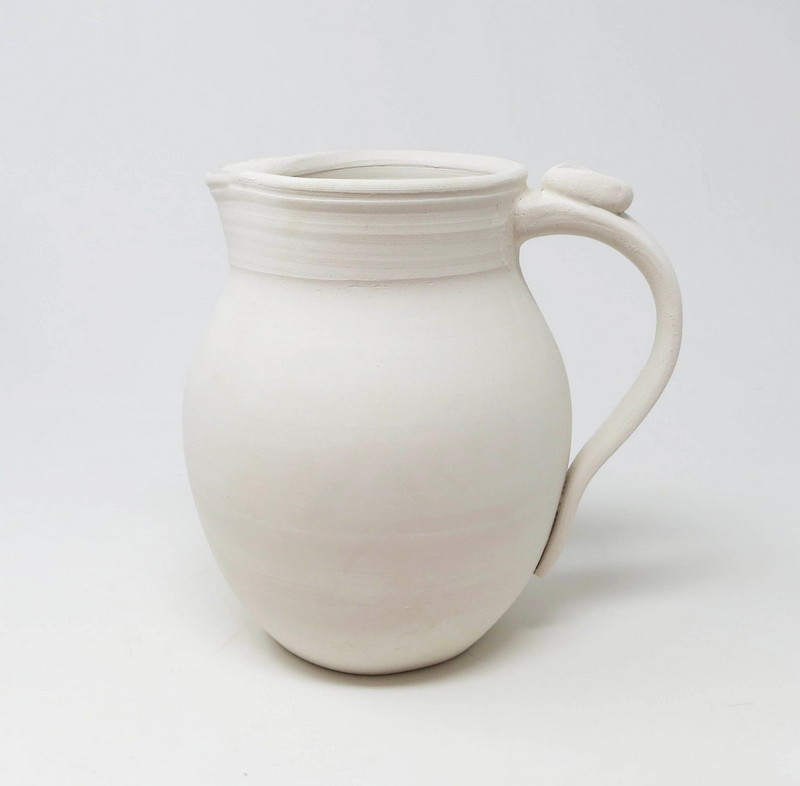
Spout
Grab hold of the rim of the form and gently tug at one side of the rim until it flares out.
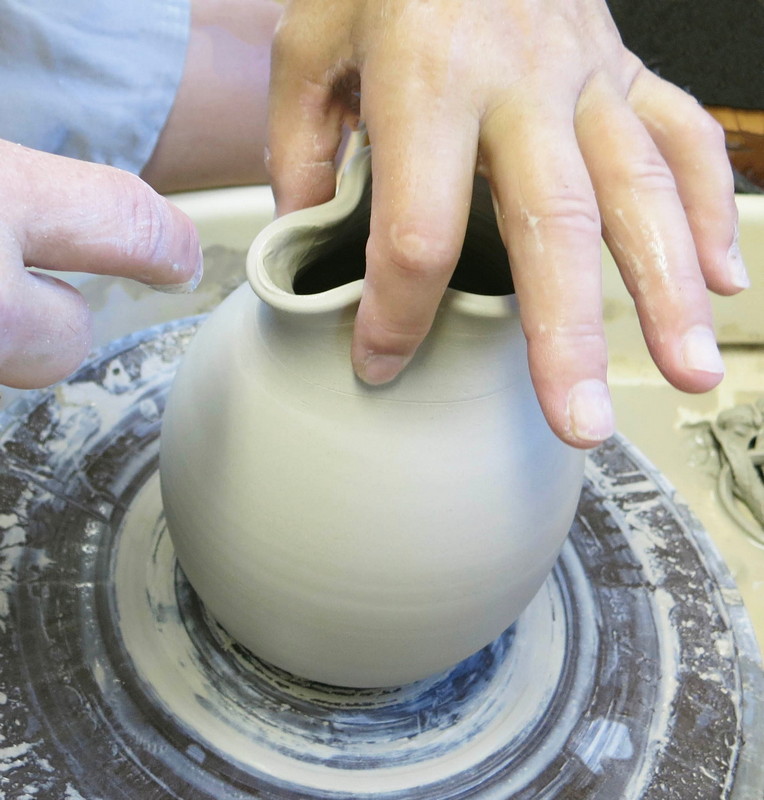
Rub a fingertip back and forth in the creased area until it flattens into a spout.
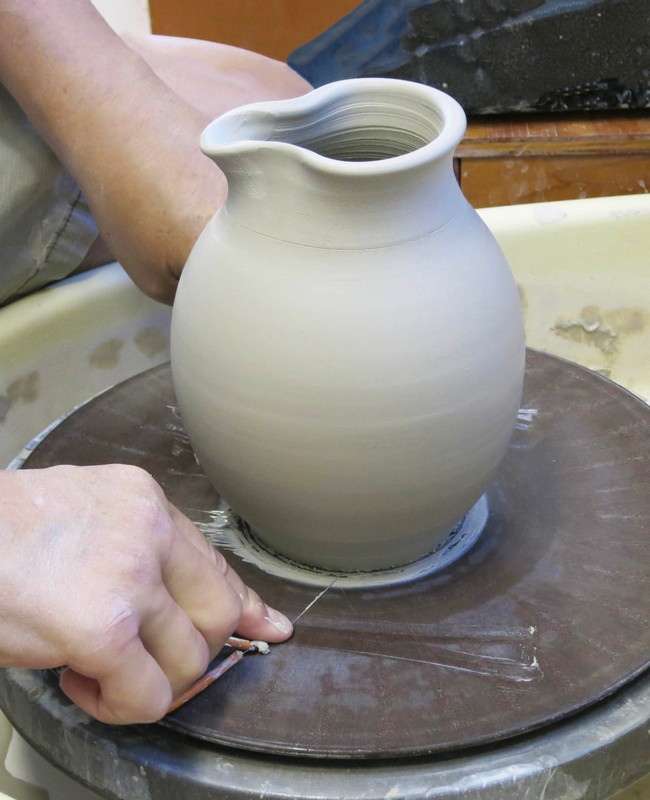
Step 11
Removal
Slip a wire tool under the base of the form cutting it off the bat.
Step 12
Leather Hard
Allow the clay to dry to a leather hard state.
Step 13
Trim
Place the form upside down onto the potter’s wheel with pieces of soft clay to secure it in place on the bat.
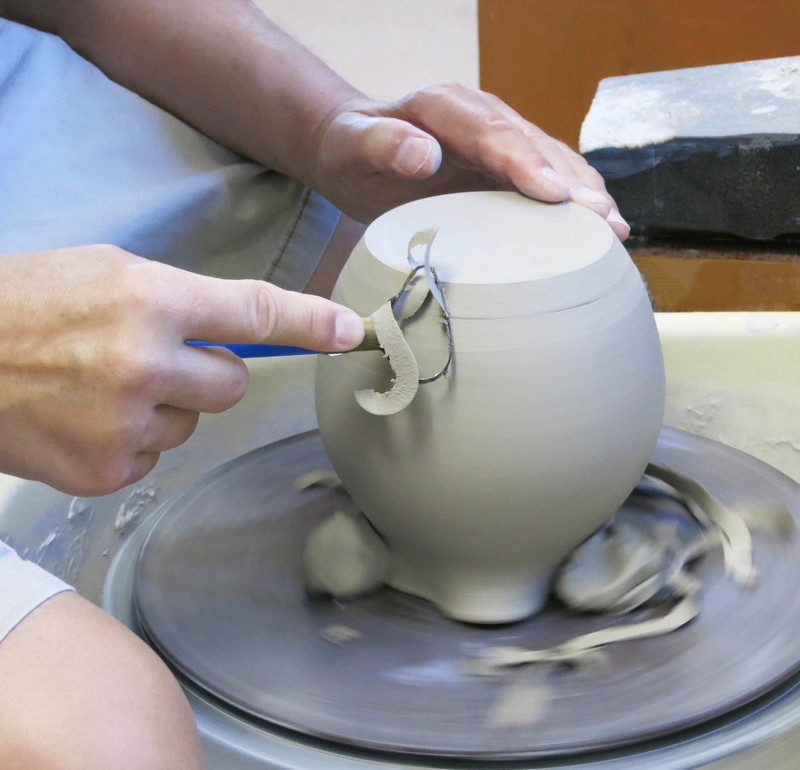
Remove the excess clay from the center of the base using a loop tool to create the pitcher’s foot ring.
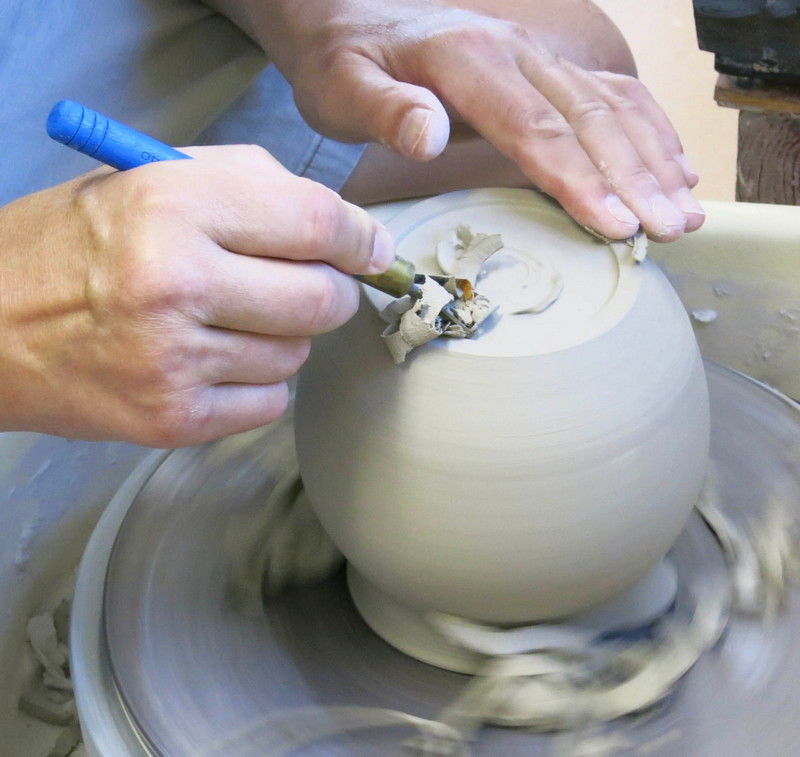
Step 14
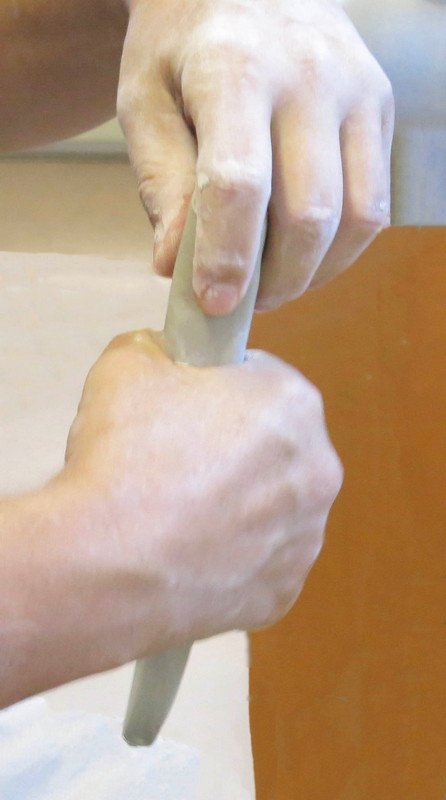
Handle
Roll a thick cone out of clay.
Dip the clay cone into a bucket of water.
Remove clay from the water and begin to pull the clay downward from the top with fingertips.
Keep stretching the clay downward until the clay reaches the desired length and thickness.
Set the handle aside to stiffen up before attaching it to the pitcher.
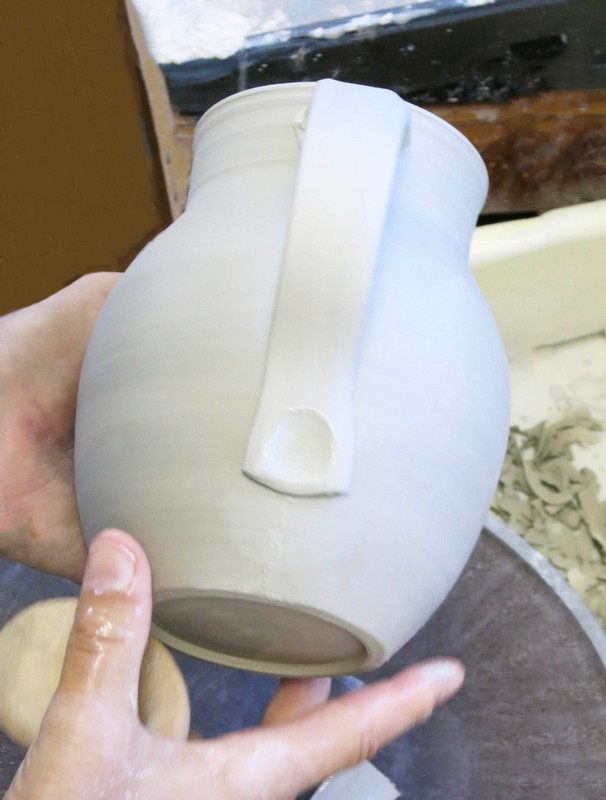
Score the area where the handle will be connected to the pitcher.
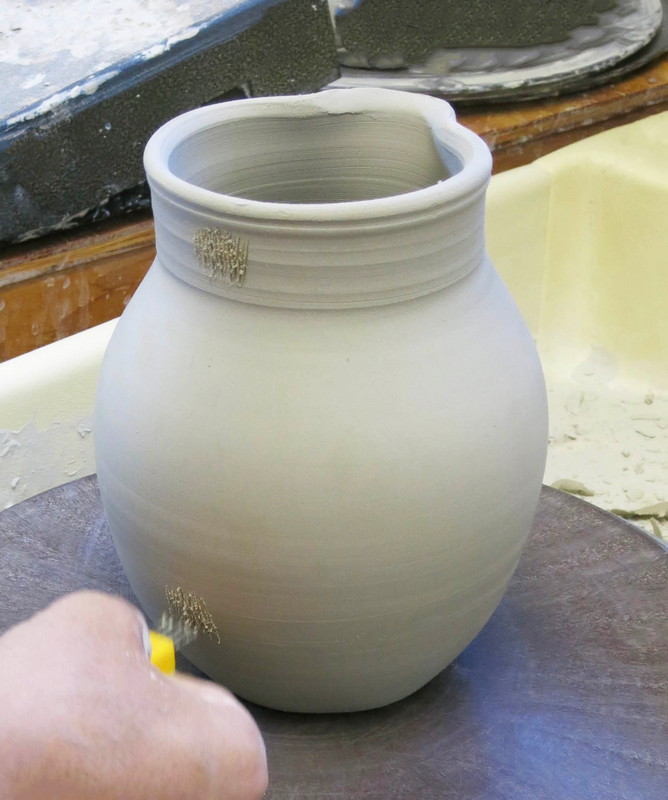
Score one end of the handle.
Apply clay slip over the scored lines.
Attach the handle over the scored and slipped areas.
Smooth the two pieces of clay together with fingertips.

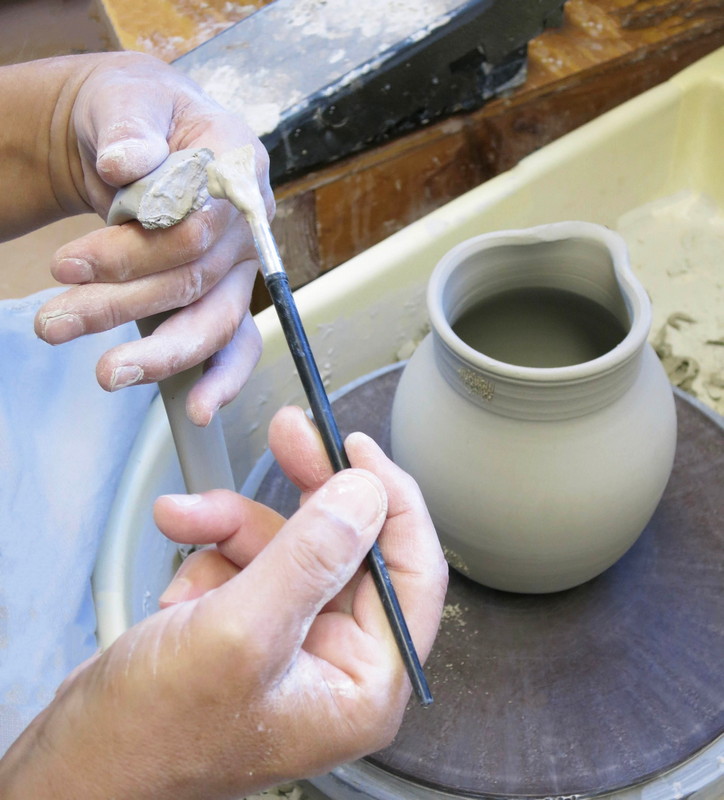
Bend the attached handle out away from the belly of the form and back again.
Cut the excess clay away with a felting knife.
Attach the bottom of the handle to the pitcher form.
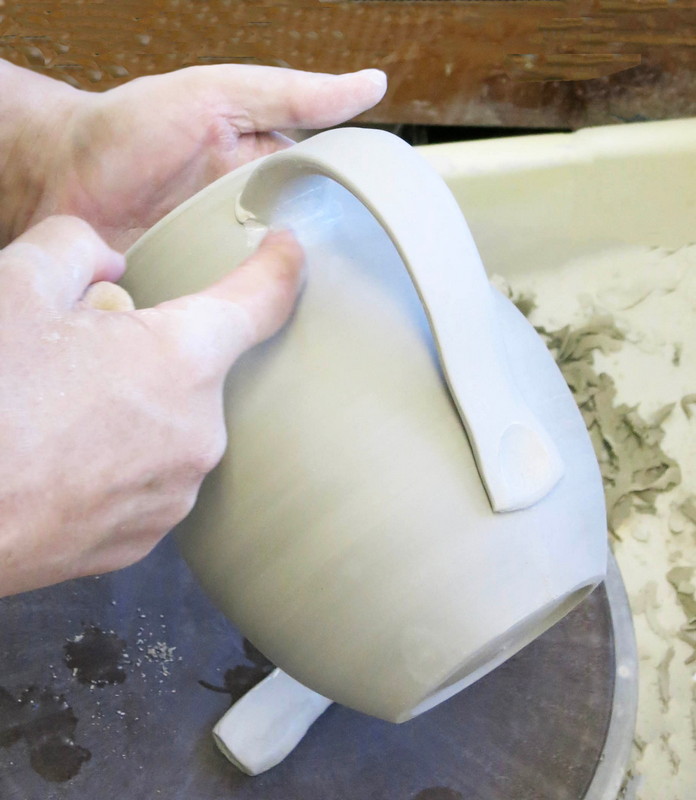
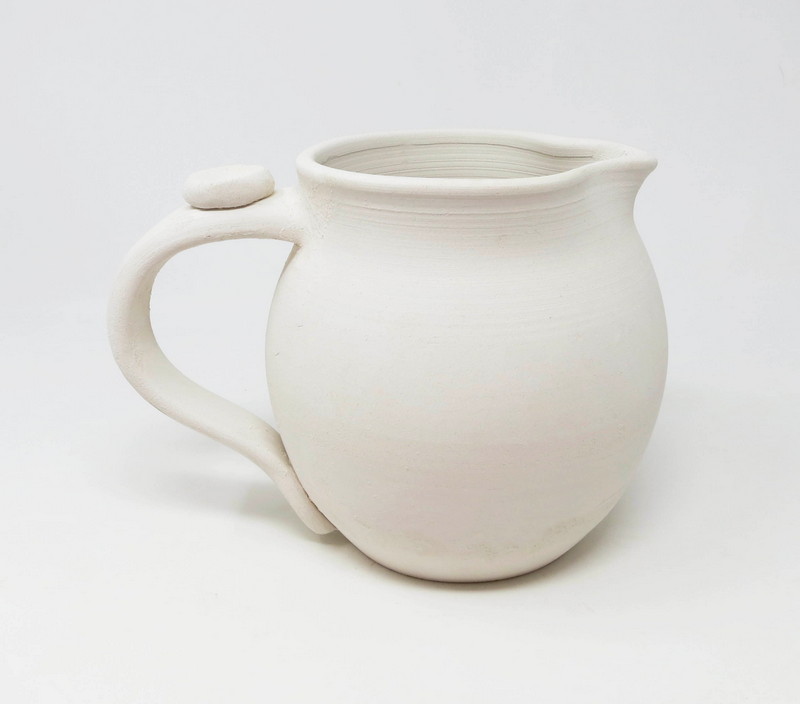
Step 15
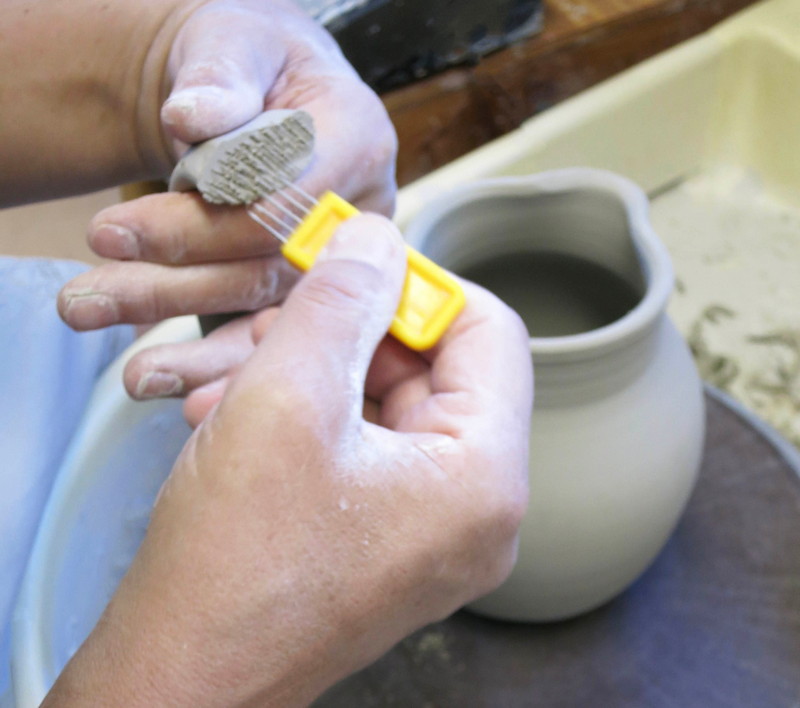
Thumb Rest
Roll a small sphere of clay. Score and slip it onto the top of the handle. Gently press thumb into the clay until it flattens the clay to a comfortable thumb rest shape.
Step 16
Dry
Allow the clay to bone dry.
Step 17
Bisque Fire
Fire the clay pitcher in the kiln to bisque fire temperature.
Step 18
Glaze
Apply glaze to the bisque pitcher according to manufacture’s directions.
Firing range: 1240-1300ºC / 2264-2372ºF / Cone 6-10

Step 19
Glaze Fire
Fire the glazed pitcher in the kiln.