Terracotta Style Stamped Chimes
By Marisa Pawelko
![]()
Summary:
Antique pottery is expensive! So why not make your own?! Summon Roman luxury with these elegant antique style wind chimes! Sandtastik’s Air Dry Clay combined with your favorite rubber stamps allows you easily create beautiful timeless accessories to adorn your surroundings.
What’s Needed:
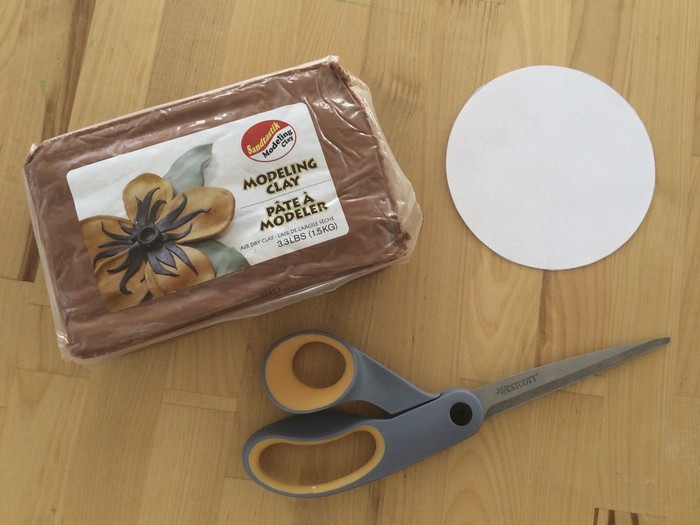
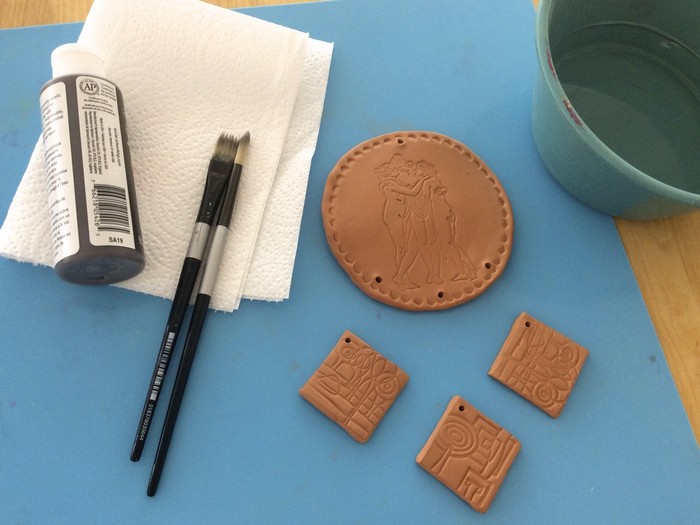
- Sandtastik® Air Dry Modeling Clay in Terracotta
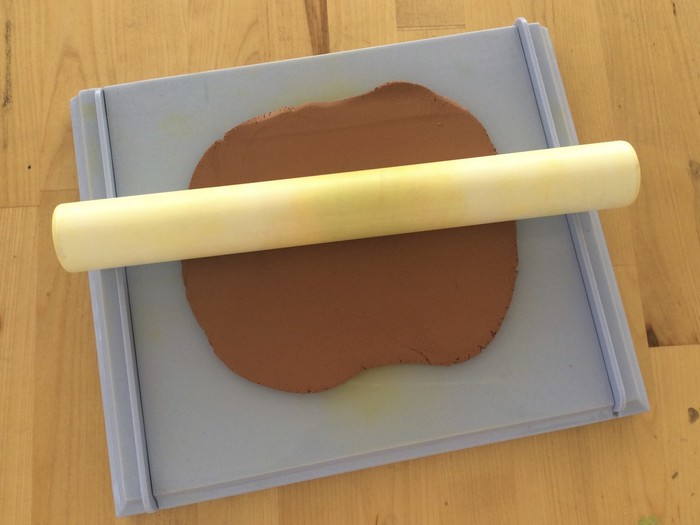
- Clay Roller Kit
- Sculpey® Clay 3 Piece Starter Tool Kit
- Rubber Stamps
- Craft Paint
- Varnish
- Paint Brush
- Paper Towels
- Bowl of Water
- Beads
- String
- Scissors
- School Glue
- Compass
Create a circle template out of paper large enough to encompass the stamp for your main accent design.

Cut the circle out of the paper with scissors.
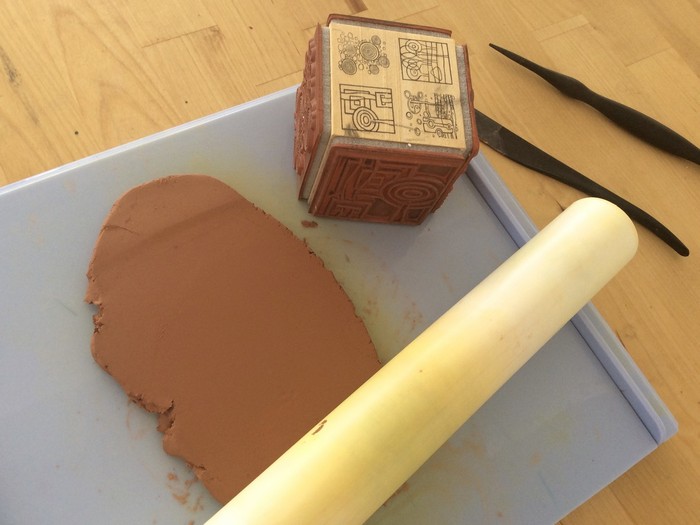
Set up your Clay Roller Kit using the ¼” rails. Roll out a mound of Sandtastik® Air Dry Clay. For this dsign we used the Terracotta color, but feel free to use any of the different color options available!

Continue rolling until your slab is flat and large enough to accommodate the circle template.
Place the circle template onto the slab and roll over it to create an impression of the shape.
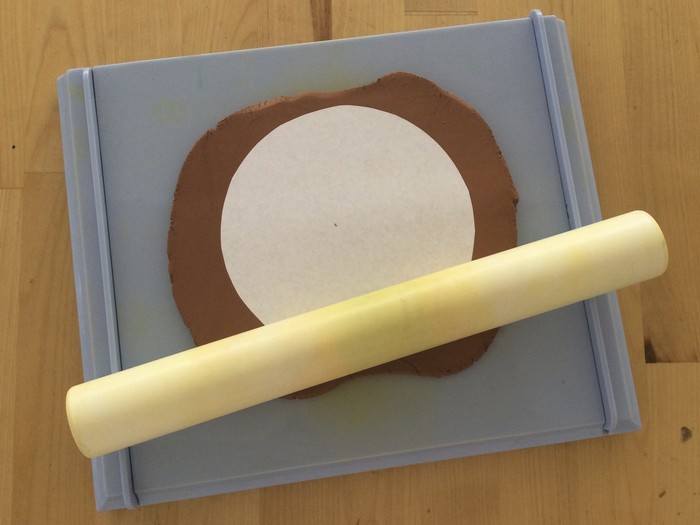
Trim away the excess clay with the Sculpey® Tool.

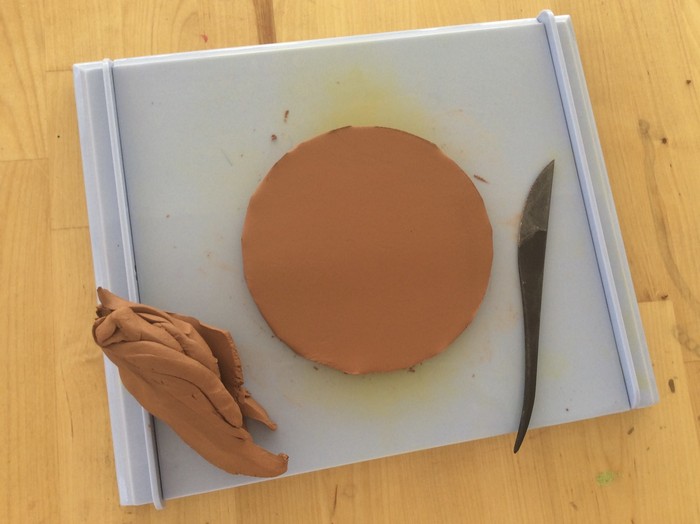
Put some water in a bowl and keep it nearby as you work. Dampen your fingertips and smooth out the egdes of the circle. Then grab your favorite rubber stamp.
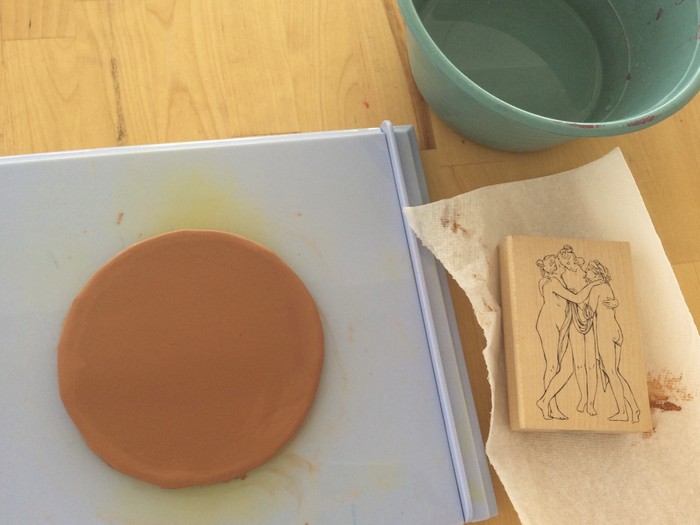
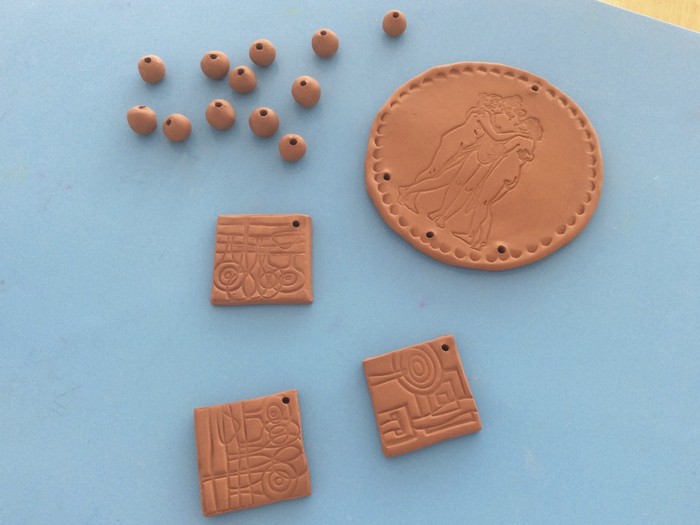
Carefully stamp the image onto the circle.


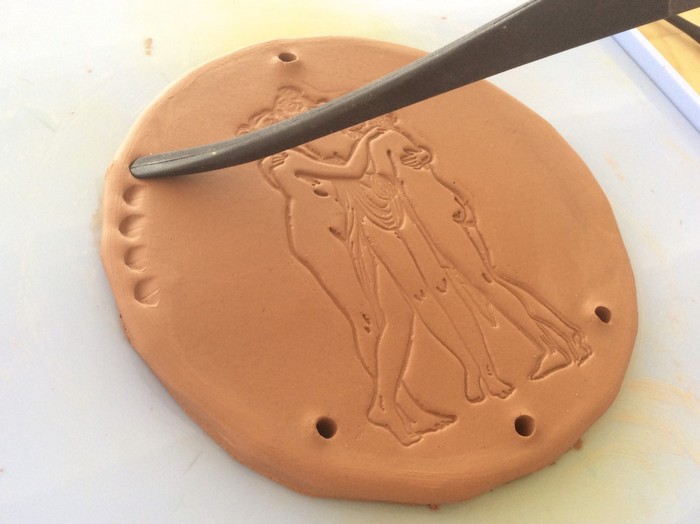
With your other Sculpey® tool, poke four holes through the piece for the dangling elements and the hanging loop we will be creating later.

With the other end of the trimming tool, create a border with repeating indentations as shown.
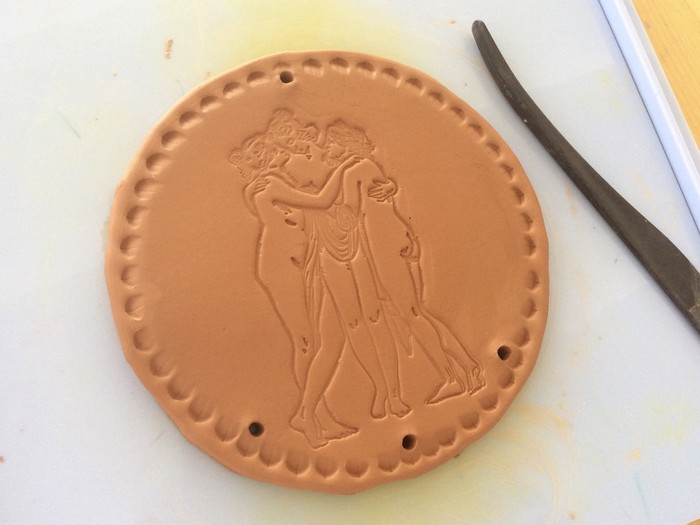
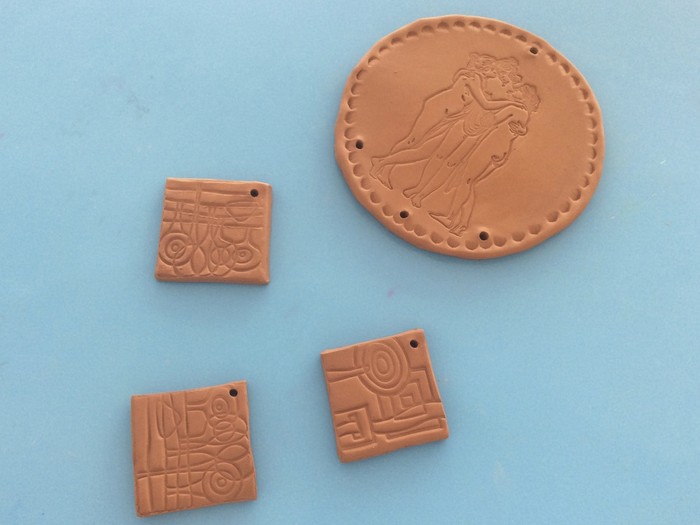
Carve your signature into the back with the Scupley® tool and set the piece aside to dry.
Now you are ready to begin working on the dangling elements for your wind chimes. Grab another one of your favorite stamps and repeat the process to create the chime danglers.
For this design we incorporated a geometric square patterns, but feel free to mix it up and make it your own!

Remember to stamp designs onto the back of the danglers so the chimes look beautiful from all sides! Poke holes for hanging into the dangler pieces.
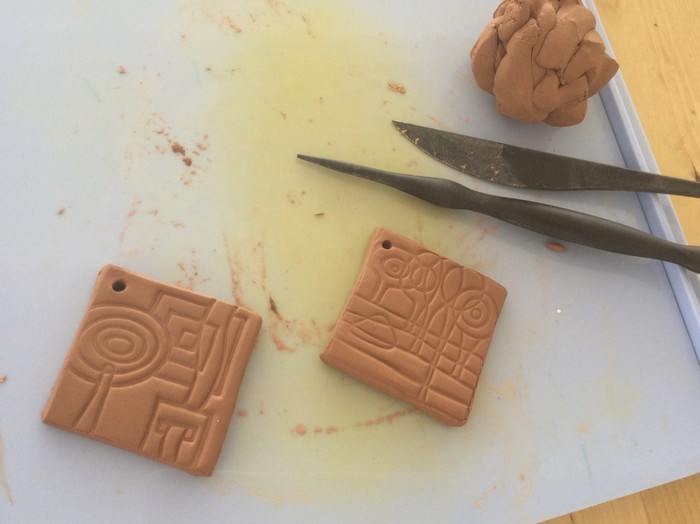
Set the pieces aside to dry.
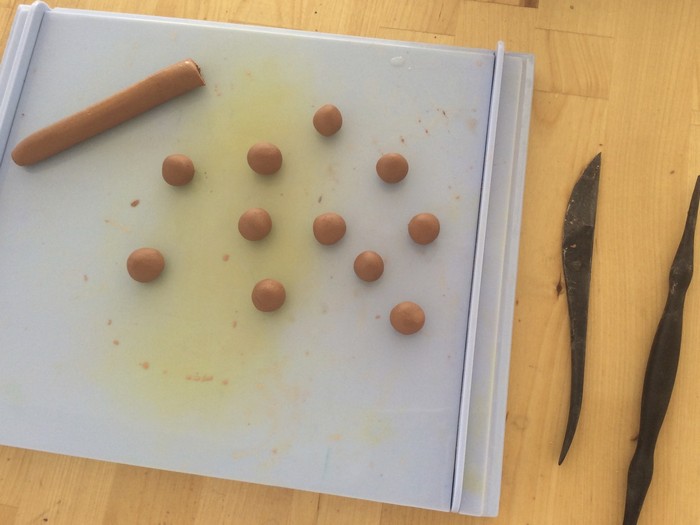
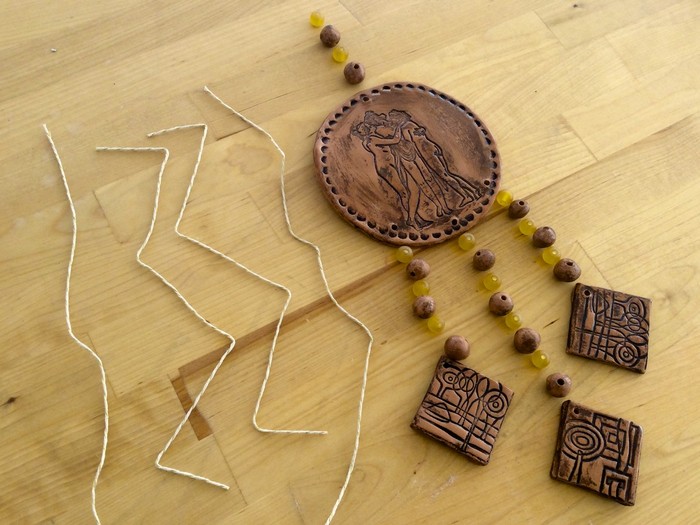
Now you are ready to begin making the coordinating clay beads for your chimes! Roll out a long piece of clay and cut out into little pieces.
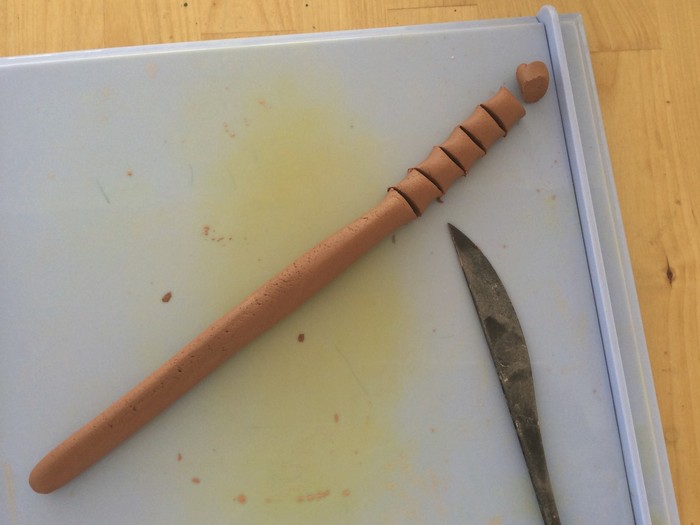
Form the pieces into spheres by rolling them between your hands.
With the Sculpey® tool, poke holes through the beads. It helps to first make the holes with the metal tip and then widen them with the plastic tip.
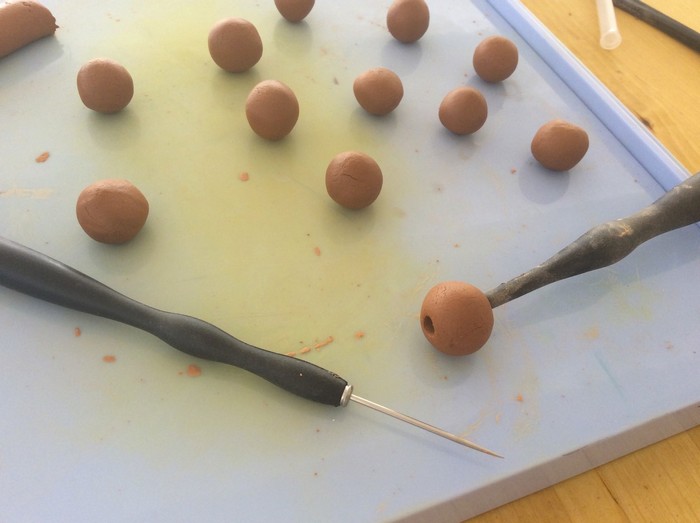
Cover your beads with a damp paper towel as you work to prevent them from drying out.
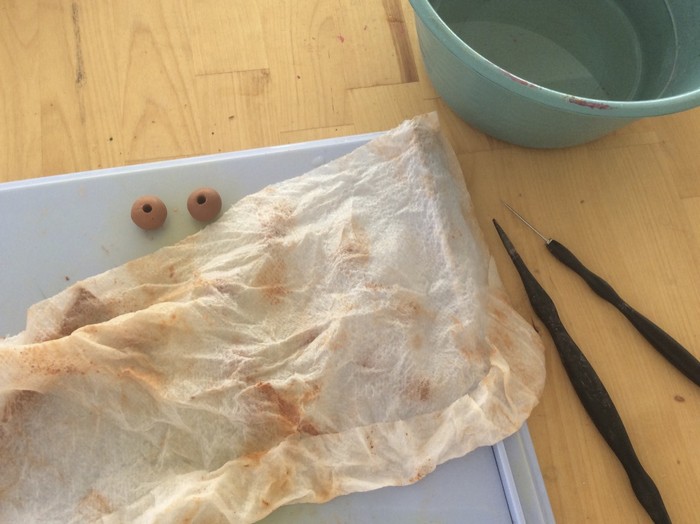
Set the beads aside to dry with the other pieces.
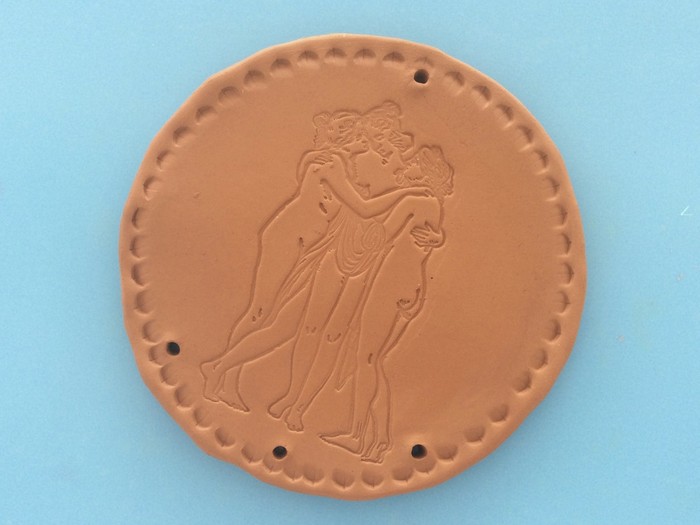
Once dry you are ready to begin the antiquing process.
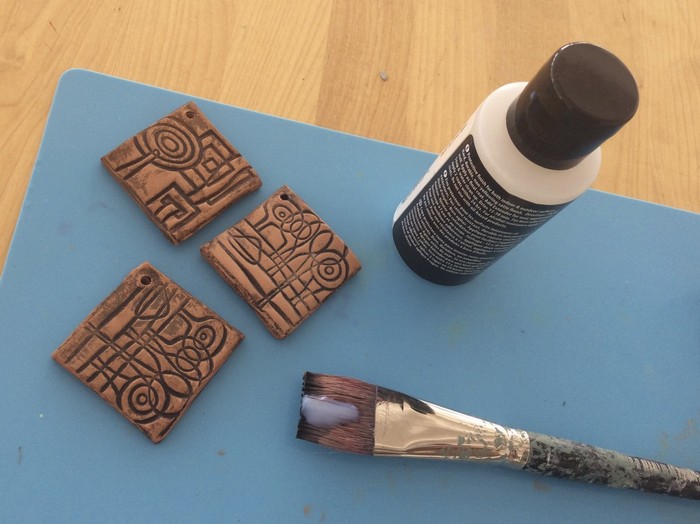
Antique each piece individually. First apply a generous layer of craft paint to your piece.
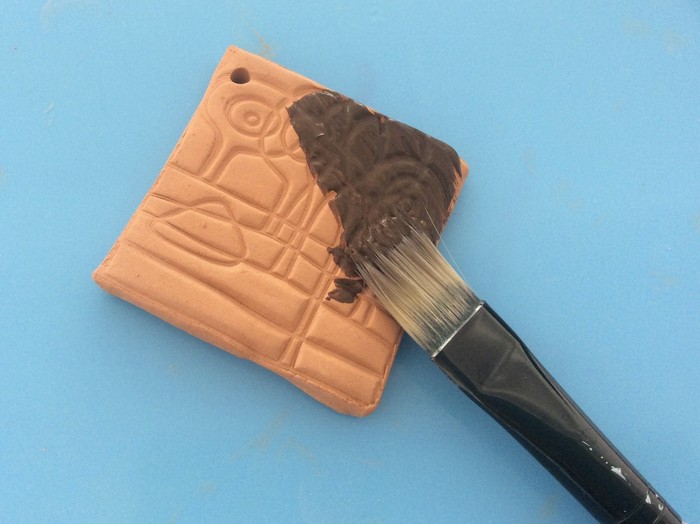
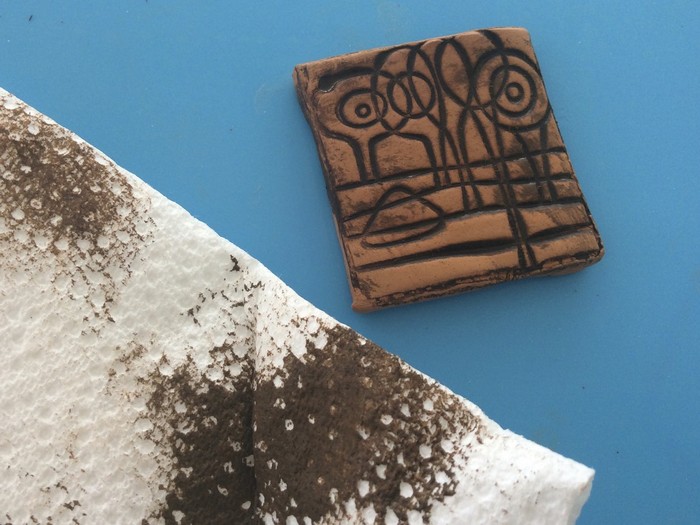
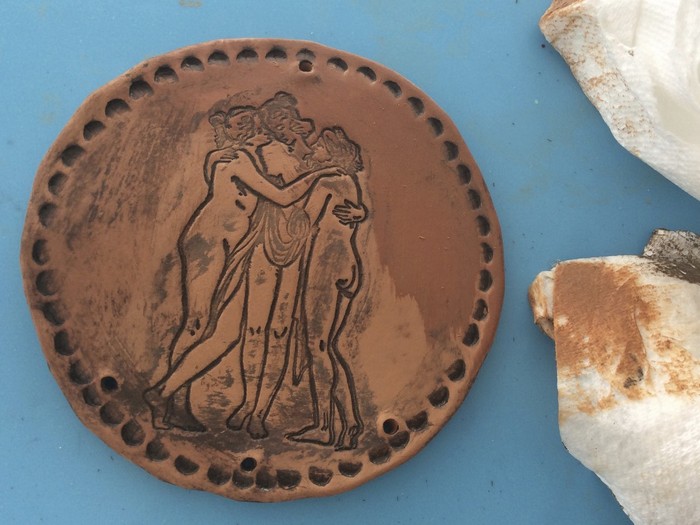
Then quickly wipe it off with a dry paper towel.
Repeat this process for the remaining dangling pieces.
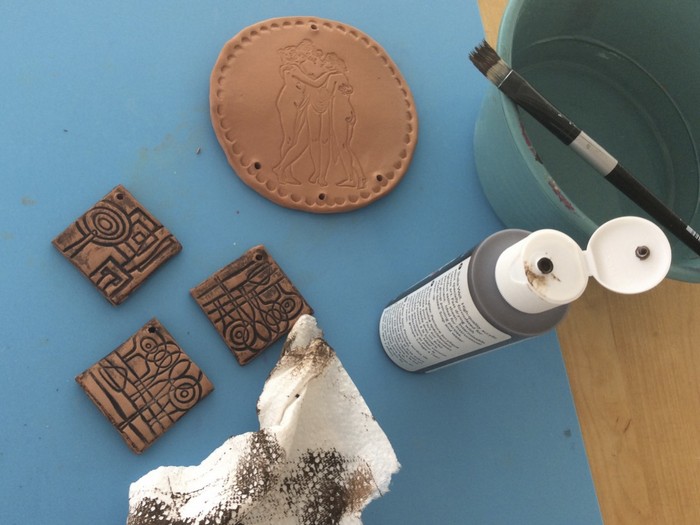
Then continue by antiquing the main design piece with the same method.
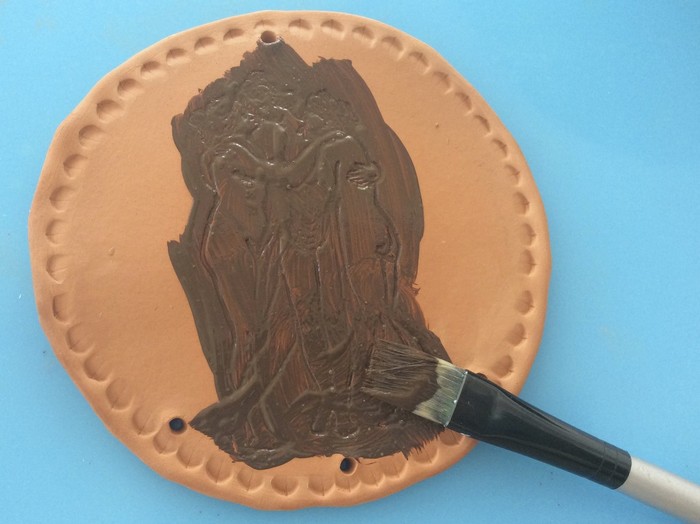
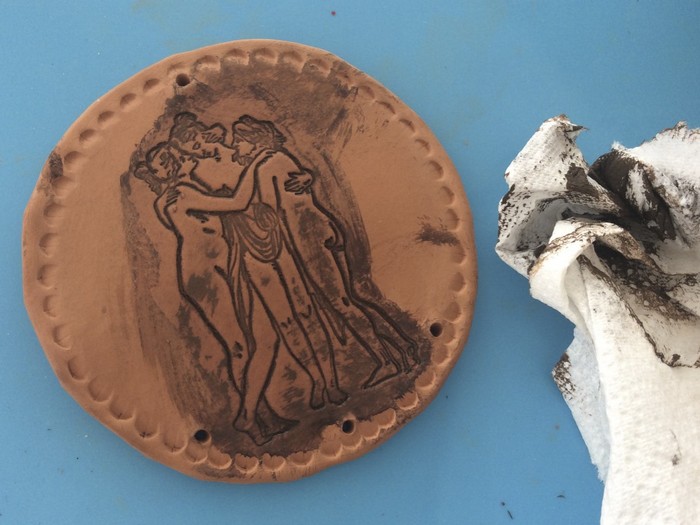
It helps to work in small areas to prevent the paint from drying too soon. If it does dry too soon, you can blend the excess with a damp paper towel.
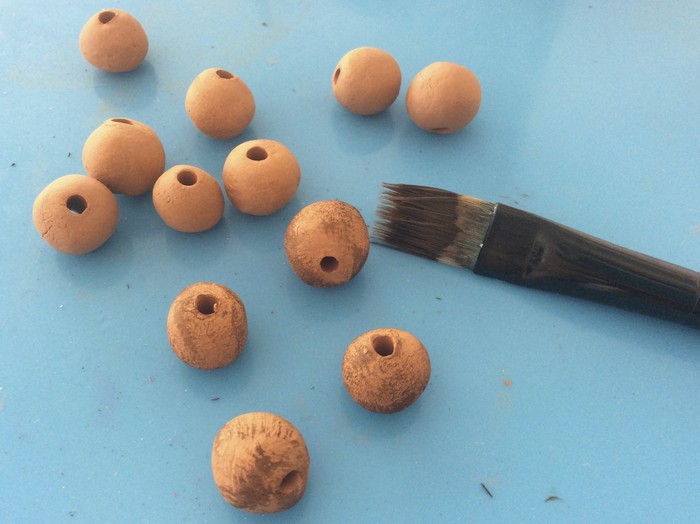
To antique the beads we used a dry brush technique.

Simply apply a little bit of paint to the brush and wipe off the excess. Then gently brush the beads with the dry brush.
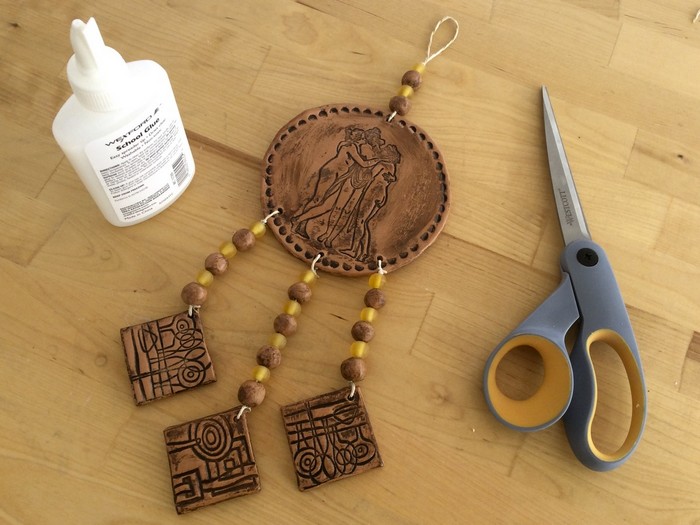
If you are going to hang these chimes outdoors, I recommend you hang them under a covered area like a porch or tree and apply a layer of outdoor satin varnish to the pieces.
Varnish the pieces and set them aside to dry. It helps to put the beads on a piece of wire while drying.

To finish off your chimes grab some string and the accent beads of your choice. For this design we incorporated some frosted yellow glass beads and natural bakers twine.
Assemble the chimes as shown and for extra security, apply a drop of school glue on the knots so they stay nice and tight. Once the glue is dry, you are ready to proudly display your unique decorative masterpiece in your home or garden!
- ABOUT THE ARTIST -

Meet celebrity crafter Marisa Pawelko, winner of the Craft & Hobby Association Indie Craft Contest and the host of “America’s Next Top Crafter™”. Armed with a formal education in furniture design, Marisa used her talents to design products for the gift, toy, fashion and accessories markets before turning her focus to the craft industry. In 2005, sparked with an idea to create a recycled baby memento-keeper out of one of her son’s baby food jars, she founded Modern Surrealist LLC, which quickly developed an international following. Marisa enjoys inspiring crafters on her blog with thrifty project ideas for “upcycling” ordinary objects, into extraordinary custom creations! Her work has been featured by PBS, HGTV, Illinois State Museum and in countless exhibitions and high end boutiques around the world. Modern Surrealist LLC has been providing customers around the globe with individualized and fantastical gifts, crafts and accessories since 2004. Featuring eclectic themes that celebrate your individuality with humor and heart!