Directions
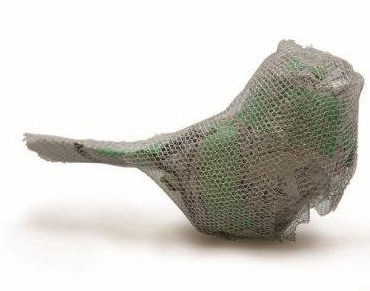 STEP 1 Inner Core (Activa Wire Mesh) - Begin by creating a core for your sculpture. Create the basic shape for the sculpture by forming balls of newspaper and joining the seperate balls together by using masking tape. Once you have the basic form of your sculpture, wrap it with Activa Activ Wire Mesh to hold the shape.
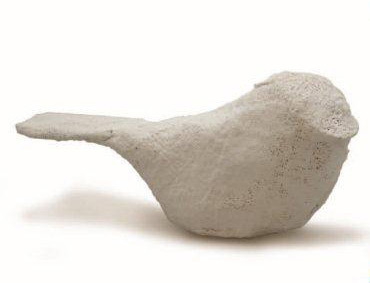 STEP 2 Inner Shell (Rappit Plaster Cloth) - The next step involves wrapping the "core" sculpture with strips of Sandtastik Rappit Plaster Molding Cloth. This step is made very easy by the Rappit Plaster Molding Cloth as you just wet the strip and apply it in 2-3 layers over the Activ-Wire Layer. Once dry, the plaster will become completely hard and strong.
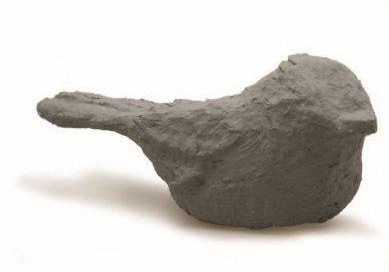 STEP 3 Outer Shell (Celluclay) - After the Sandtastik Rappit Plaster Molding Cloth is completly dry, follow the directions on the package to add water to the Activa Celluclay and use sculpting tools to add all of the final sculpture details (such as the feathers on the bird)
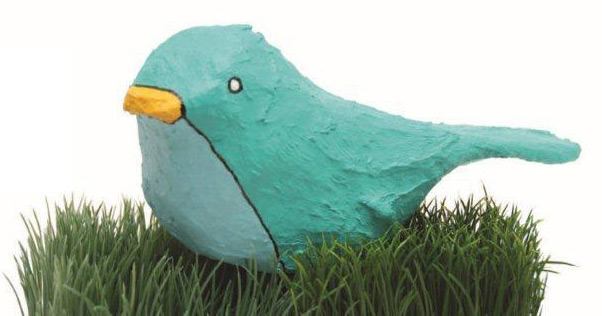 STEP 4 Final Color (Acrylic Paint) - Once the Activa Celluclay is entirely dry, you can finalize your sculpture by adding color. This example was painted entirely with acrylic paint.