OVERVIEW
This fun and easy project allows you to create using Sandtastik Modeling Clay
Original Project Design by Landon Wideman
Supplies
- Modeling Clay - White 3.3 lb Brick (Air Dry)
- Modeling Clay - Green 3.3 lb Brick (Air Dry)
- Sculpey Clay Tool Starter Set
Directions
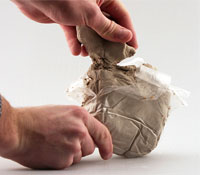
STEP 1 Break off a piece of Sandtastik White Modeling Clay to use for the rose bloom.

STEP 2 The approximate size of the white clay should be about a palmful. The size can vary depending on how big you want the rose bloom.
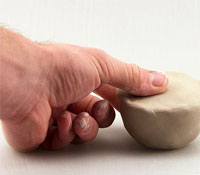
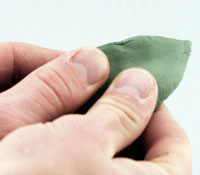
STEP 3 Mold and shape the white clay using your fingers into a half bowl shape as shown in the picture.
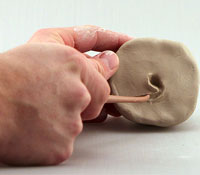
STEP 4 Take the Clay Tool from the Clay Tool Starter Set and begin to carve into the flat part of the clay starting from the middle.
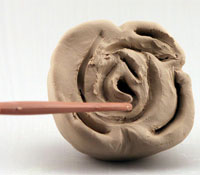
STEP 5 Continue carving into the clay using the tool to until it begins to look like the rose bloom.
STEP 6 Break off a piece of Green Sandtastik Modeling Clay
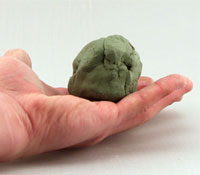
STEP 7 The amount broken off should equal a palmful again. The size can vary with how many leaves you want and the length of the stem.
STEP 8 For the stem roll a piece of the green that has been broken off into a coil.
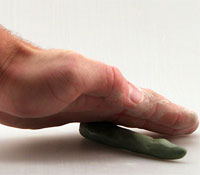
STEP 9 Break the remainder into smaller pieces and begin to shape them by flattening them using your fingers.
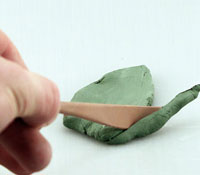
STEP 10 Use the clay tool to trim these pieces into a leaf shape.
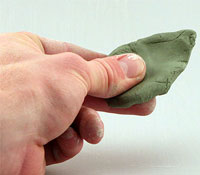
STEP 11 Continue to mold the piece to smooth out the creases and holes until it looks like a leaf.

STEP 12 You should have 3-4 leaves, a stem and the rose bloom at this point.
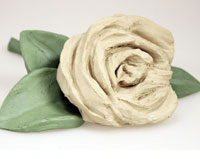
STEP 13 Put them together and mold them into each other to form a rose. Let air dry to harden. When it is hard it can be painted and accepts virtually any finish!