Contemporary Accent Lighting
By Marisa Pawelko
Summary:
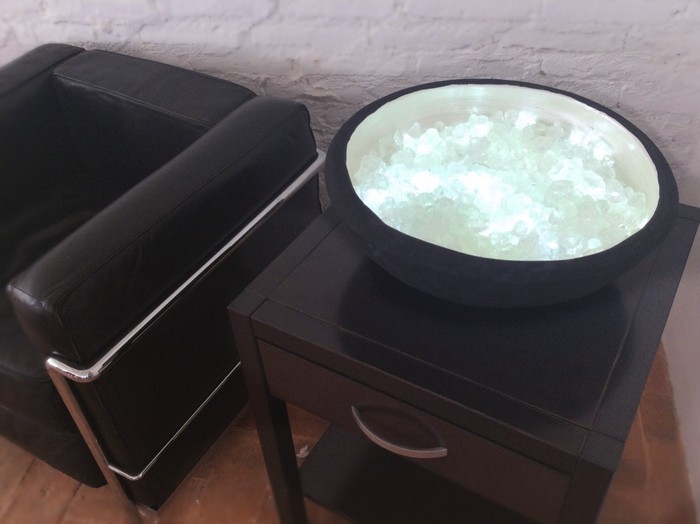
Add wondrous accent lighting to your home or office with Sandtastik’s Colored-ICE! Form meets function with this D.I.Y. contemporary sculptural light fixture. Ambient light shines though the Colored-ICE to create a visually stunning centerpiece.
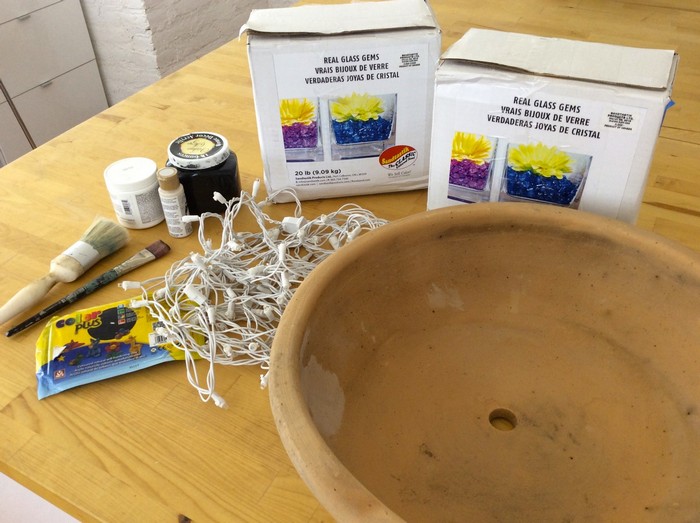
What’s Needed:
- Colored-ICE
- Colored-ICE Clear Cubes
- Color PLUS Natural Air Dry Clay
- Acrylic Paint & Paintbrush
- Low Profile Terracotta Planter
- LED Christmas Lights
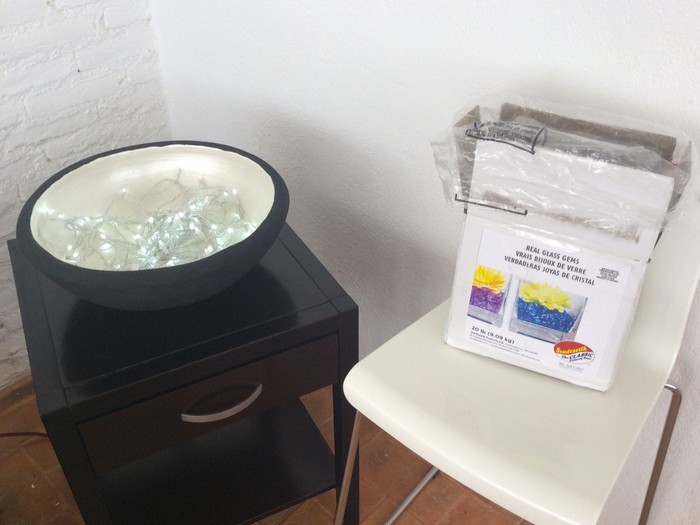
Gather up your supplies as shown.
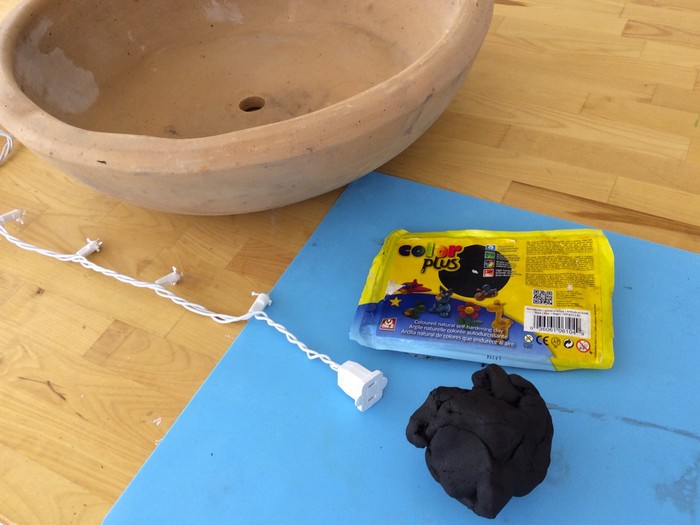
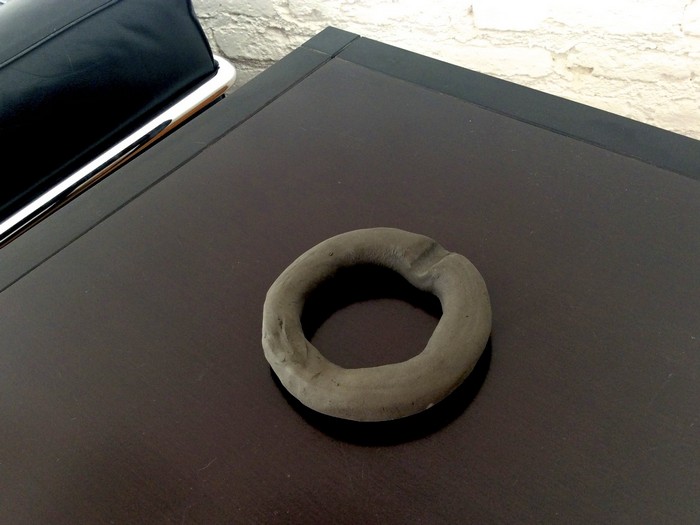
To start this project you are going to create a base for your container with Color PLUS Natural Air Dry Clay. Choose a color that corresponds with the color you’ve chosen for the outside of your container. For this piece we went with the black Color PLUS Natural Air Dry Clay. The base will serve as a hiding place for the loose end of the LED Christmas lights cord.
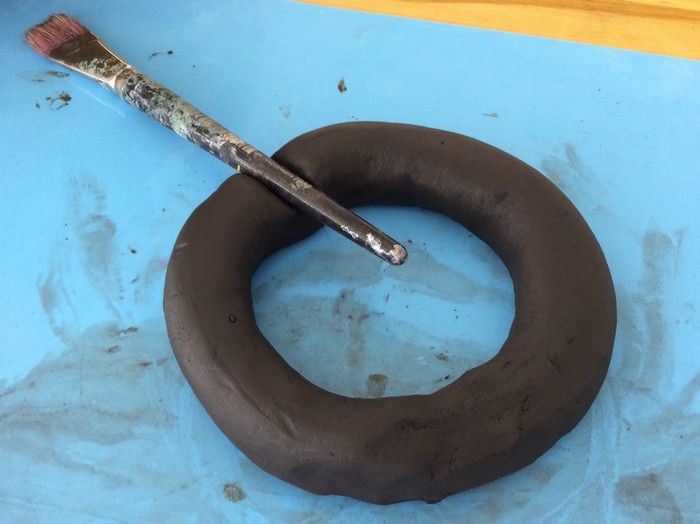
Roll out a long piece of clay that is the height of the connector at the female end of the cord.
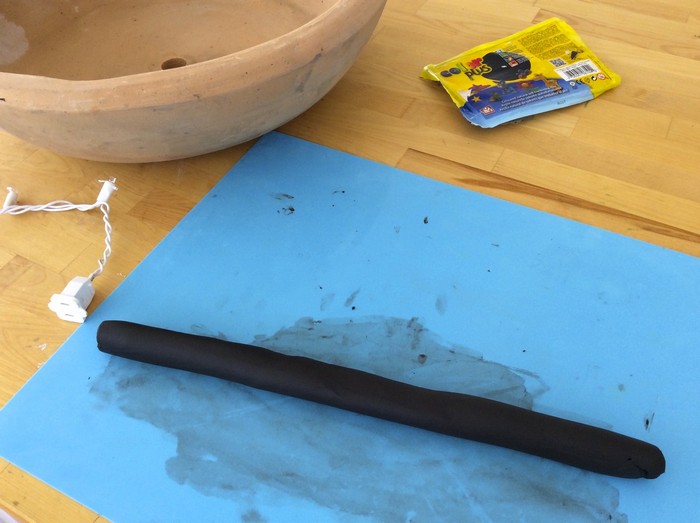
Form the clay piece into a circle. With your paintbrush, press an indentation into one side of the circle as shown.
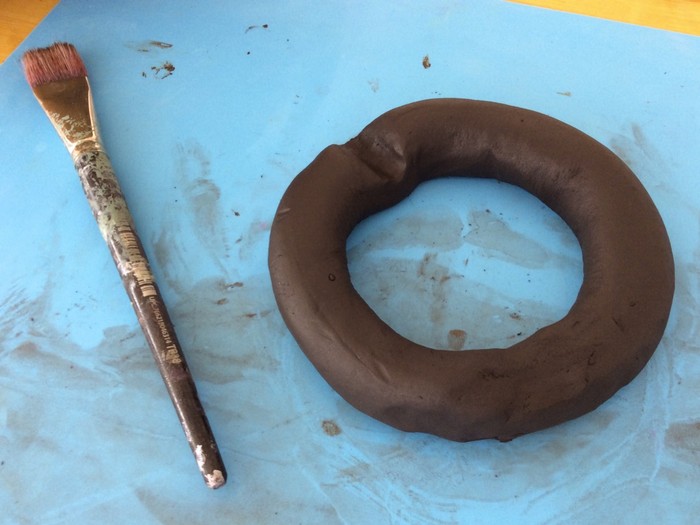
Set the clay base aside to dry.
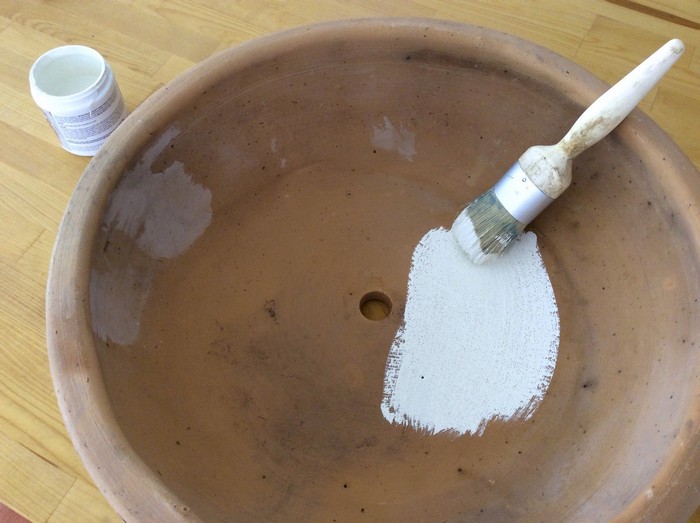
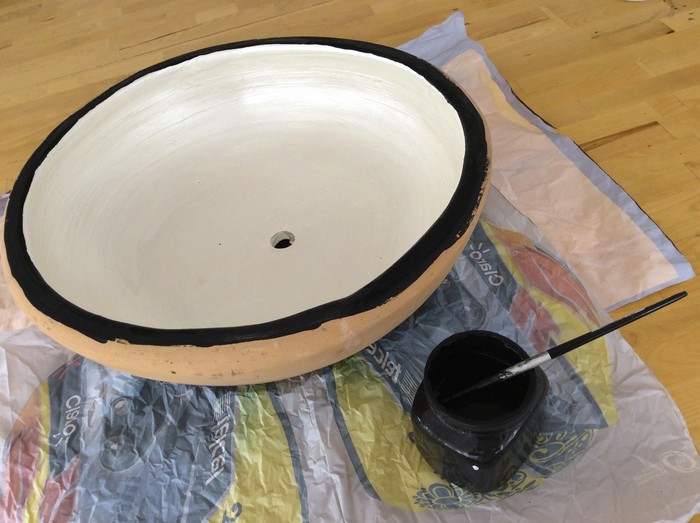
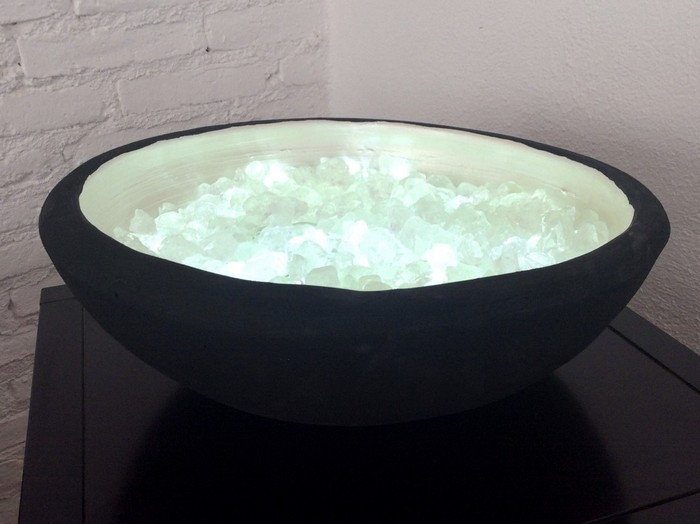
Now you are ready to begin painting your terracotta container. For this piece we chose a bright white paint for the inside of the container.
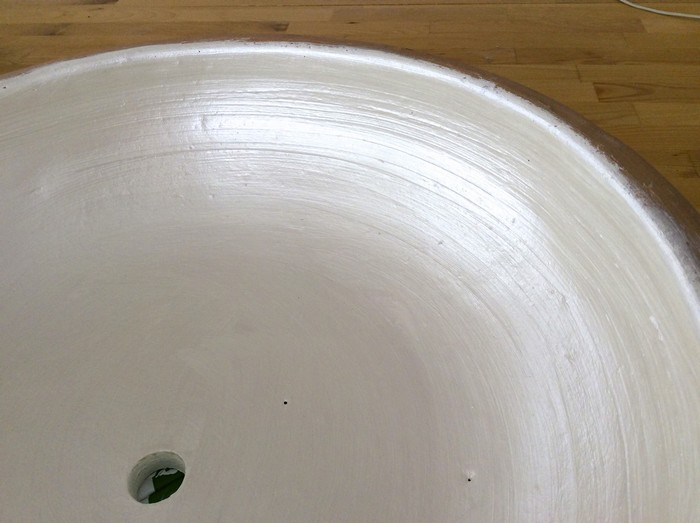
After the white paint was dry, we added a layer of pearly white paint. The pearlized finish will serve to further reflect the light of the LED lights.
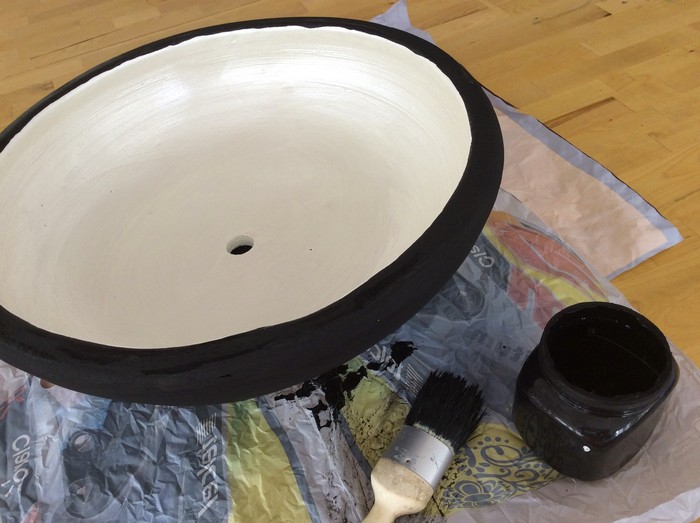
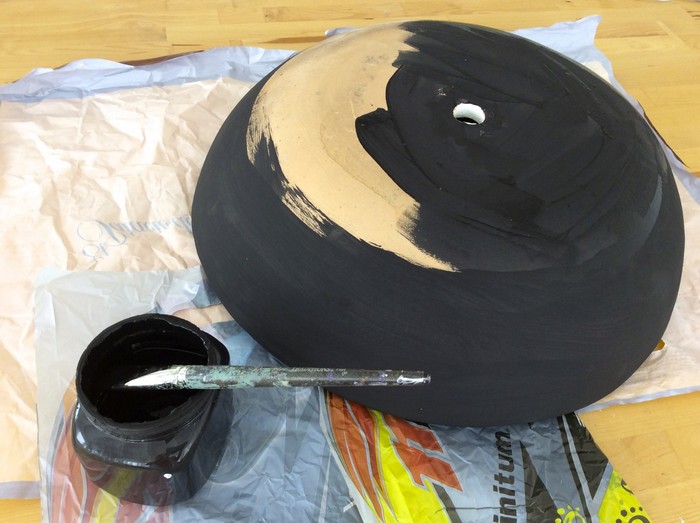
Next carefully paint the rim and exterior of your container with a contrasting color of paint. For this design, we painted the exterior a flat black to match the circular base we crafter earlier.
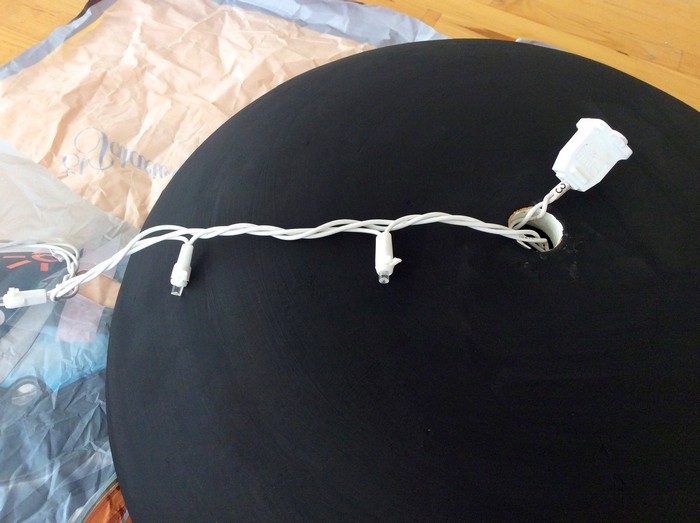
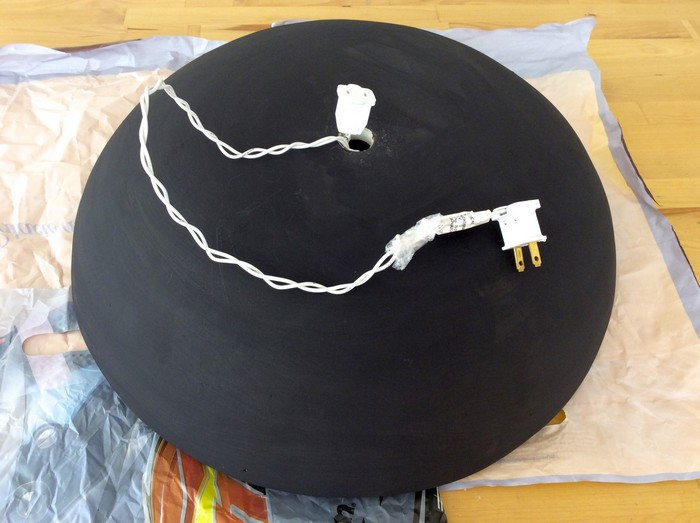
Once the paint is dry, insert the length of the LED Christmas lights into the drainage hole of the terracotta planter. The female end of the cord will remain outside the hole as shown.
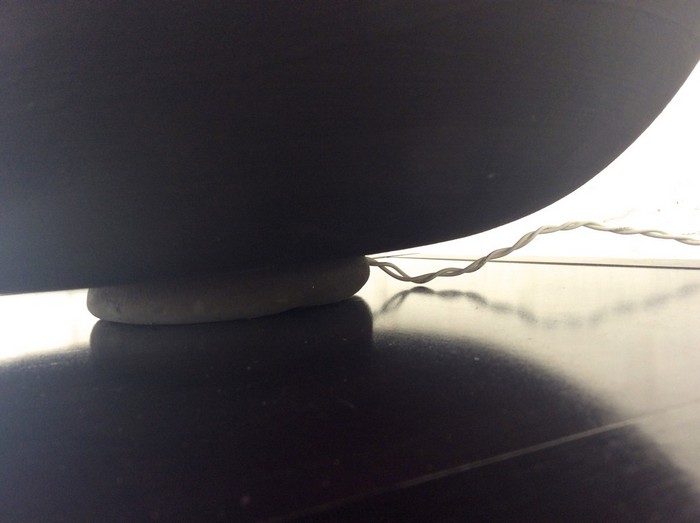
Place the base in the desired location.
Place the container on top of the base, leaving the female end of the cord hidden within the base. Run the cord with the male end though the indentation you made in the circular base as shown.
Arrange the LED lights so they are spread evenly throughout the bottom of the container.
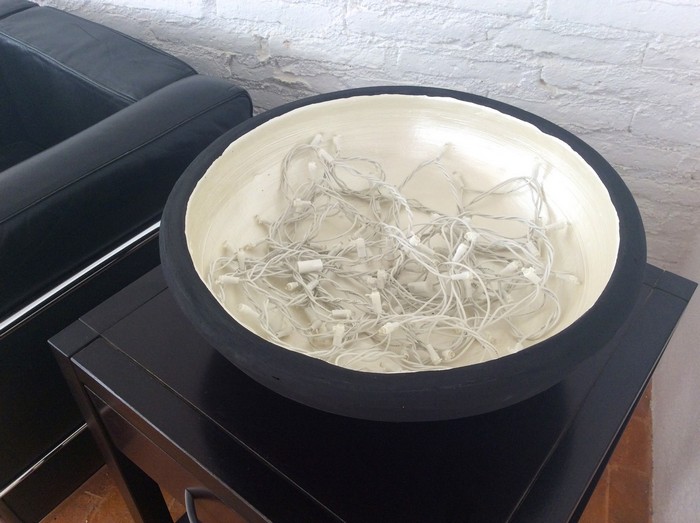
Now you are ready to begin adding your Colored-ICE. For this project we went with the clear Colored-ICE for a clean modern feel, but feel free to mix it up and make it your own by choosing from the myriad of vibrant colors available!
Pour the Colored-ICE over the LED lights.
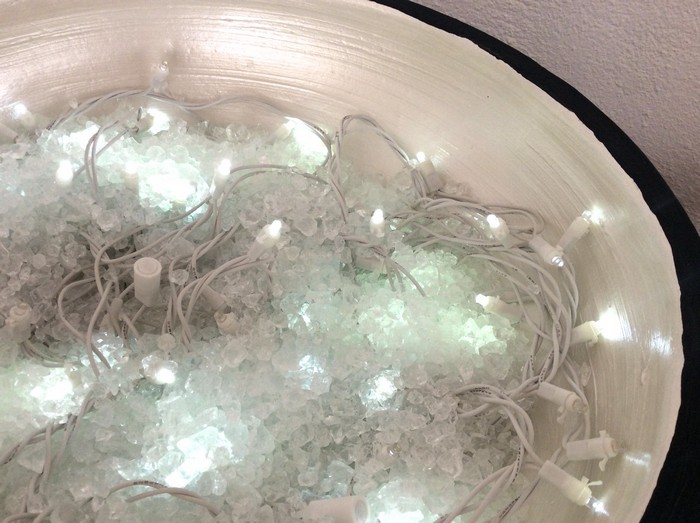
Next add a generous layer of Colored-ICE Clear Cubes, arranging to make sure that all the LED lights are fully covered. Now you are ready to enjoy the ambient light emitted from your very own custom made contemporary light fixture!
- ABOUT THE ARTIST -
Meet celebrity crafter Marisa Pawelko, winner of the Craft & Hobby Association Indie Craft Contest and the host of “America’s Next Top Crafter™”. Armed with a formal education in furniture design, Marisa used her talents to design products for the gift, toy, fashion and accessories markets before turning her focus to the craft industry. In 2005, sparked with an idea to create a recycled baby memento-keeper out of one of her son’s baby food jars, she founded Modern Surrealist LLC, which quickly developed an international following. Marisa enjoys inspiring crafters on her blog with thrifty project ideas for “upcycling” ordinary objects, into extraordinary custom creations! Her work has been featured by PBS, HGTV, Illinois State Museum and in countless exhibitions and high end boutiques around the world. Modern Surrealist LLC has been providing customers around the globe with individualized and fantastical gifts, crafts and accessories since 2004. Featuring eclectic themes that celebrate your individuality with humor and heart!