Materials Needed:
- SIO-2 Plus® Self-Hardening Modeling Clay in bright white, white, terra-cotta, and black
- Activa’ Clay Rolling Kit
- Circle Cutter
- Plastic Bag
- Vinegar
- Water
- Bristle Brush
- Porous Bowl Mold (paper or ceramic work bests)
- Water Based Sealant
- Mop Brush
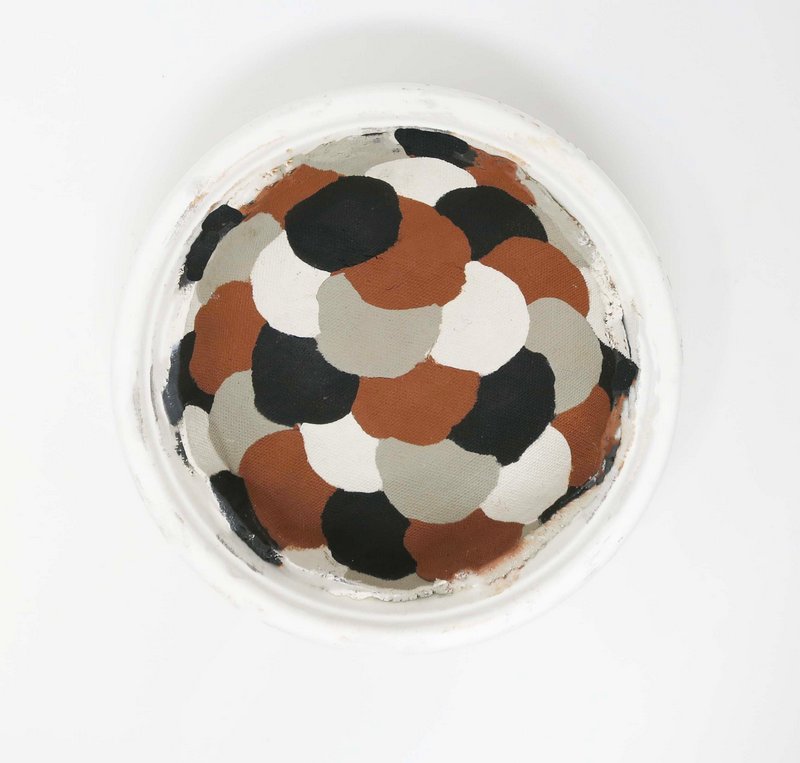
Step 1
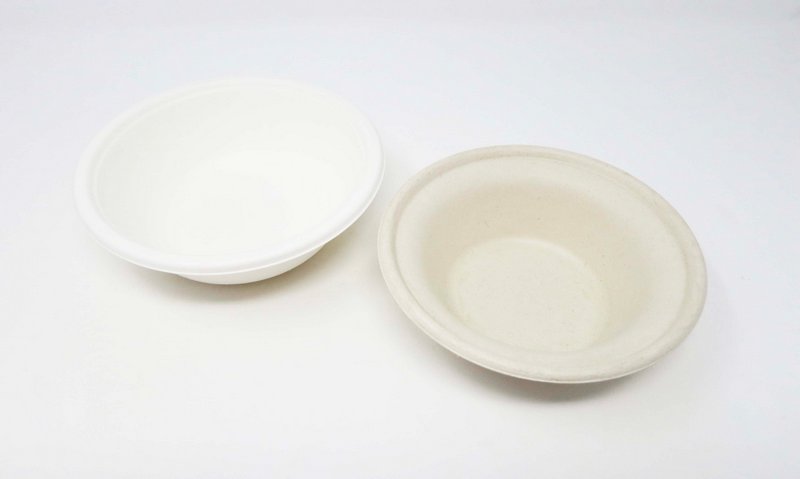
Mold
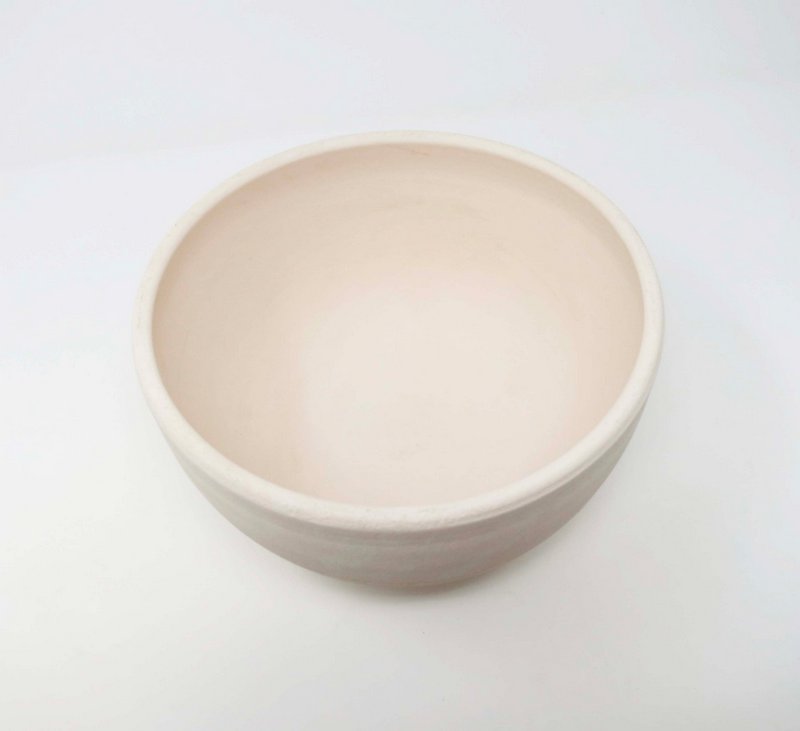
Choose a premade porous bowl to use as a mold.
Step 2
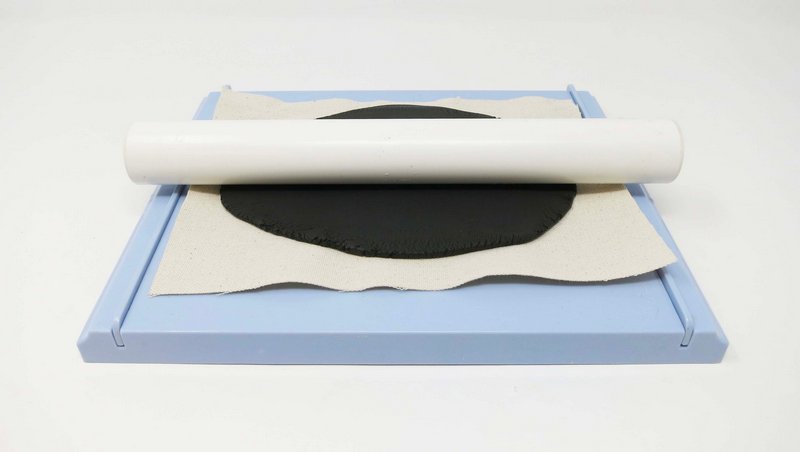
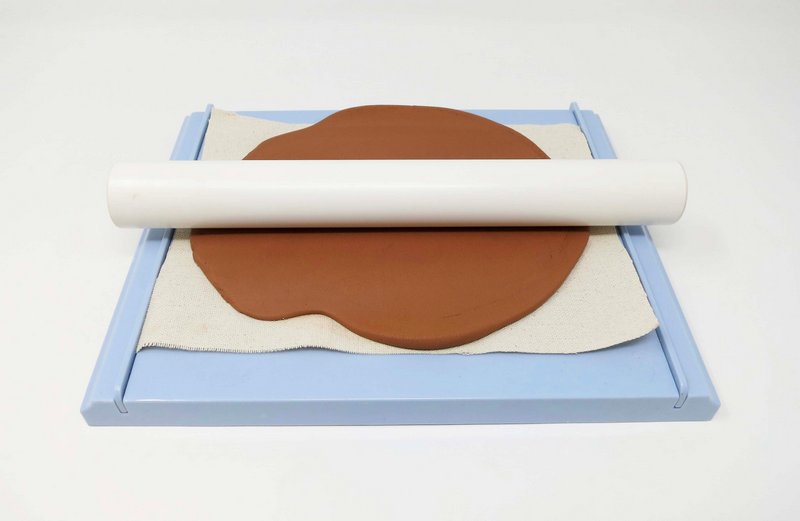
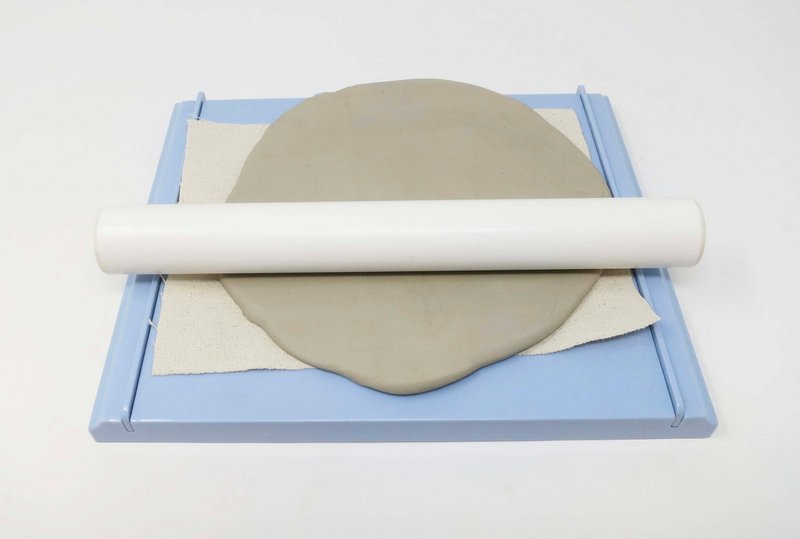
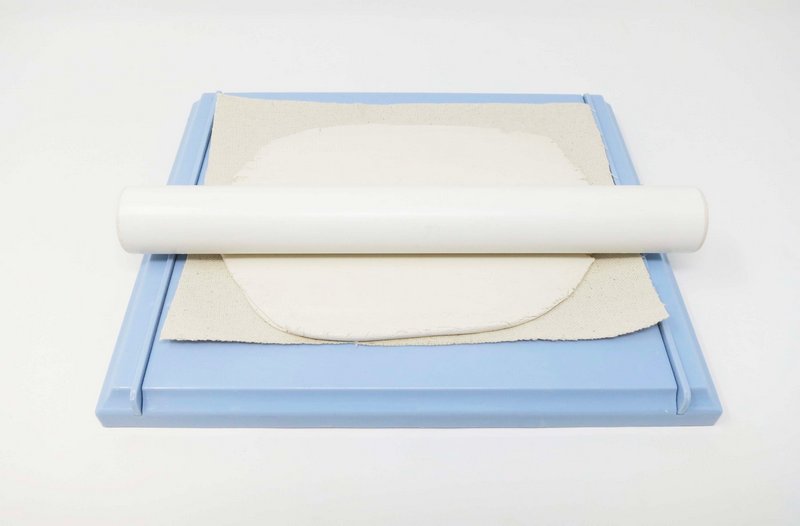
Clay Slabs
Roll a 3/16” slab of each color of clay using the clay rolling kit.
A piece of canvas may be used to avoid the clay from sticking to the surface.
Step 3
Clay Circles
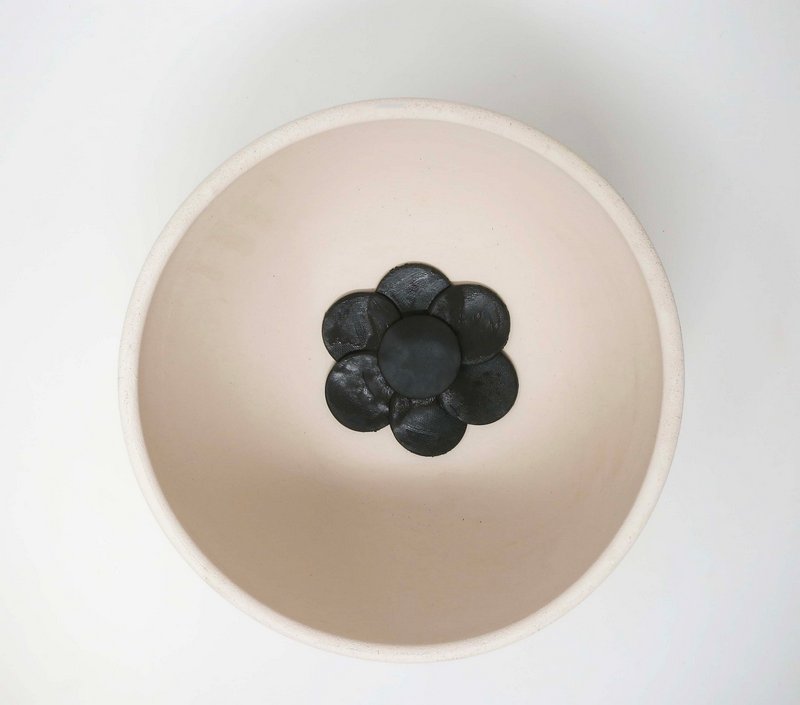
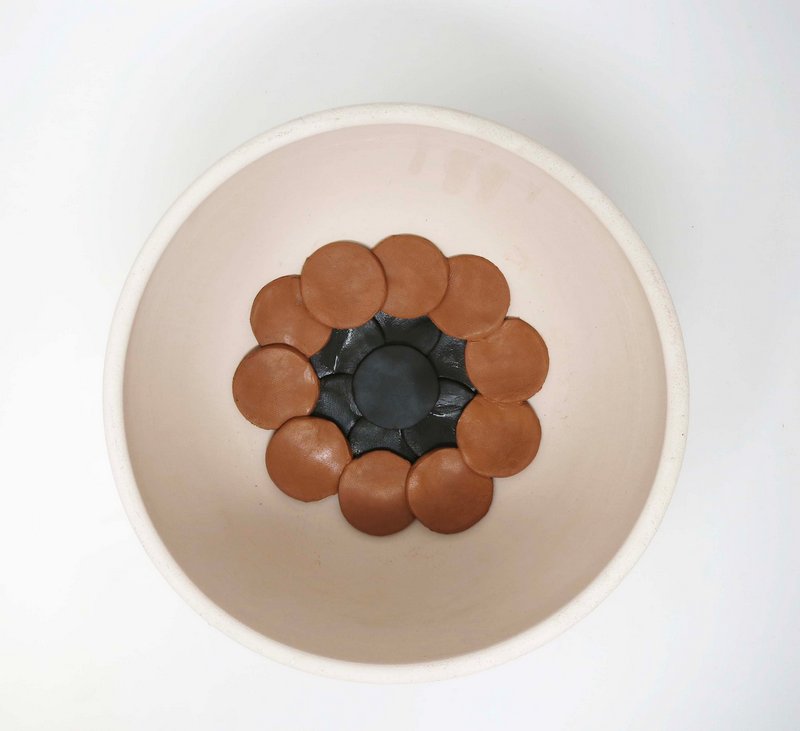
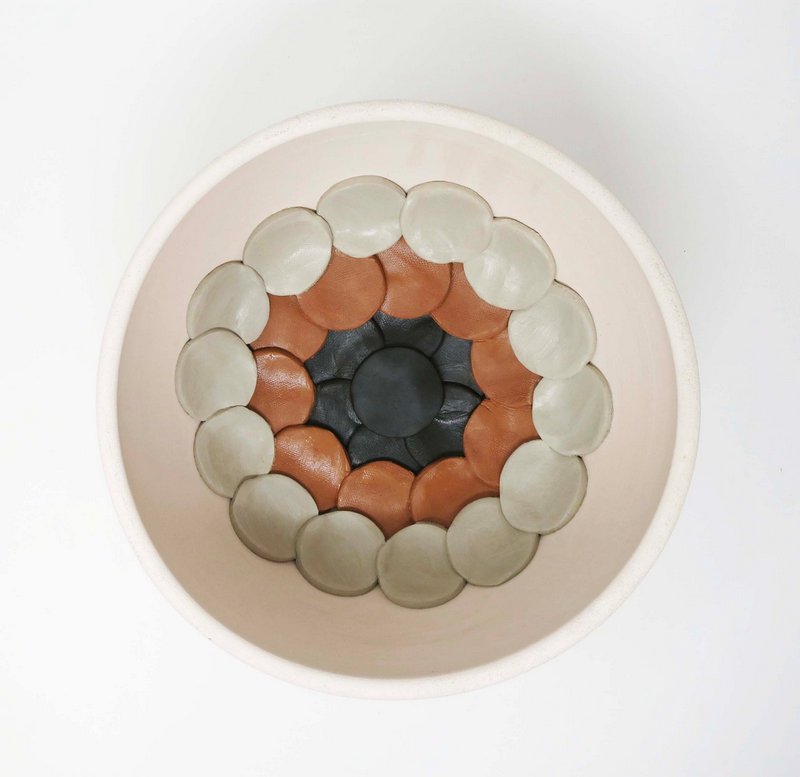
Use a circle cutter to cut out several circle shapes out of each clay color.
Circles may be all the same or vary in size.
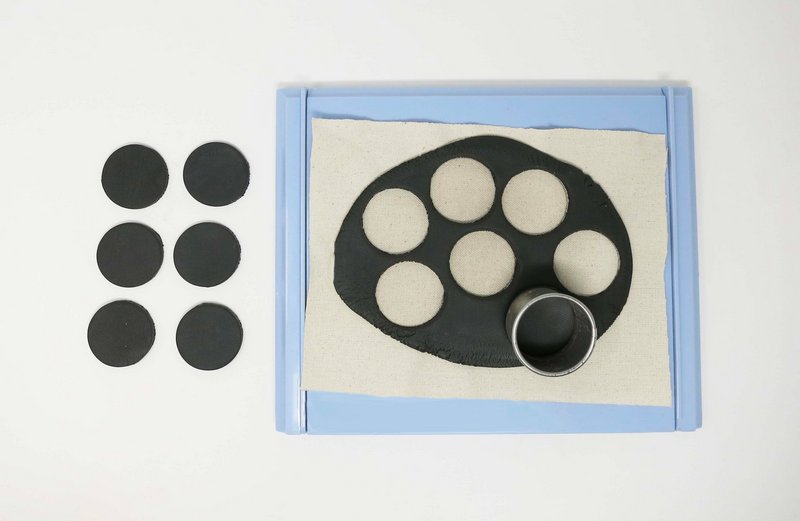

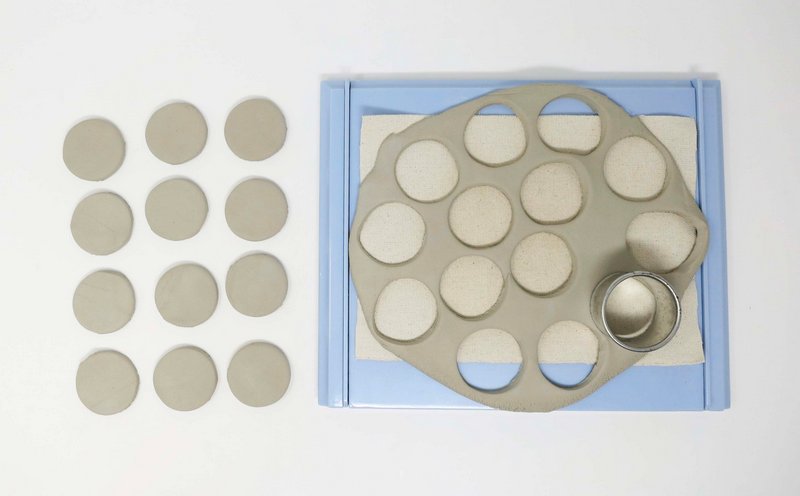
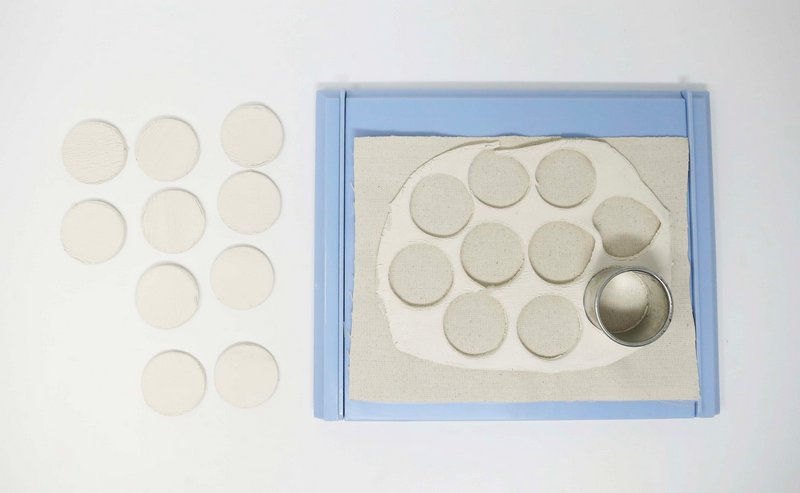
Place clay circles in a plastic bag to avoid them from drying out.
Step 4
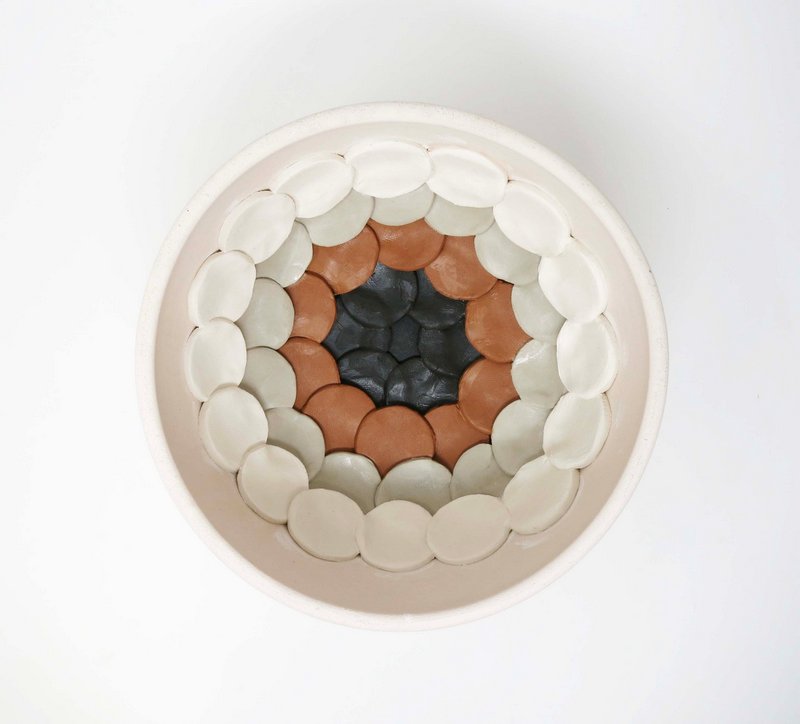
Arrangement
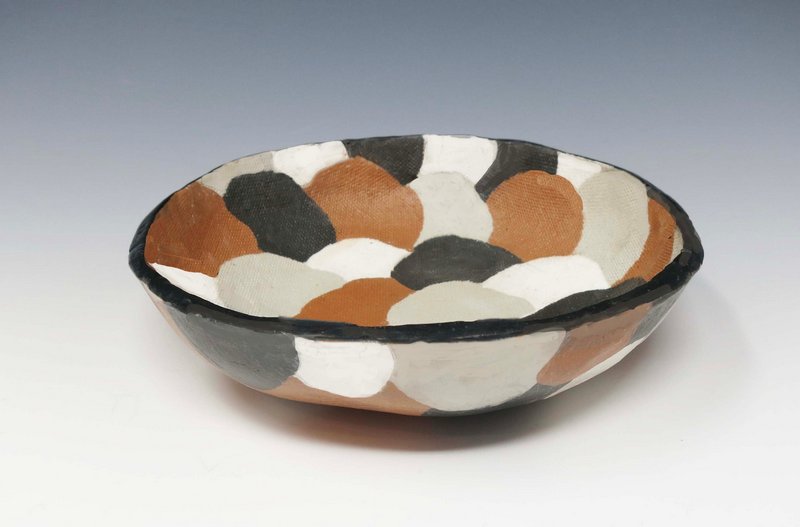
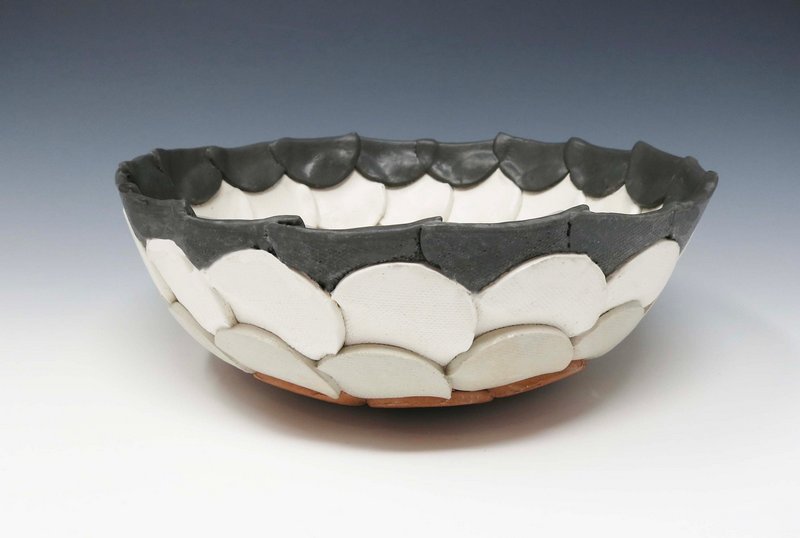
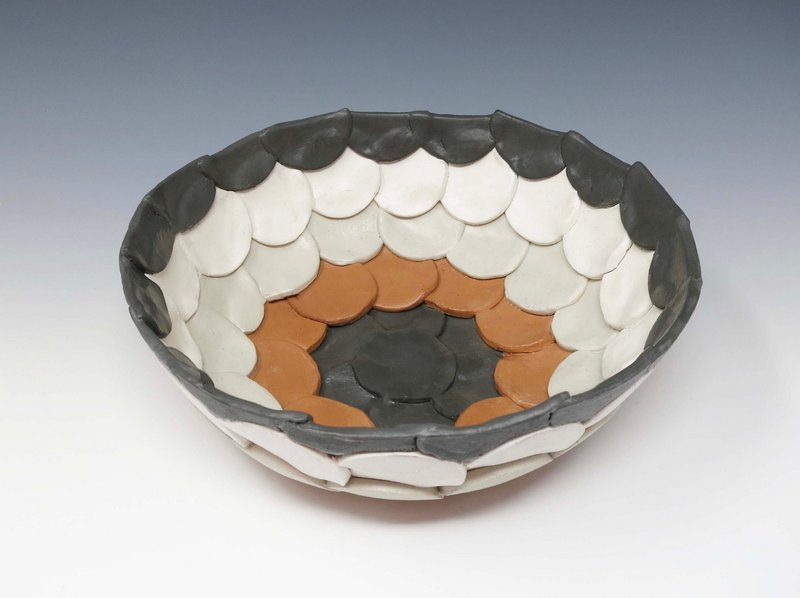
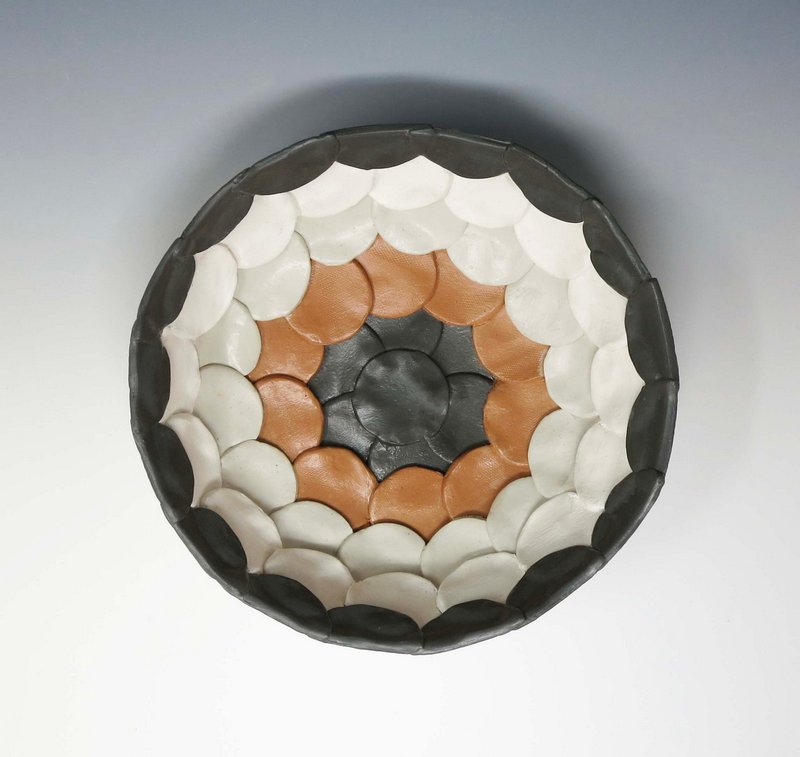
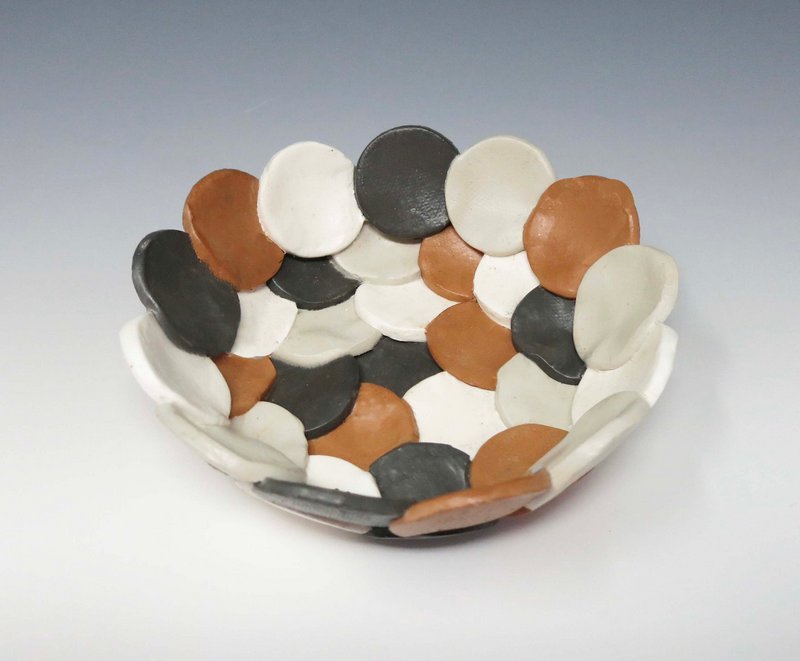
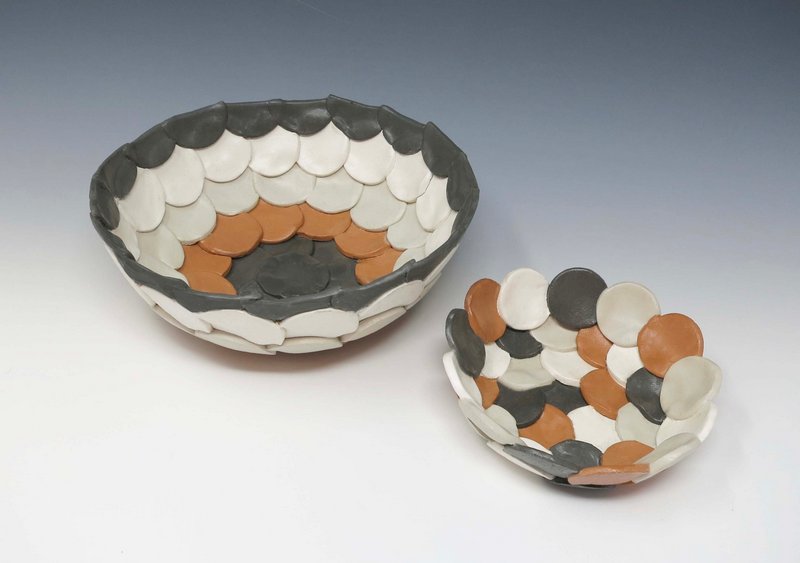
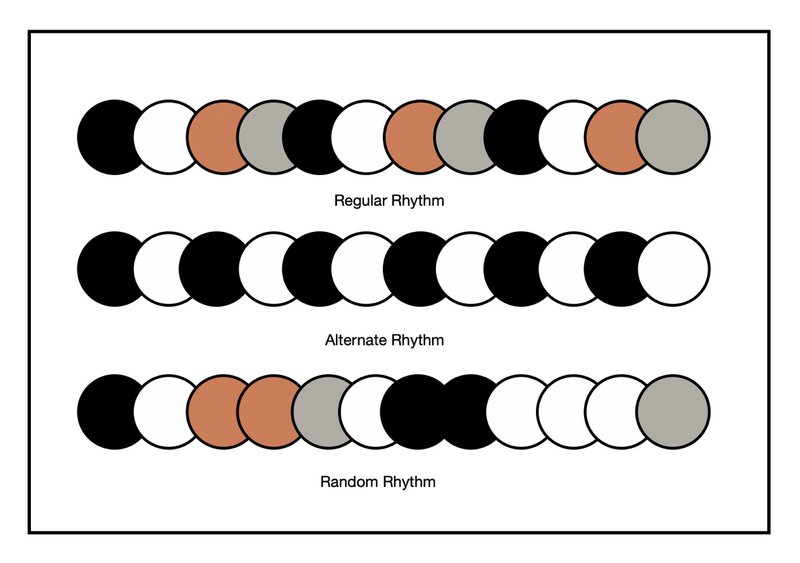
Decide on how to arrange the colors of clay in the design. Regular, alternate, or in a random pattern.
Step 5
Attach
Place the clay circles into the mold one at a time. Use the stiff brush and vinegar to join the clay pieces together.
Press shapes together with finger tip.
Step 6
Rim
The rim of the bowl may be left as a scalloped edge or half circles may be added.
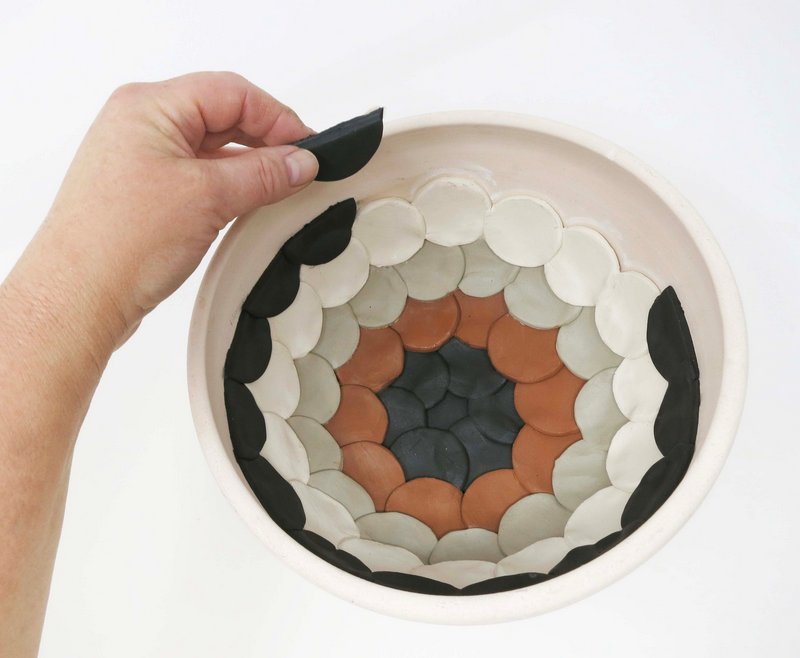
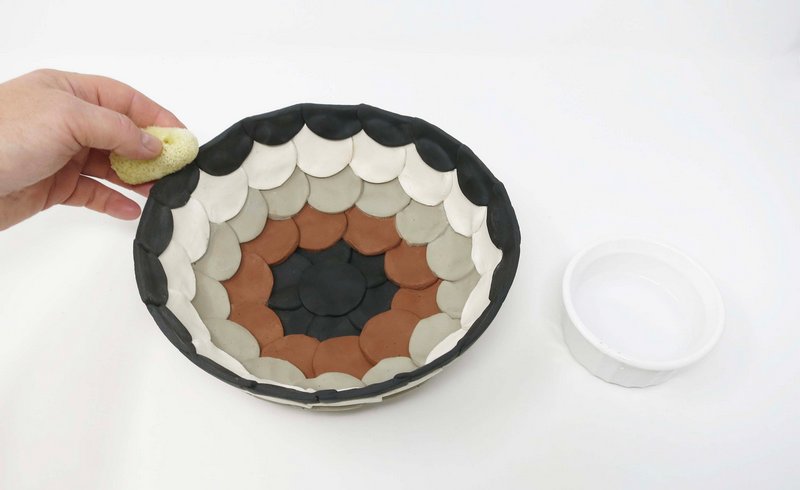
Smooth rim with a wet sponge.
Step 7
Dry
Allow the clay to dry.
Step 8
Removal
Turn the bowl mold upside down and allow the dry bowl to fall out of the mold.
Turn the bowl right side up.
Step 9
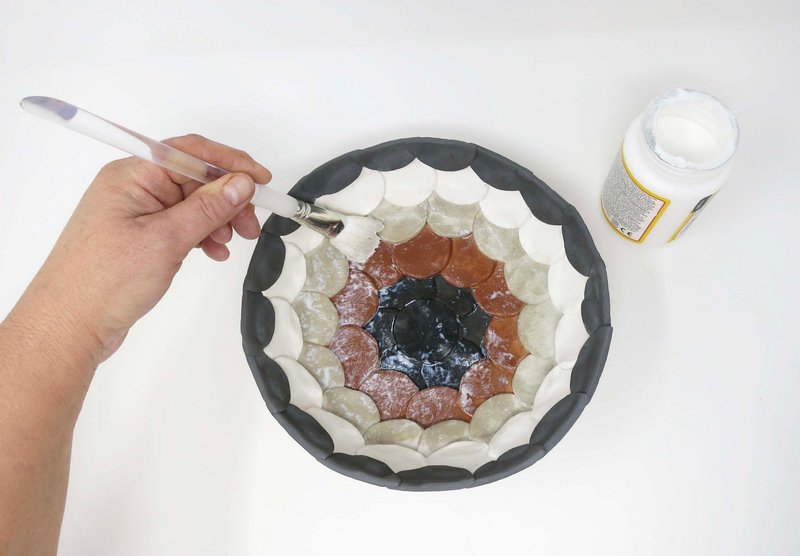
Varnish
Coat clay with a layer of clear water based varnish.
VARIATION
Step 1
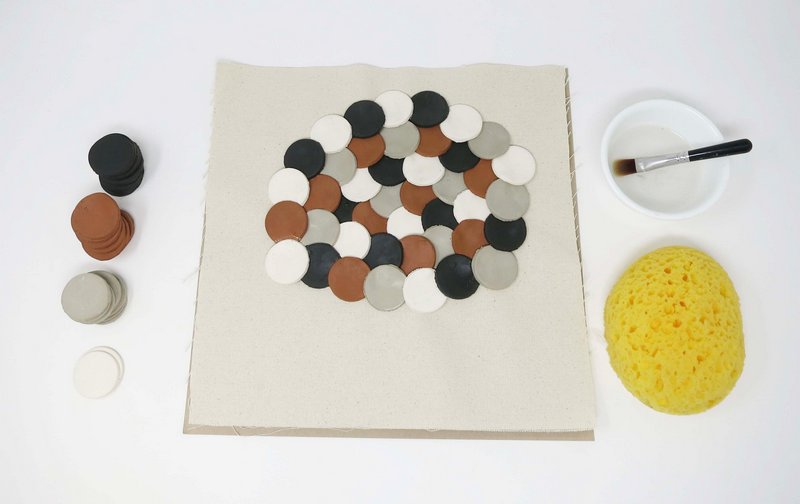
Arrangement
Overlap circles on a canvas mat in desired pattern.
Join circles together with a little bit of vinegar on the edges that touch each other.
Step 2
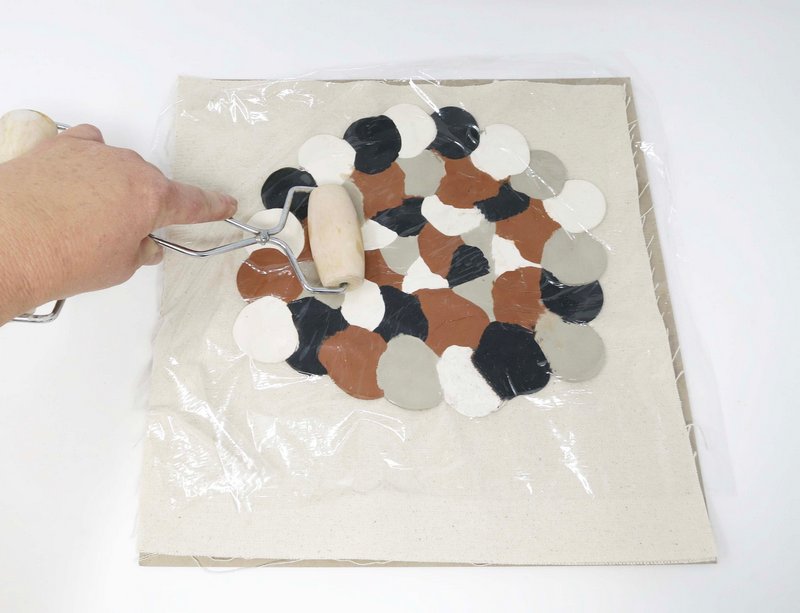
Flatten
Cover clay circles with plastic wrap. Gently roll over the clay with a Pony Roller.
Remove plastic wrap when finished.
Step 3
Trim
Place bowl mold upside down onto the flattened clay.
Trim around the mold with a needle tool to cut out a circle shape.
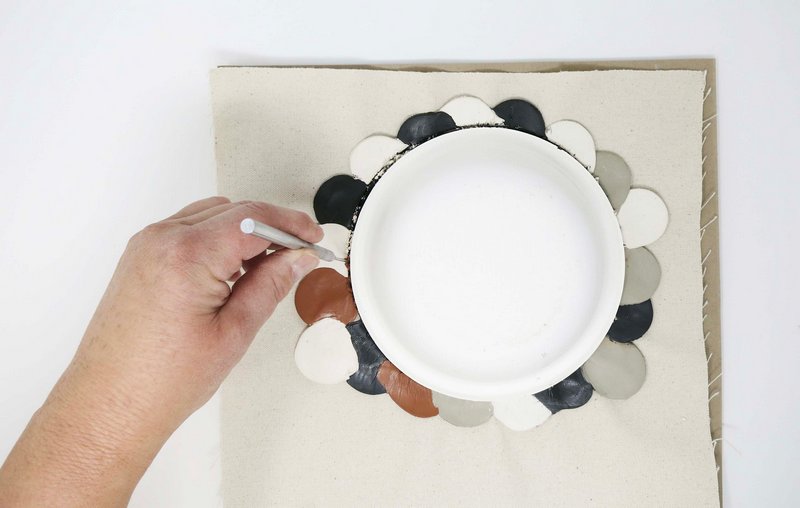
Remove excess clay from around the bowl mold.
Step 4
Drape
Place clay circle into the concave bowl mold. Press clay into the mold gently with fist.
Step 5
Dry
Allow clay to dry.
Step 6
Removal
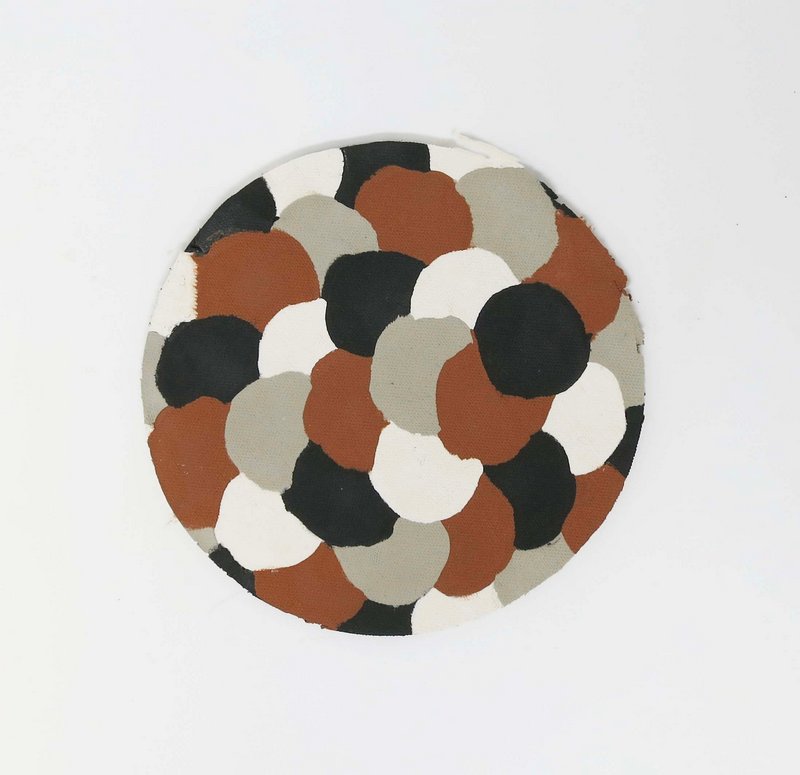
Remove pressed clay form from the bowl mold. Smooth rim with a damp sponge.
Rim may be painted all one color if desired.
Step 7
Varnish
Coat clay with a layer of clear water based varnish.