SIO-2® Gingerbread Christmas Ornaments
Designed by Amy Koranek

What’s Needed:
- SIO-2® ColorPlus Natural Air Dry Clay
- Gingerbread cookie cutter
- Craft Knife
- Roller
- Toothpick, or skewer, or pointed tool
Instructions-Gingergirl:
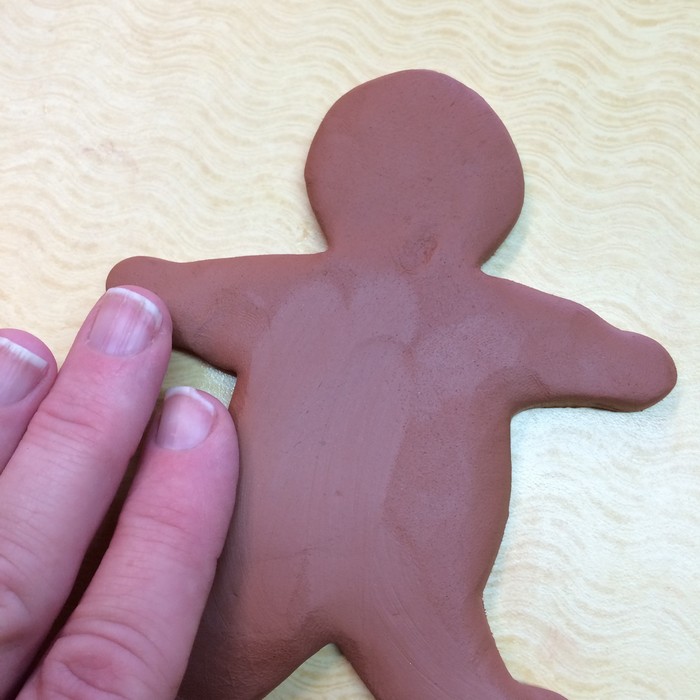
Roll Terracotta clay out to about 3/16” thick. Cut out gingerbread shapes, one for each ornament you would like to make. Smooth the cut edges with your fingers so they aren’t so sharp.
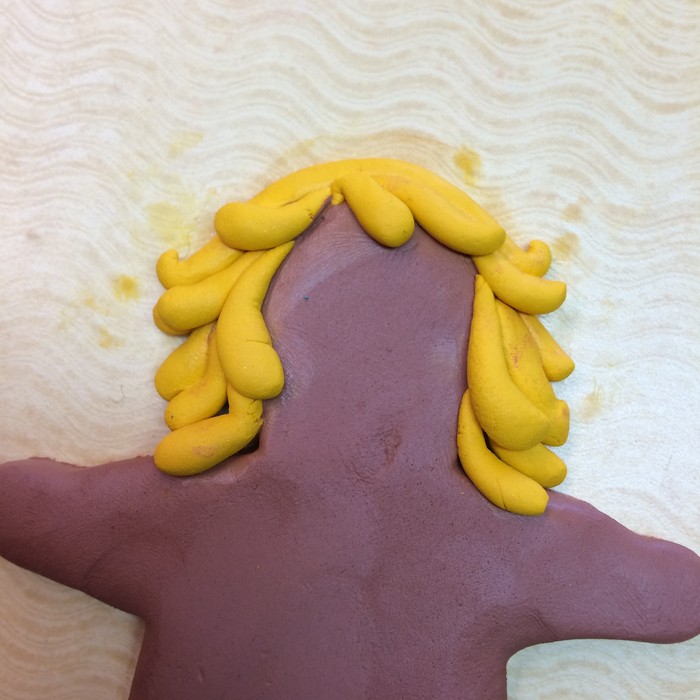
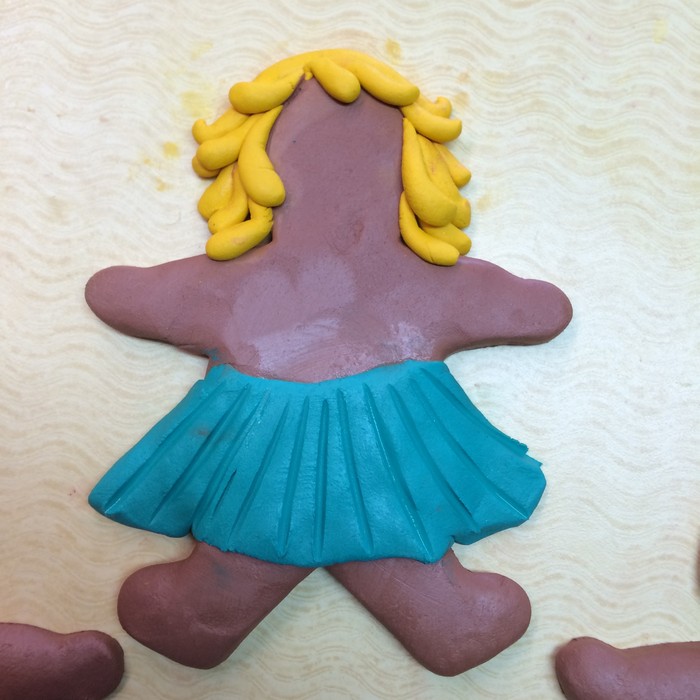
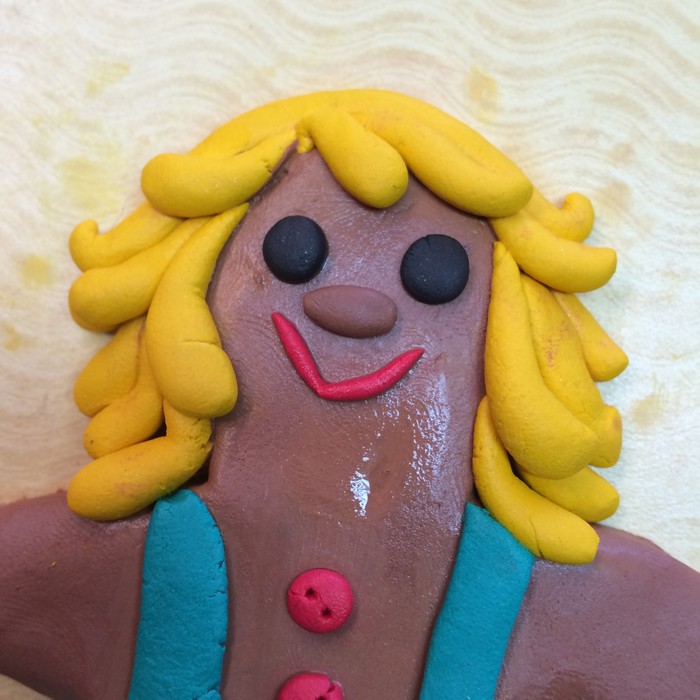
Add some little yellow teardrop shapes around the face and on the top of the head for hair.
Add a kind of triangle shape across the bottom of the body for a skirt. Score lines in the skirt with a toothpick or a pointed tool.
Add an oval shape of Terracotta for the nose. Add a little string of red for the smile. Add two strips of green for jumper straps. Add some little round red buttons at the bottom of the straps and on the chest. Poke some little holes in the buttons.
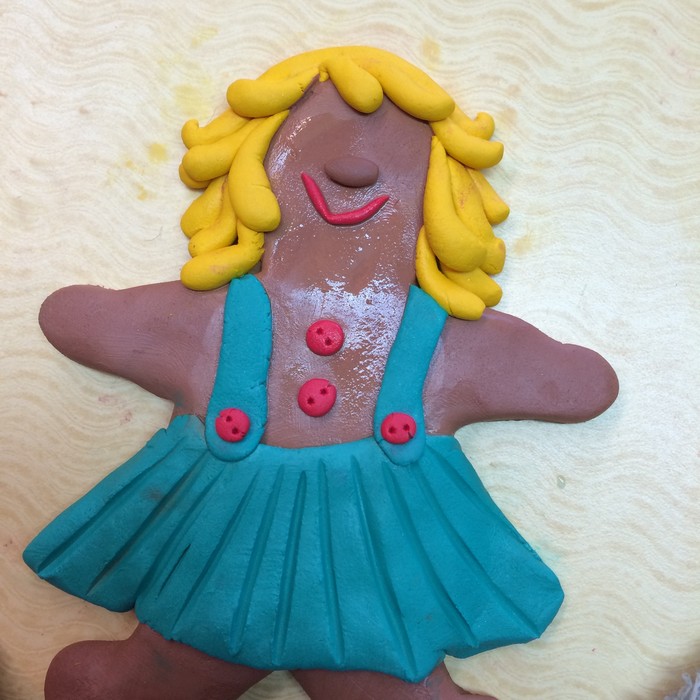
Add black eyes to the face.
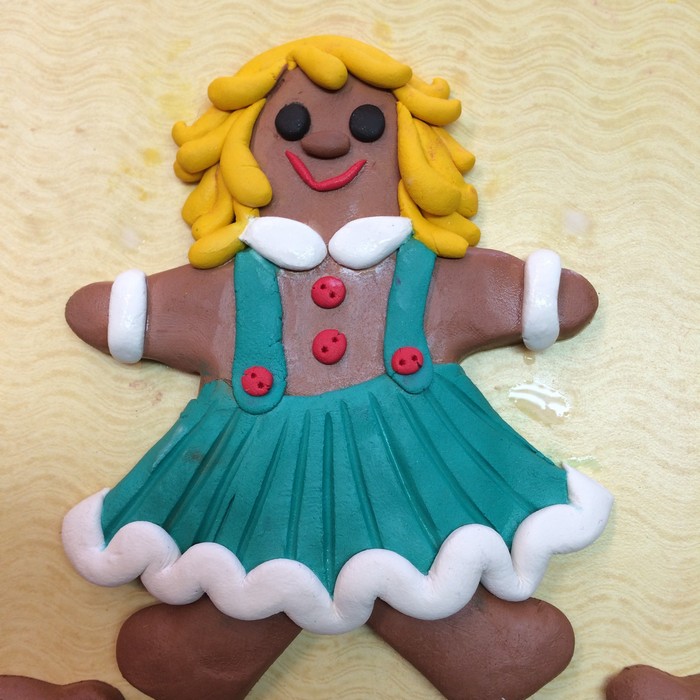
Roll out a long rope of white clay about 3/16” thick.
Use the rope of white clay to make a shirt collar, cuffs, and a rick rack along the bottom of the skirt. Poke a hole in the top of her head to string a ribbon later for hanging. Let the ginger girl air dry completely before adding the ribbon.
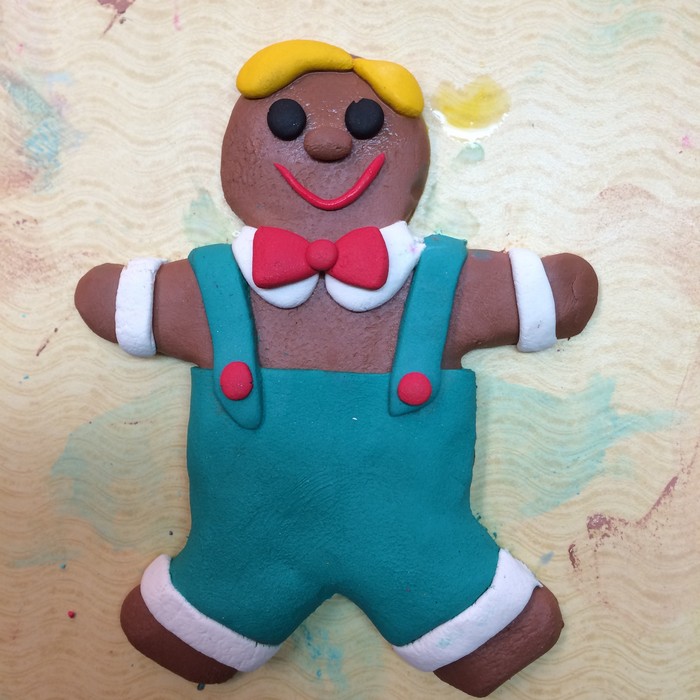
Instructions-Gingerboy:
On another gingerbread body, place a wide band of green for pants.
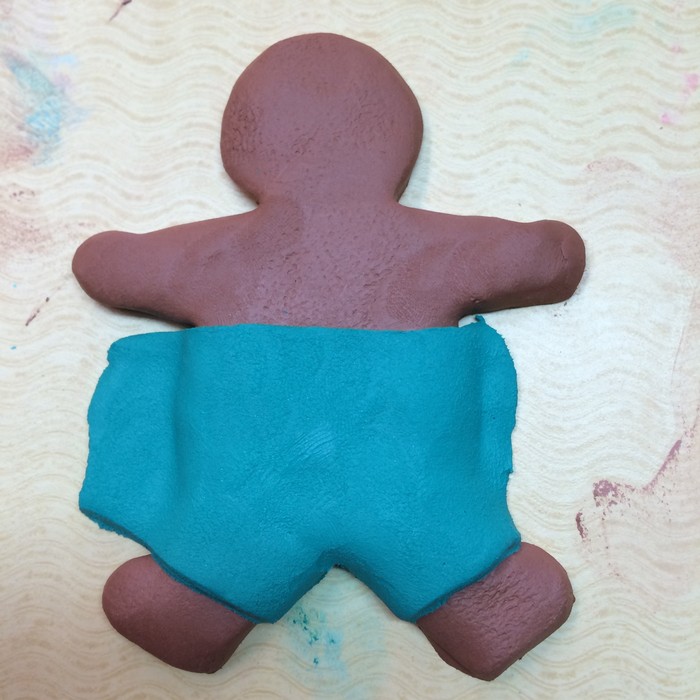
Trim the pants along the sides of the body and along the sides of the legs. Add little straps to hold the pants up.
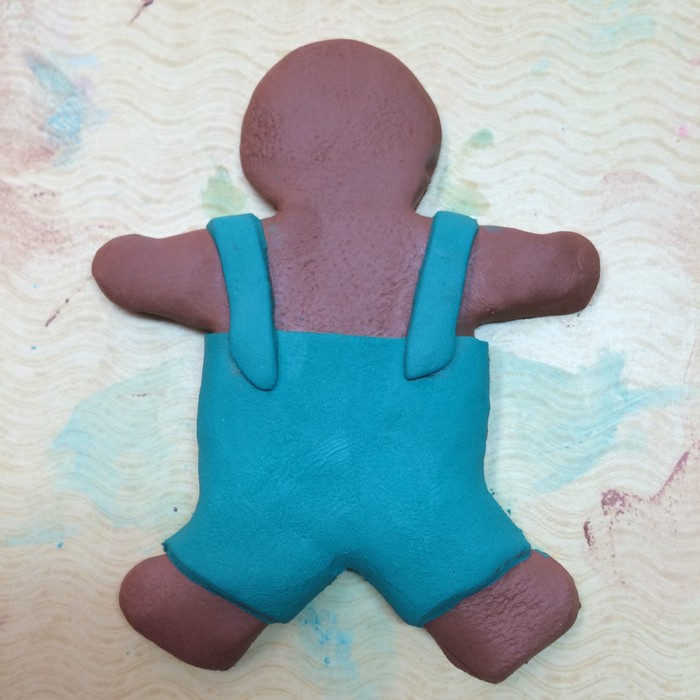
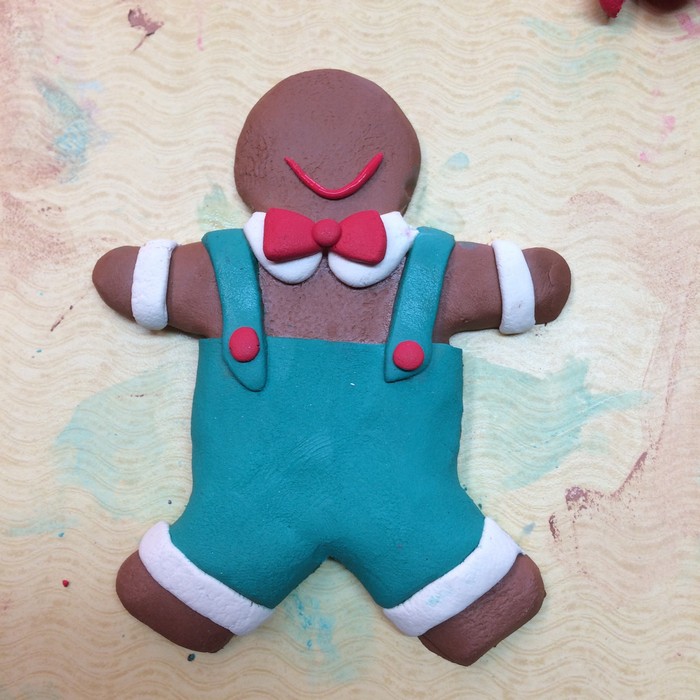
Add white ropes of clay along the bottom of the pants, for cuffs, and a collar.

Add a thin rope of red for a smile, make a red bow tie out of two triangles and a ball, add little buttons to the straps.
Put two yellow teardrop shapes on the head for hair.
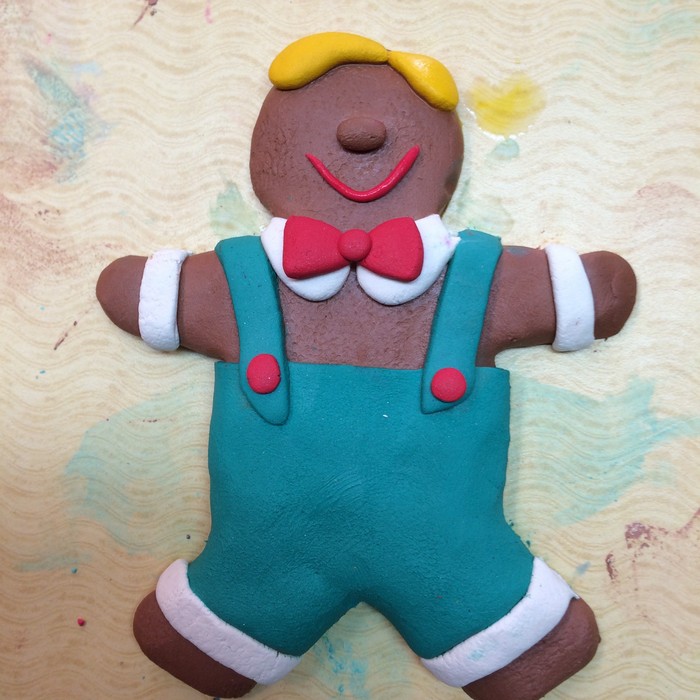
Add black eyes to the face. You can poke a hole in the head so you can add a ribbon later for hanging your ornament. Let the ornament air dry completely and then add a ribbon.